

Add a room
Create a bookable room, choose its floor and map placement, set maximum or minimum–maximum capacity and optional room area, and enable booking. Covers headcount suggestions, priorities, import and copying.
1. Open Standard Rooms
Open Standard Rooms2. Add it — the name is all it asks for
Add opens a small panel with a single Name field, already filled in with the next number in the list — Room 6. Change it or accept it.
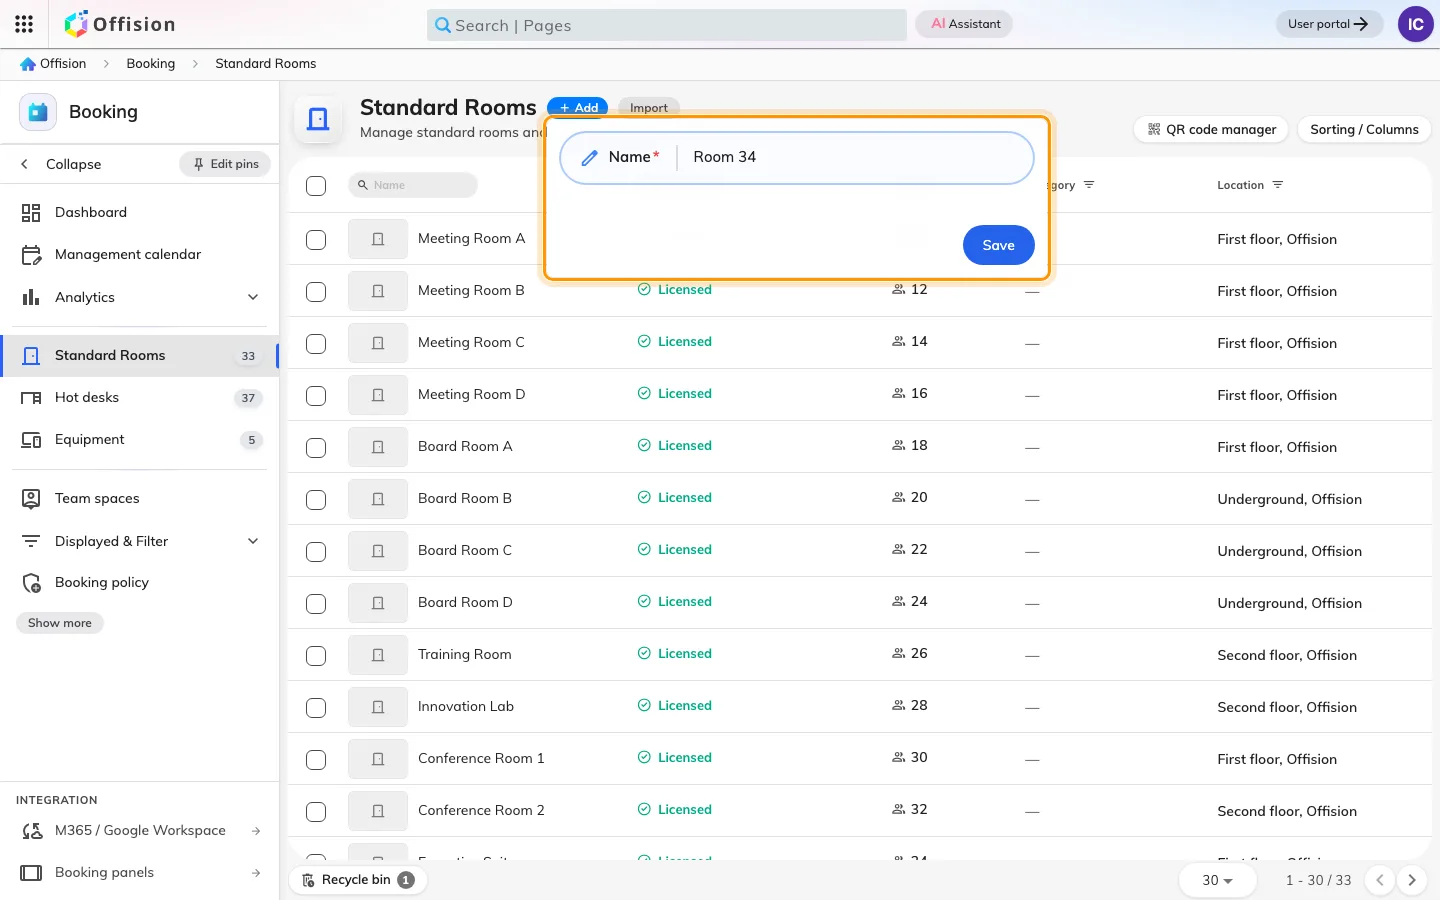
Add asks for a name and nothing else.
Save creates the resource and closes the panel. It does not open the settings, and nothing announces that it worked beyond a new row in the list. That is the point people most often think it failed and add a second one — check the list before clicking Add again.
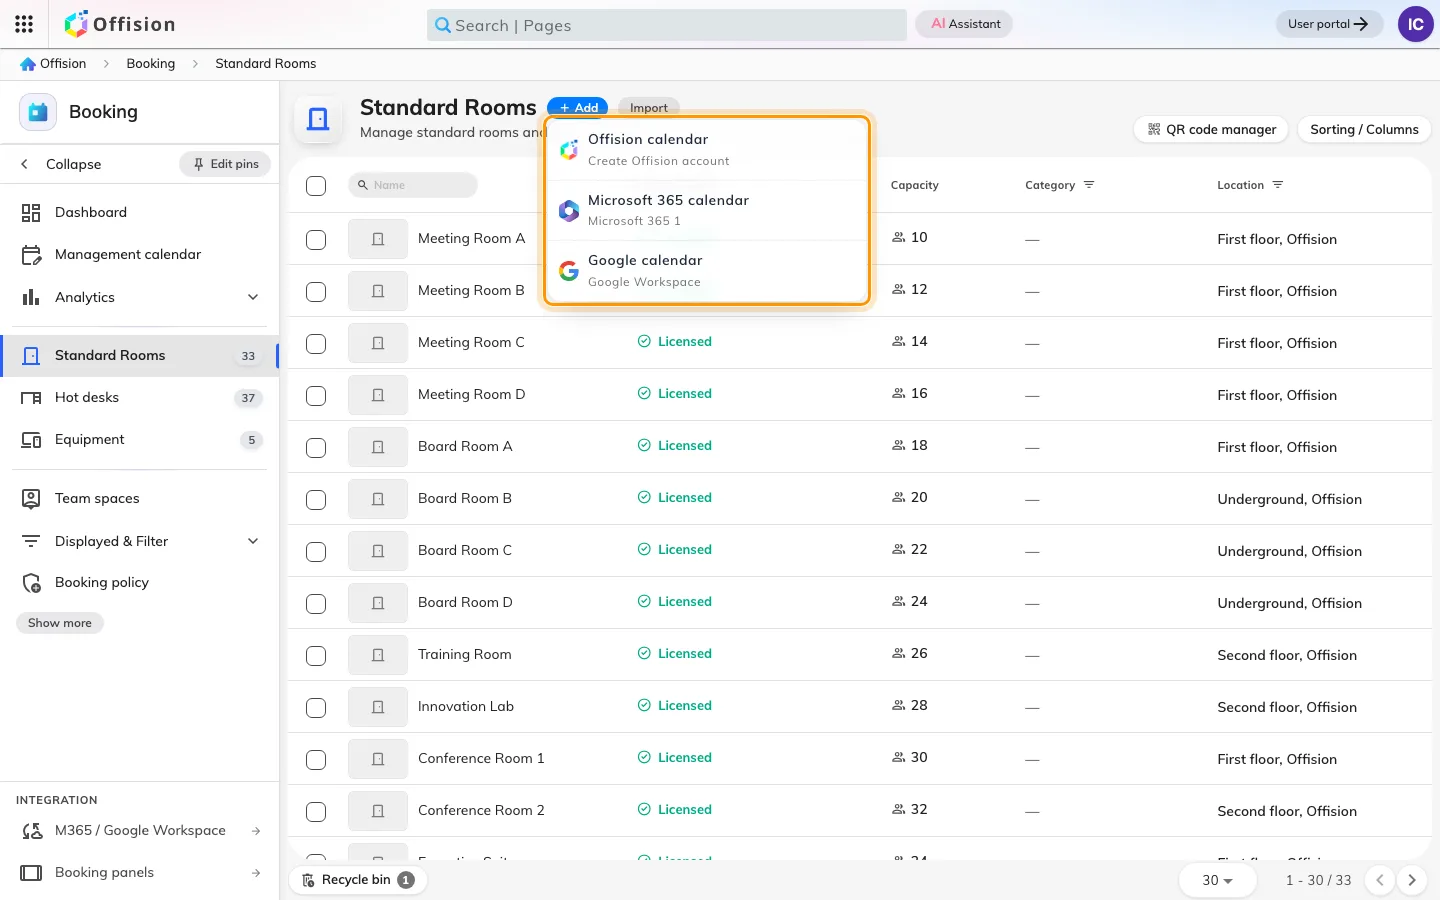
With an integration connected, Add asks which kind of room first.
Creating a room does not draw its map shape. In Map, assign the room to a shape in the map family you use: Map 2.0 assignments or Classic assignments.
3. Open the row and fill in Basic
Click the new row, then Edit. The editor has its pages down the left — Basic, Policy, Service, Advanced, then Out of service period and Information — with the resource’s photo above them rather than on a page of its own.
Location opens a picker: choose the building and floor, then place the resource on the map shown. On Classic, choose the room’s area or a point. On Map 2.0, choose a compatible map object to bind to the room. The floor controls location filtering; the map placement makes the room findable on that map. Creating a resource does not draw an object for it.
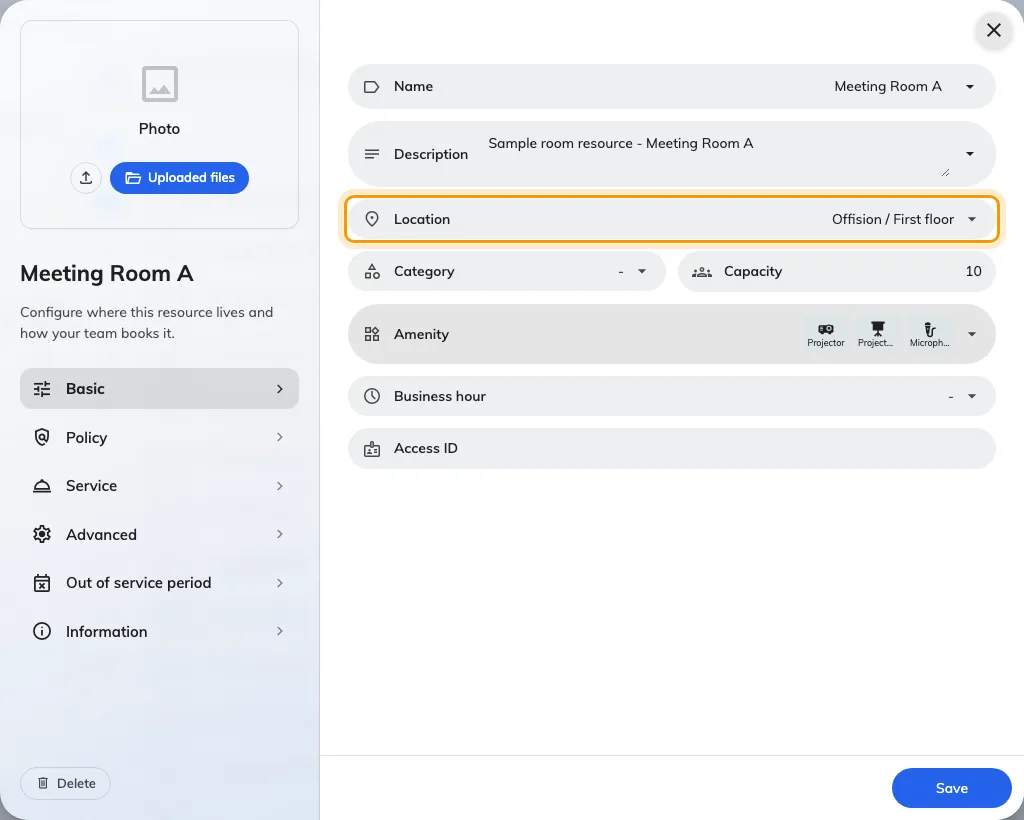
Basic, with the Location picker that puts the resource on a floor.
The rest of the page:
| Field | Worth knowing |
|---|---|
| Name, Description | One value per enabled language. A blank one falls back to English. The description can also be printed on the booking form — see Show a room’s description on the booking form |
| Category | Meeting room, Interview room, Phone booth, Lounge and the rest. The options are filtered by resource type, so this list is the rooms’ own |
| Capacity | Required maximum headcount. Choose Range to add a Min value and show, for example, 4–8 people. The minimum must be at least 1 and cannot exceed the maximum. Remove the range to return to a single capacity |
| Size | Optional room area, with a unit selector (m² or ft²). It is separate from headcount and appears where room size is shown |
| Amenity | What the room has — projector, whiteboard, microphone. People filter on these |
| Business hour | The hours this resource may be used at all, on top of any booking policy |
| Access ID | The handle a spreadsheet uses to name this resource on import |
The minimum guides room suggestions when a headcount is supplied: a 4–8-person room is not suggested for two people. It does not make a smaller booking invalid. The maximum is still used by capacity filters and the attendee warning; that warning does not prevent booking. Suggestion Priority only changes ranking among suitable rooms.
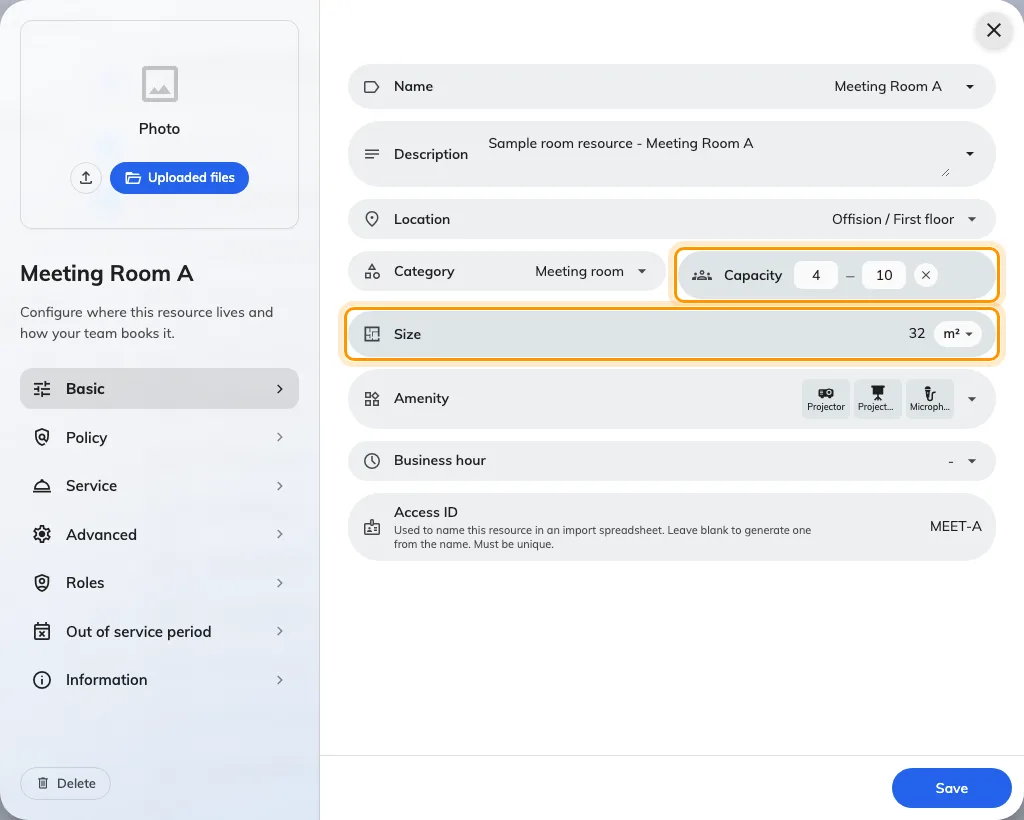
Room settings: the capacity range and separate room area.
4. Switch it on for booking
Open Policy. The first thing to look at is the Booking settings toggle, because it decides whether the rest of the page exists.
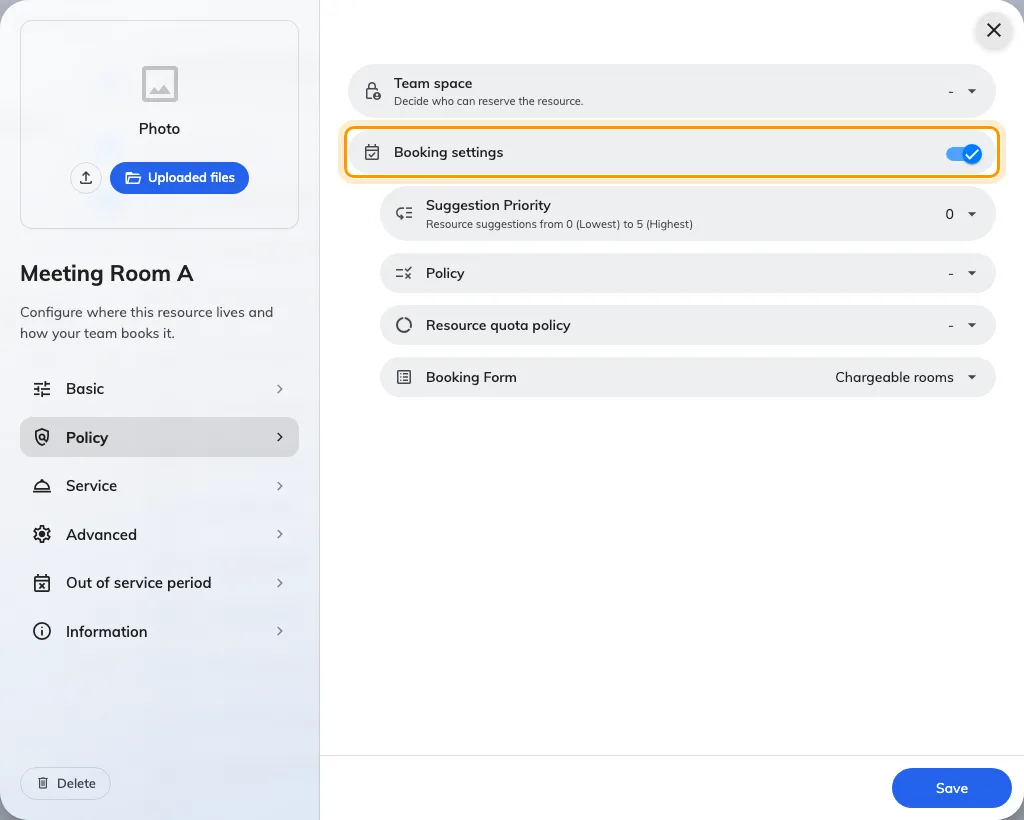
Booking settings off replaces the rest of Policy, and all of Service.
Turn it off and everything below it — plus the whole Service page — is replaced by This resource will not be available for booking. That is the setting to reach for when a space exists but nobody should be claiming it, and it is also the first thing to check when a resource refuses to appear in the user app.
With it on, four pickers decide how the resource behaves. None of them is required, and all four point at shared objects rather than settings on this resource, which is why a room you have not touched still obeys rules:
- Policy — the booking window, check-in, no-shows, approval. This is the big one, and it is documented in Booking rules reference.
- Resource quota policy — how much of this resource one person may claim.
- Booking Form — the extra fields people fill in when booking it.
- Team space, at the top of the page — “Decide who can reserve the resource”. A resource on no team space is bookable by everyone, which is the default for everything you create here. See Give a department its own rooms.
Suggestion Priority is the odd one out: 0 (Lowest) to 5 (Highest), nudging this resource up or down when Offision suggests a room. It changes nothing about whether a booking is allowed.
Save. One save covers every page.
5. Check it worked
Do not check in the admin console. It shows you every resource whatever state it is in, so a room that is invisible to your colleagues looks perfectly fine there.
Open the user app’s resource finder, search for the resource by name, and book it. If it does not come back:
- Booking settings is off — step 4.
- It is on a team space you are not a member of. That is intended behaviour, and it is worth confirming with an account that should have it.
Add many at once
For a whole floor — or a whole building, when moving in from another system — use Import, beside Add. It creates and updates resources of the list’s type in one pass, from one spreadsheet.
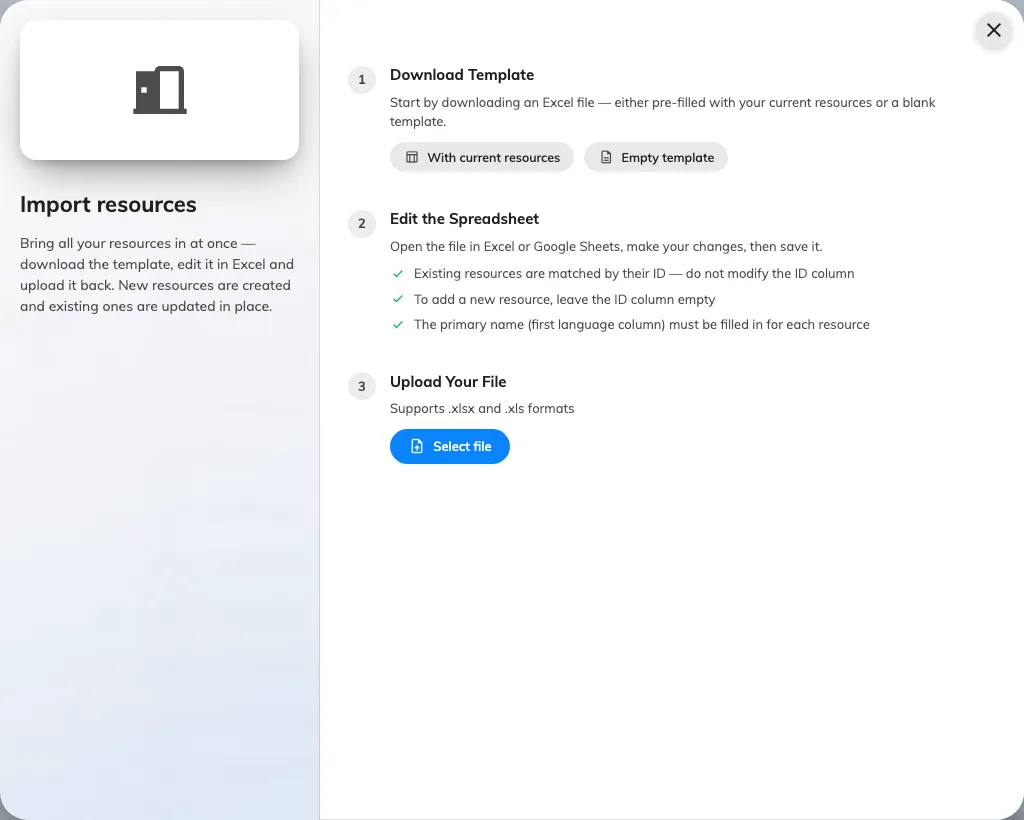
Import: download a template, edit it, upload it back.
Download a starting file first — With current resources to get everything you already have, which is also the easiest way to rename in bulk, or Empty template to begin from nothing. Three things decide whether an import behaves:
- Existing resources are matched by the ID column — never edit it. A row with an ID updates that resource; a row with a blank ID creates a new one.
- The first Name column must be filled on every row. The other language columns fall back to it when blank.
- The only other columns are Capacity for rooms and Has EV Charger for parking spaces. Everything else — location, policy, amenities, Access ID — is set on the resource afterwards, per step 3.
Before anything is written you get a preview counting what is new and what is an update, row by row. Read it — a sheet that matches nothing reports no changes rather than creating duplicates.
What this does not cover
- The panel outside the door is a separate device with its own setup — the room does not create one.
- Approval is set on the booking policy, not on the resource — see Require approval before a room is booked.
- Hot desks are added from their own page and behave differently in four or five places — see Add a desk.
- Combine rooms, equipment, parking spaces and other resources are added from their own pages. They share this form, but each has fields this article does not cover — for a room made of other rooms, see Combine two rooms into one bookable room.
- Creating bookings in bulk is the management calendar’s own import — see Import bookings from a spreadsheet, which names rooms by the Access ID set in step 3.