

Offer a room layout when booking
Build a set of seating plans with reference images, decide whether picking one is compulsory, and put the set on the rooms it applies to. About ten minutes.
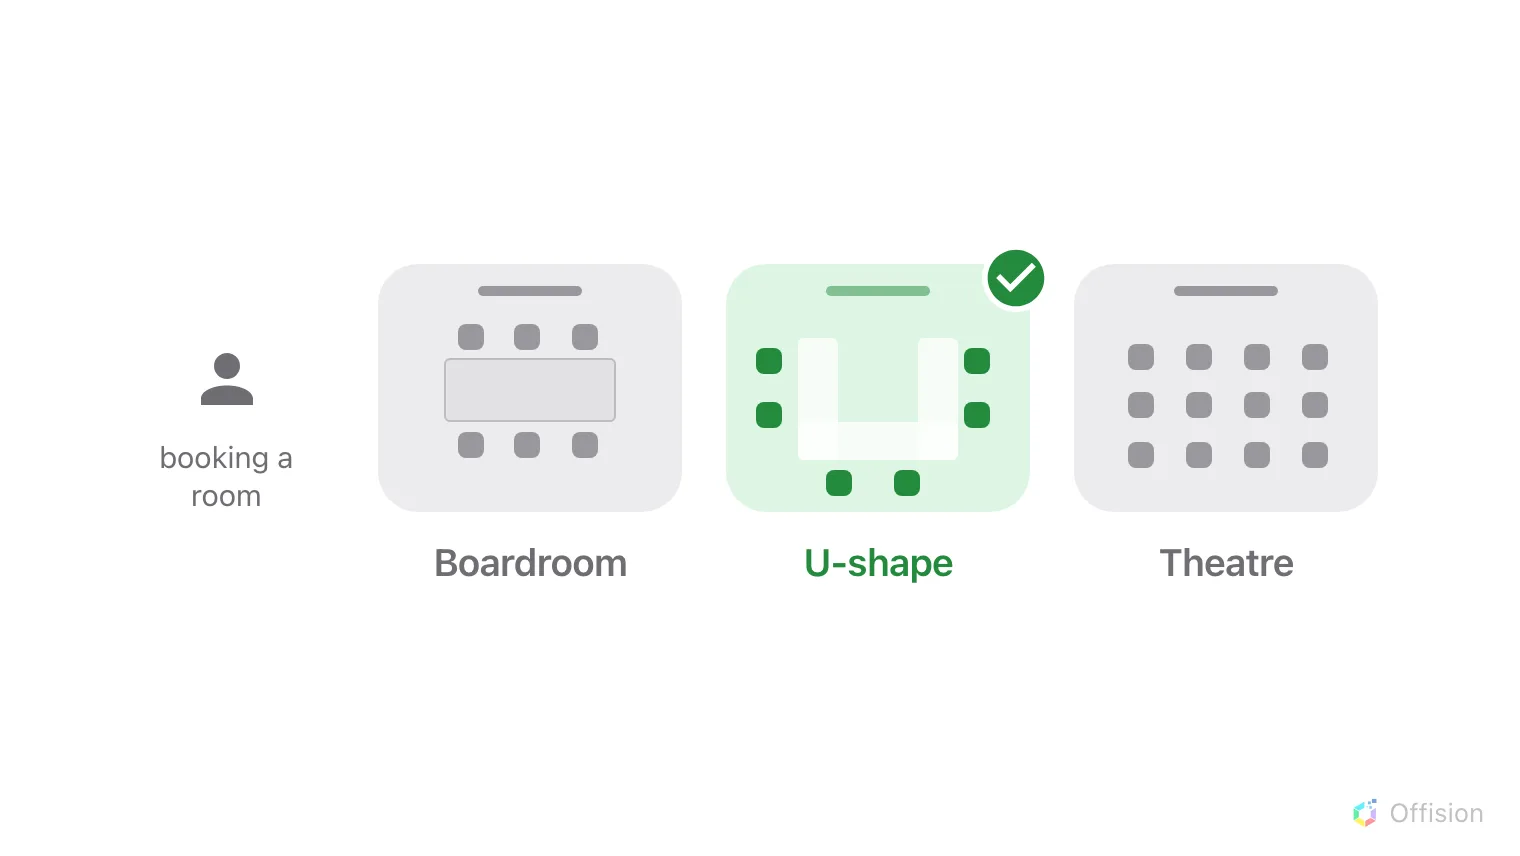
The person booking the room says how it should be arranged.
One entry here is a set of layouts, not one layout. You build the menu — Boardroom, U-shape, Theatre — and put the whole menu on the rooms it applies to. That is why one entry can serve every meeting room in a building, and why a room that needs a different menu needs a different set.
1. Add a set of layouts
Open Room Layouts and use Add beside the title.
Open Room Layouts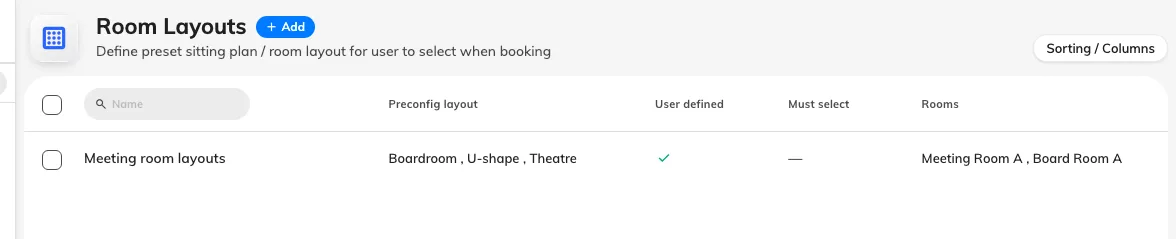
One row per set. Preconfig layout lists the layouts inside it.
2. Name it for the rooms, not for one layout
The name at the top of the dialog is the set’s name, and it is what you will look for when you assign it. Meeting room layouts or Training rooms — something that describes the group of rooms, since the individual layouts are named further down. It is checked for duplicates as you type.
3. Add the layouts people choose from
Add option builds one layout. Three fields:
- Reference image — the box at the top, which becomes the picture once you attach one. This is the field that matters most: on the booking form the image is what people actually decide from, and the name underneath only confirms it. A plan drawn from above beats a photograph, because a photograph shows one room and the layout applies to several.
- Name — Boardroom, U-shape, Theatre.
- Description — one line, shown under the name to the person booking. Use it for what they need to decide: “seats the most people”, not an internal note.
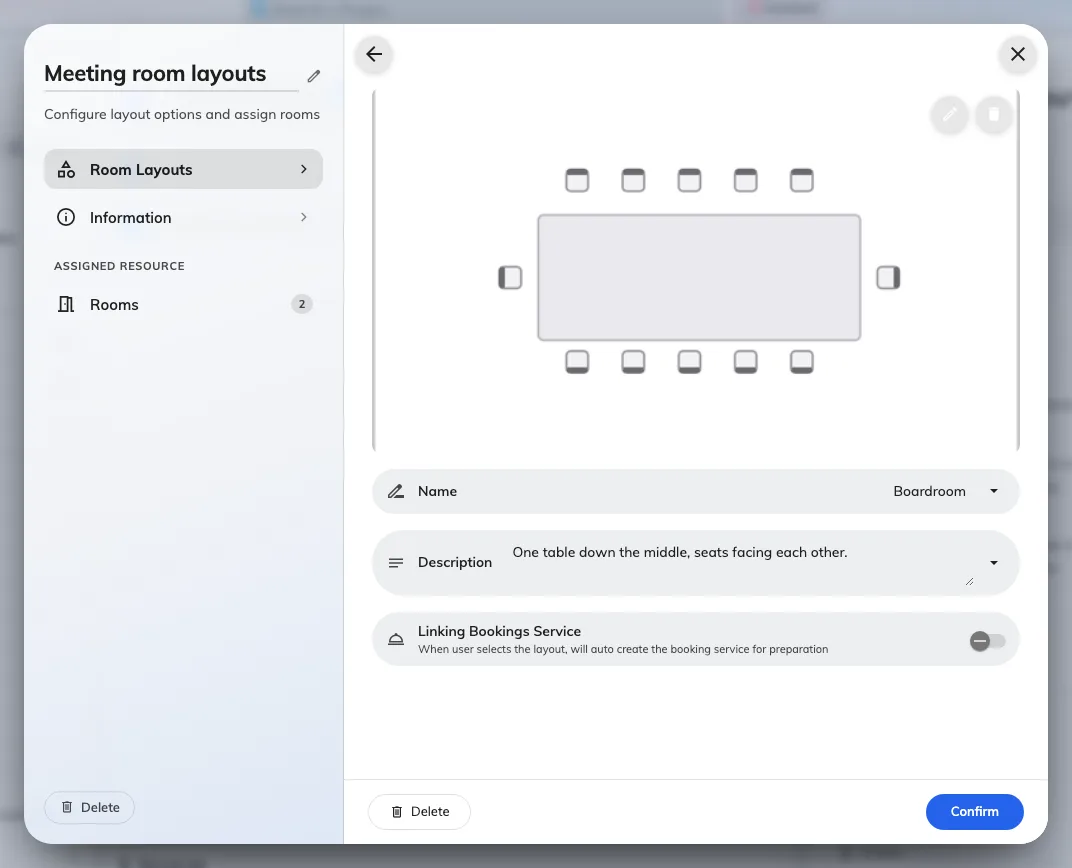
A layout is a picture, a name and a line of explanation.
Drag the rows to reorder them — that order is the order the booker sees, so put the everyday arrangement first. Nothing is written until Save at the bottom of the dialog, including layouts you have already confirmed.
4. Decide whether choosing one is compulsory
Two settings sit above the list, and they apply to the whole set.
Must select — “Must select open layout when booking” — refuses the booking until a layout is chosen. Turn it on where the room is genuinely reset between meetings and somebody has to say how; leave it off where most bookings are happy with the room as it stands. With it on, the booker also loses the Clear button, so there is no way back to “no layout” once they have picked.
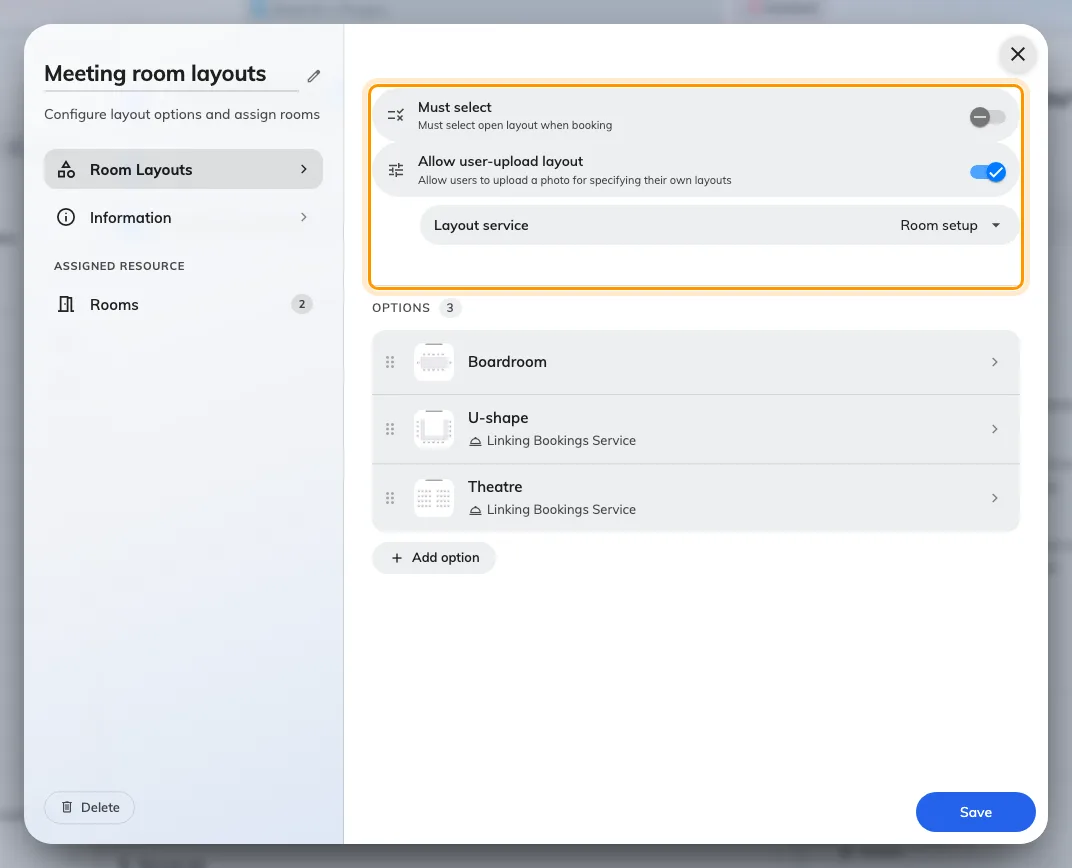
The two rules that apply to every layout in the set.
5. Let people upload their own plan
Allow user-upload layout adds one more row to the picker: Upload my own layout. The person booking attaches an image or a PDF of the arrangement they want, and it travels with the booking exactly as a chosen layout does.
Turn it on where the rooms are used for events nobody can write a menu for. Leave it off where the furniture only goes into a fixed number of arrangements — an uploaded plan the room cannot physically take is worse than no plan.
A Layout service field appears underneath it. That is for turning an upload into real work for the people who move the furniture, and it is covered in Turn a layout choice into a setup job.
6. Put the set on its rooms
The bottom of the list on the left is Assigned resource, with a Rooms page under it and a count beside it. Tick the rooms this menu applies to.
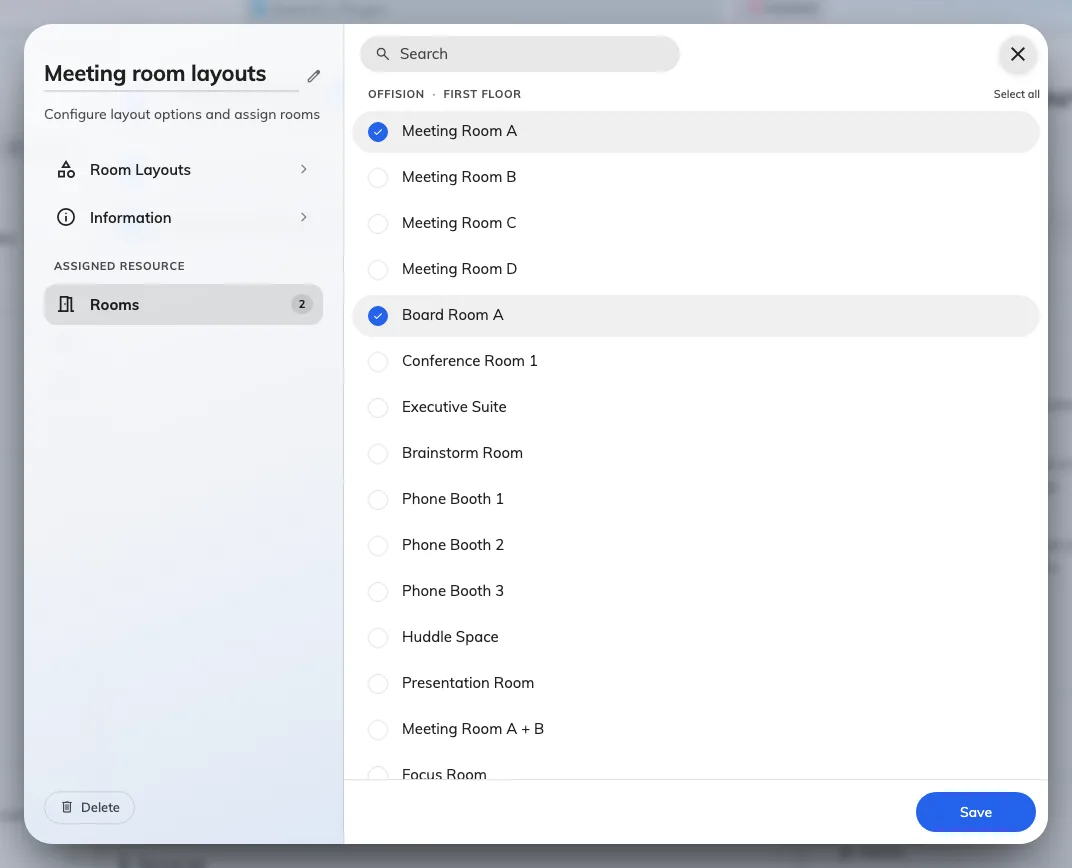
The rooms that will offer this set, grouped by building and floor.
Two things to know before you tick:
- A room can carry one set only. Assigning it here takes it off whatever set it was on before, silently. If a room needs Boardroom and a menu of training arrangements, both belong in the same set.
- Rooms only. Desks, equipment and parking have no layout, so they are not offered here.
Then Save.
7. Check it worked
Book one of those rooms as an ordinary user. Under the room, a row appears carrying the room’s name and, on the right, No specified layout. Open it and the layouts are there, each with its picture.
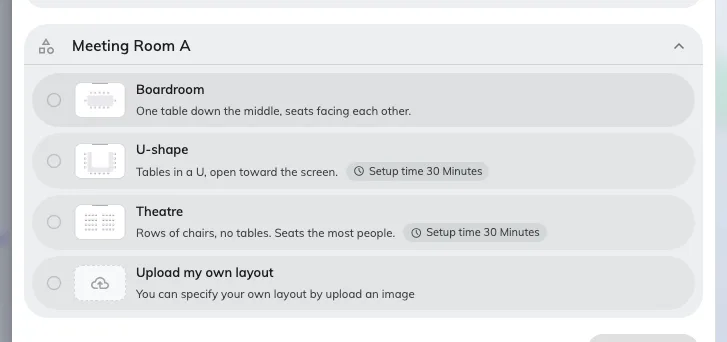
One row per room. The pictures are what people choose from.
Pick one and a Remarks for the setup box appears under it — where the organiser says the thing your menu could not anticipate, like which end of the table the guest sits at. In a booking with two rooms, each room gets its own row and its own choice.
The choice then shows on the booking itself, and to whoever approves it, so an approver can see what is being asked for before they agree to it.
What this does not control
- Capacity. A theatre layout seats more people than a boardroom one, but Offision does not know that. The number of people a room takes is the room’s own Capacity, and it does not change with the layout. Sizing the room to the party is a separate job — see Keep large rooms for large meetings.
- Which rooms are offered. Choosing a layout never filters the room list — it runs the other way round, and the room decides which layouts exist.
- Booking emails. The chosen layout is not printed in the confirmation the organiser receives.
- Anybody actually moving the furniture. A layout on its own is a note on a booking. To turn it into a job with a time attached, see Turn a layout choice into a setup job.