

Print and put up resource stickers
Producing the printed QR code that goes on a desk or a door — the three sizes, the four print resolutions, doing a whole floor in one go, and the policy settings that decide what a scan is then allowed to do.
A resource sticker is a printed QR code belonging to one desk or one room. Stuck to the furniture, it is the whole booking interface for that resource: somebody with a phone can take the desk, confirm a booking, add time to it, or hand it back — with no panel on the wall and nothing installed.
That makes it the usual answer for hot desks and for small rooms, where a panel per resource costs more than the room is worth.
1. Decide what a scan is allowed to do
The sticker is the same for every resource. What a scan does comes from that resource’s booking policy, so set this before printing anything.
Open Booking policySix settings decide it. All of them are documented field by field in Resource policy reference — what matters here is which parts of the sticker each one switches off:
- Allow booking from User Portal — the on/off one, and the only one that can stop a scan booking anything at all. A scan opens the portal on the phone, so the sticker is the User Portal channel; turning that channel off takes the sticker with it. See Choose where a resource can be booked from.
- Require check-in — without it there is no check-in to confirm, and a scan can only book, extend or end. With it, the sticker becomes the cheapest way to stop no-shows holding a desk all day.
- Allow early check-out — shows End now. Turn it off and a scan can never hand the resource back early, which is most of the value on a hot desk.
- Allow extend booking — shows Extend.
- Allow attendees to check-out / extend in User Portal & check-in via QR — decides whether anyone on the booking may act, or only the organiser. On a shared desk this rarely matters; on a room booked by an assistant it decides whether the people actually in the room can do anything.
- User Portal check-in IP restriction — the one to think hardest about. A printed code never changes, so anyone who photographs it can scan it from home. Restricting check-in to your office addresses is what stops that.
2. Open a resource’s sticker
Open Hot desks — or Standard Rooms, or any other resource list — and select the resource. The panel that opens down the right-hand side carries a QR Code sticker row, showing a small preview of that resource’s own code.
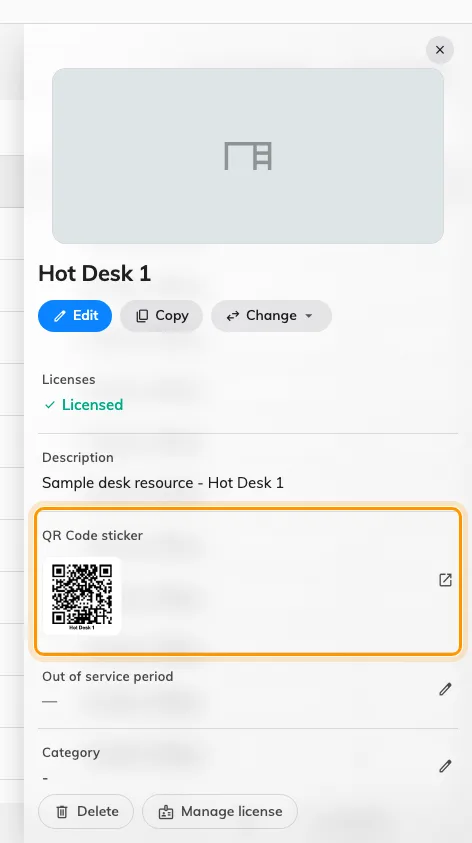
The QR Code sticker row on a desk. The thumbnail is that desk's real code.
3. Choose the size
The dialog offers three:
- QR Code only — the bare code and the resource name, on white. Use it when you are placing the code into your own printed label, a name plate or a third-party placard.
- Small — a square desk sticker.
- Large — a portrait door poster reading Please scan / before usage.
It opens on the right one for you: a desk starts on Small, everything else on Large.
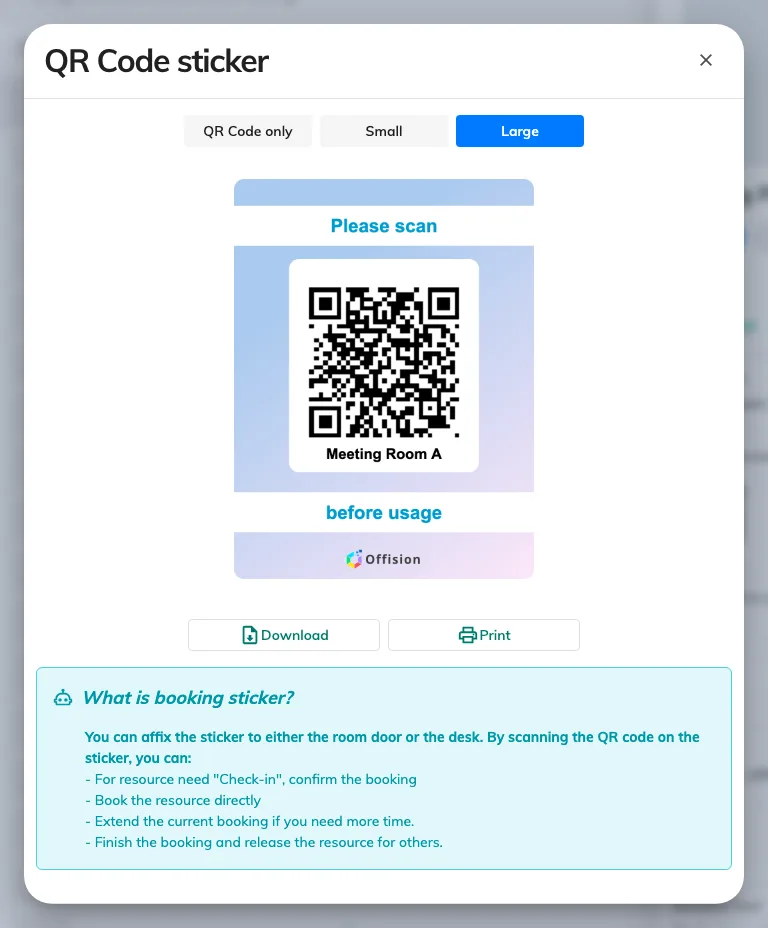
A room's sticker at Large, and the list of what scanning it can do.
4. Download or print it
Download and Print both ask for a resolution — 96, 150, 300 or 600 DPI. This is not image quality for its own sake: the resolution is written into the file, so the printer reproduces the sticker at the physical size it was designed for instead of stretching it to fill the paper. Take the offered default unless you have a reason, and print a single one before committing a whole floor to a size.
Print onto something that survives being wiped down. A desk code is touched, leaned on and cleaned around far more than a door code.
5. Produce them for a whole floor at once
Doing this resource by resource is fine for five desks and unbearable for a hundred. The QR code manager button at the top of any resource list does the same job in bulk — Download and regenerate static QR codes for resources.
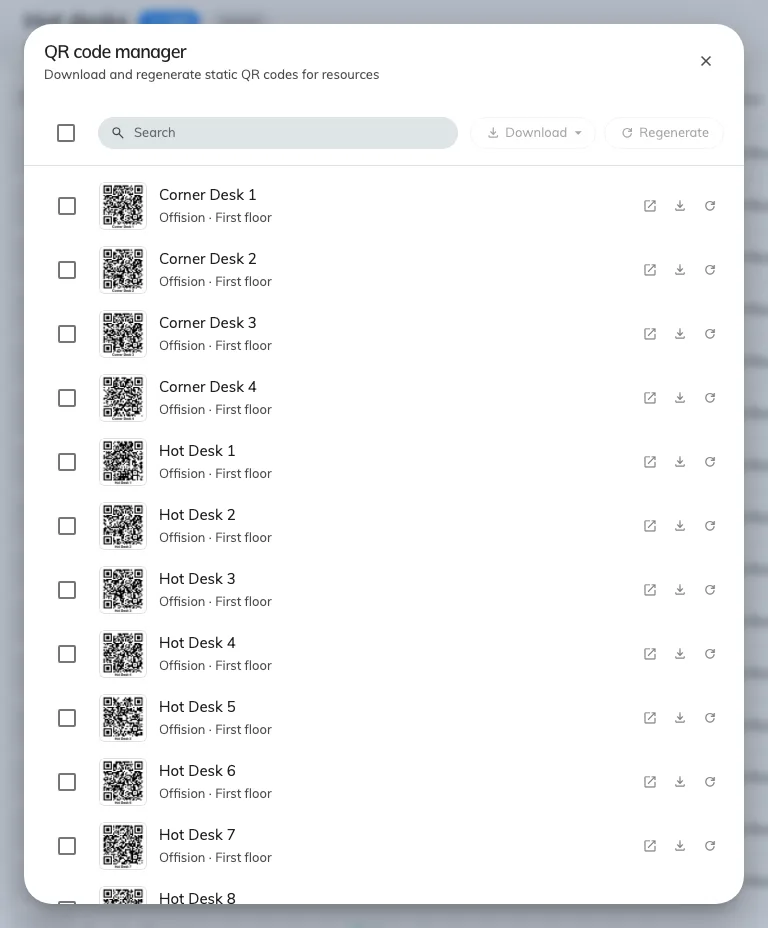
The QR code manager: search, select, and download every sticker as one file.
Search or select all, choose Large, Small or QR Code only, and download — the whole selection arrives as a single archive, one image per resource, so a print shop can be handed one file. Each row also has its own View sticker and download, for the one desk you got wrong.
6. Put them up
- A desk takes the small square code, somewhere it stays visible when the desk is in use — the edge of the surface or the monitor arm, not the middle of the desk where a laptop will cover it.
- A room takes the large portrait code beside the door, at eye height, on the outside. Somebody deciding whether to walk in has to be able to scan it before they do.
7. Check it worked
Scan one yourself, with an ordinary phone and your own account. A free desk should offer to book it; one you have already booked should check you straight in. If a scan does something you did not expect, the state it found the resource in is the explanation — see Check in and out by scanning the sticker on a desk or room, which walks every outcome.
What this does not control
- Who may book the resource at all. That is team space, set on the resource — a scan by somebody outside it is refused. See Give a department its own rooms.
- The code on a panel’s screen. That is a different, rotating code that belongs to the panel, not to the resource — see Checking in by QR code, and proving you are there.
- Whether a scan has to prove where the phone is. GPS check-in and its radius are set separately, and apply to the app rather than to the sticker.
- The check-in window. How early and how late a scan still counts is part of the check-in policy — see How check-in and no-show work.