

Let outside attendees check in with a booking pin
The one code you can hand to somebody with no account — six digits, different for every booking, and already in every mail Offision sends. Turning it on, where the code reaches, and what the panel does with it. About ten minutes.
Every other way of checking in at the panel identifies a person — a QR code, a staff card, a passcode, a face — and each of them needs an account behind it, and usually a phone or a piece of hardware in front of it.
The booking pin needs none of that. It identifies the booking: six digits minted when the booking is made, different for every booking, and pushed out on their own to the organiser’s mail, to each attendee’s invitation, and onto the booking itself in the app. There is nothing to install, nothing to enrol and nothing for you to distribute — by the time a client asks how they get in, they have already been sent the answer.
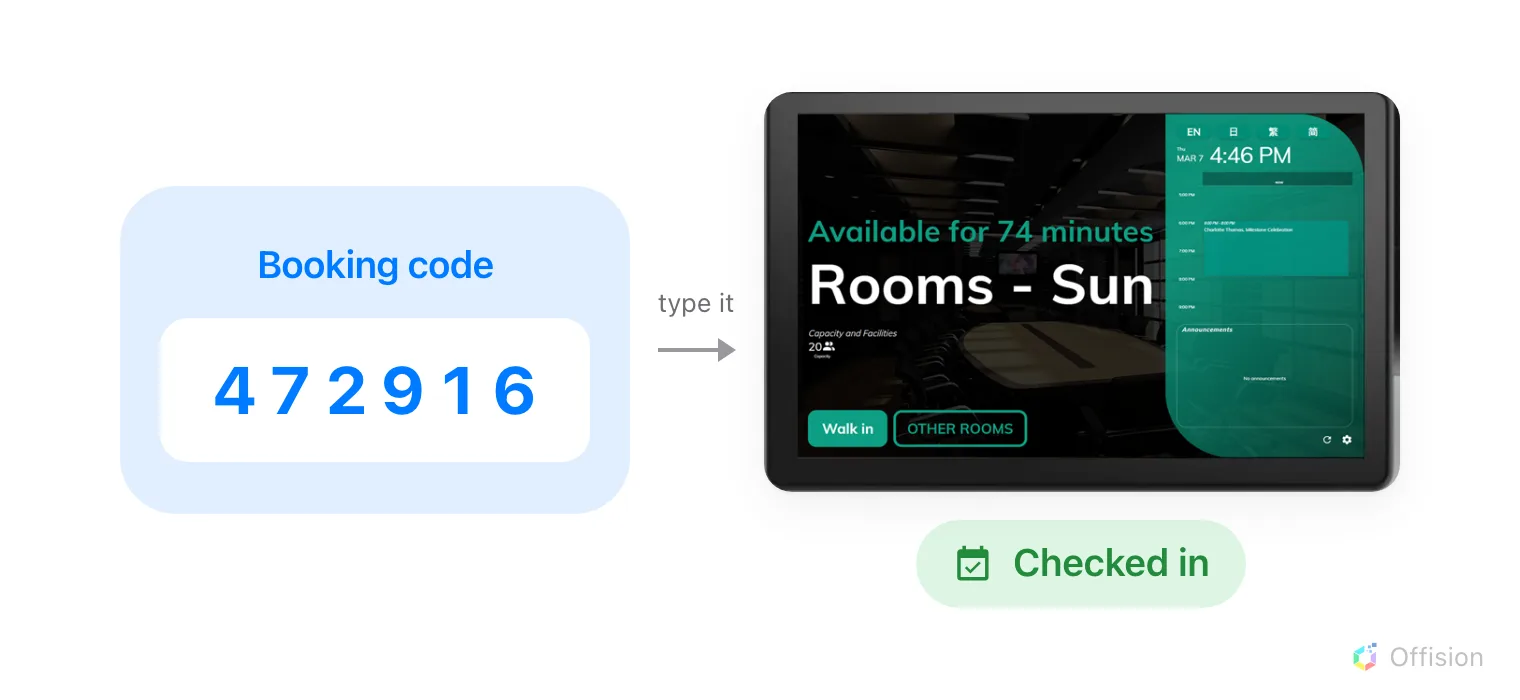
Type the six digits on the panel and that booking is checked in. The code identifies the booking, not the person, which is why the person needs no account.
1. Turn on Booking pin as a check-in method
The check-in methods are set once for the whole organisation, on User identify settings. Turn on Booking pin.
Open Check-in method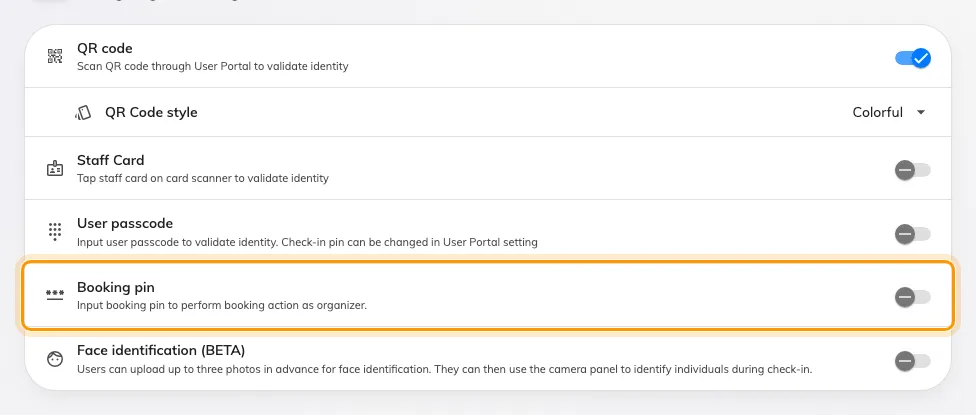
Booking pin, alongside the methods that need an account.
Leave at least one other method on. A booking pin only exists once a booking does, so it is never offered to someone walking up to a free room — turn everything else off and walk-in booking stops working, which is what the warning at the top of the page is about.
2. Choose how long the code is
Booking PIN length sets the number of digits, from 3 to 8. Six is the default and a good answer: it is what the panel’s number pad expects and what the email prints.
Shorten it only for a panel people will use in a hurry, and only if you are comfortable that a shorter code is an easier code to guess.
Open Email reminder settings
Booking PIN length, on the Settings card of the email reminder page.
The length applies to codes minted from now on. Bookings already made keep the codes they were given.
3. Let attendees use the code
This is the step that decides whether an attendee ever sees a pin, and it is easy to miss because it lives somewhere else entirely — on the policy the room uses, not on the check-in settings you just changed.
Open the policy, and on its first page, under Check in/out, check that Allow attendees to check-in / check-out / extend at the booking panel is on. It is on by default — but a policy someone has already tightened is exactly the kind that will have it off.
Open Booking policy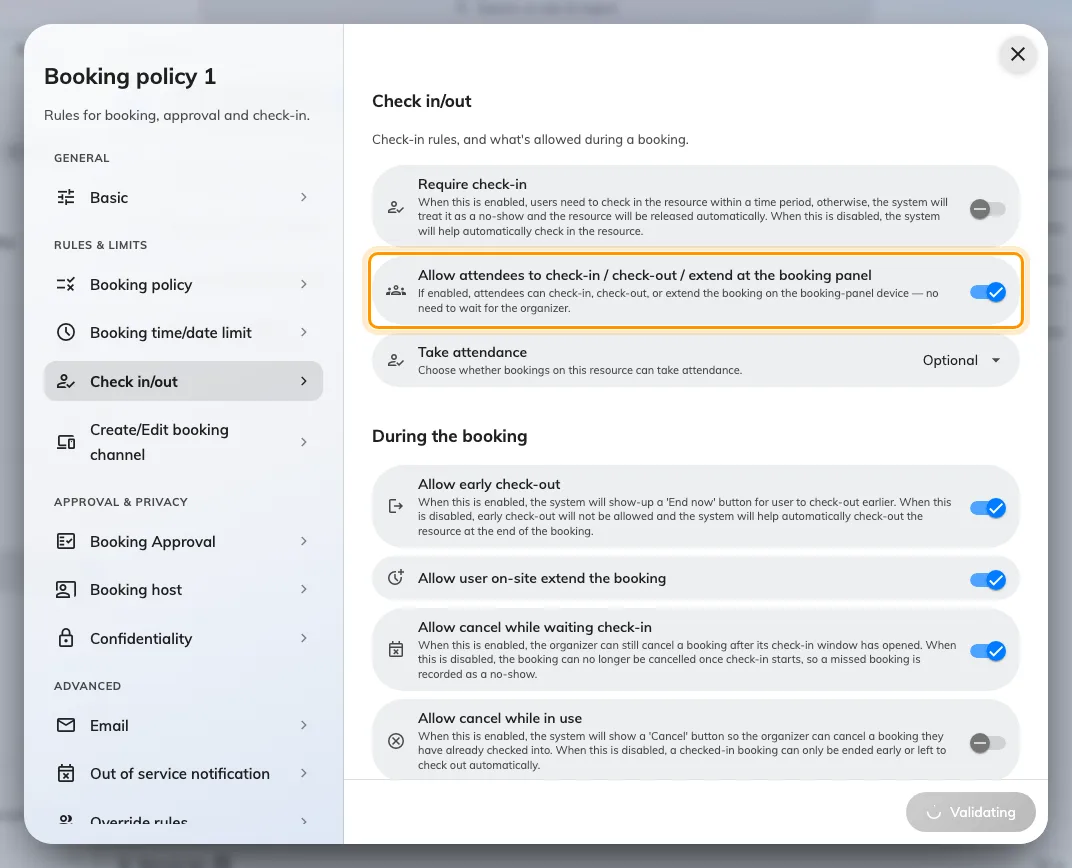
Off, only the organiser is sent the code. On, every attendee is.
With it off, the pin goes to the organiser alone and the attendee’s invitation arrives without a code — the room is not broken, the attendee simply has nothing to type. With it on, everyone invited gets it.
While you are on the policy, check that booking email notifications are not disabled on it. If they are, no invitation is sent at all and there is no code to find.
4. Invite them by email
Add the person to the booking the ordinary way, by typing their address into the attendee field and choosing Invite by email. They are recorded as an Outsider — an attendee with no account, and none is created.
5. Where the code shows up
You do not have to send it anywhere. Once step 1 is on, every booking mail carries the code, printed large under the line “You may use the following code to check in booking”:
| Goes to | Sent when | |
|---|---|---|
| Booking created | the organiser | they book |
| Booking edited | the organiser | anything about the booking changes |
| Meeting invitation | each attendee | they are invited |
| Meeting update | each attendee | the booking changes under them |
The organiser’s copy always carries it. The attendees’ copies carry it only where step 3 is on — and where the policy disables booking email notifications, none of the four is sent at all.
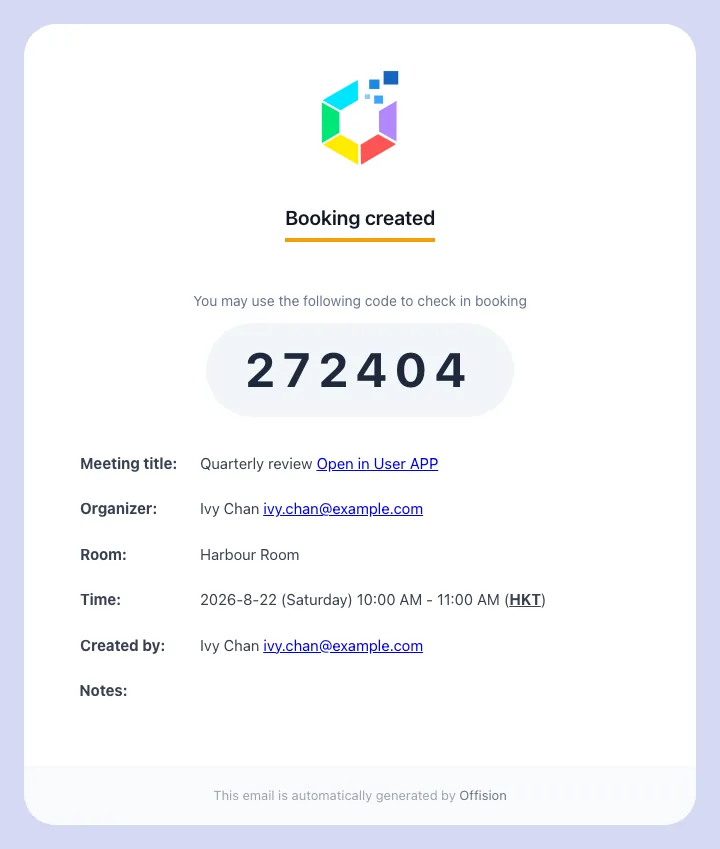
The organiser's own confirmation, with the code in the body.
The attendee’s invitation carries the same digits, plus the calendar invite as an attached file, so the meeting drops into whichever calendar they use and they can accept or decline from there. Rooms always attach it; desks and equipment attach it only when the policy says to.
Where the booking still needs approving, the code is shown with “Active after approval.” — it exists, but it will not work at the panel yet.
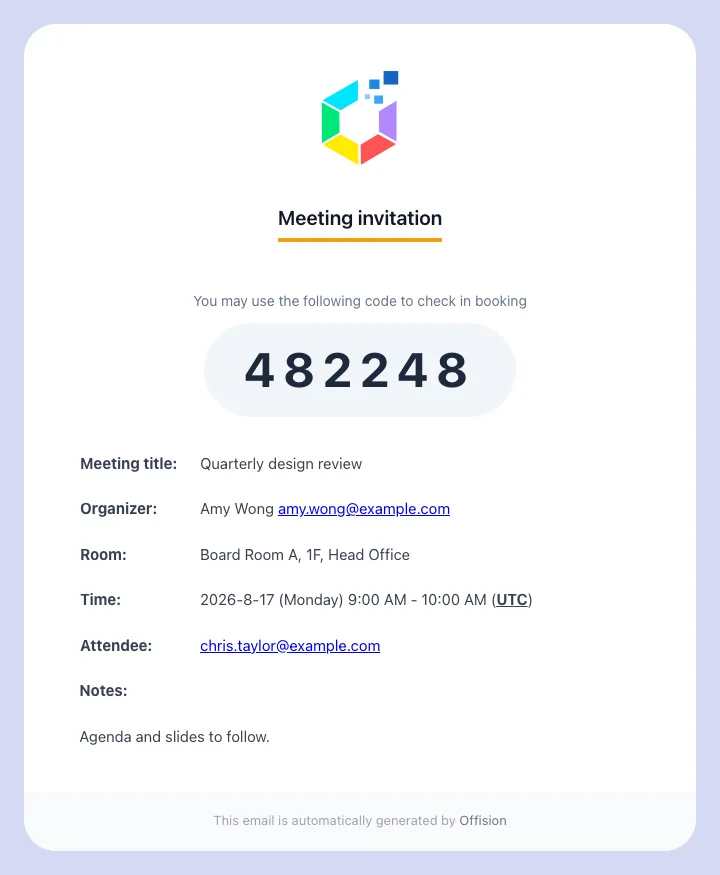
The invitation: the code in the body, the calendar file attached.
The code is also on the booking itself, in the app — a Booking code row on the booking’s own card, which is the fastest place for an organiser to read it off when somebody rings and asks. The same rule decides who sees it: the organiser always, an attendee only where step 3 is on. Find and share your booking code is the page to send people.
6. Checking in at the panel
At the door, the attendee taps Check in. Where more than one method is enabled the panel asks first — Choose authentication method — and the booking pin is the teal tile. Checking in at the booking panel covers the rest of what that screen offers, and why a button can go missing from it.
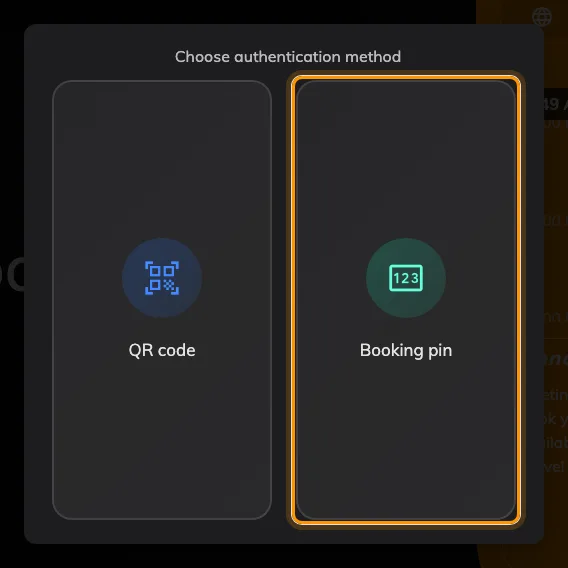
The booking pin sits beside the methods that need an account.
Then the number pad, with a reminder of where to find the code.
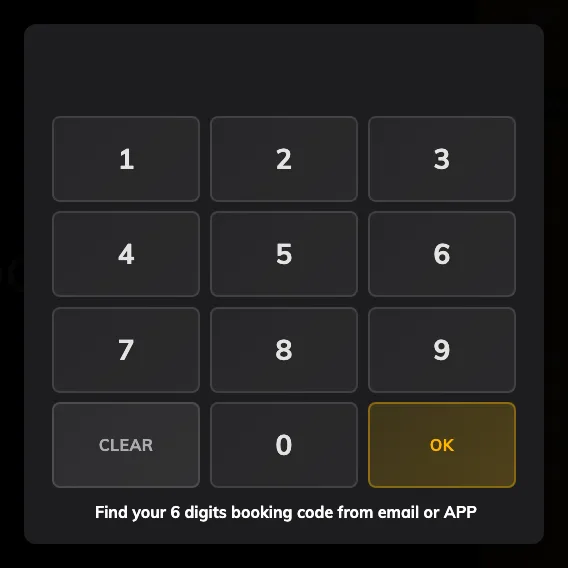
The number pad, with the expected digit count in the footer.
Four things worth knowing before someone asks:
- The same code also checks out and extends, not just checks in. An attendee who needs another twenty minutes can take them at the panel.
- The check-in is recorded against the organiser. The pin identifies the booking, and the booking’s organiser is who the panel credits — so the attendance record will not name the attendee who actually stood there.
- A wrong code is not locked out. There is no attempt counter and no cooldown; a rejected code simply clears the pad.
- A repeating booking has one code for the whole series, not one per occurrence. Convenient for a weekly meeting with the same outside attendees; worth knowing before you give the code to somebody who should only be in the building once.
7. Check it worked
Book the room, add an address you can read as an attendee, and open the mail. The code should be in the body and the calendar file attached. Type the code at the panel and the booking should check in.
If the mail arrived with no code in it, the cause is almost always step 3 — the toggle is off, or the room is on a different policy from the one you edited.