

Map 2.0
Assign rooms, desks and other resources on Map 2.0
Link Map 2.0 shapes to existing resources, choose eligible objects and desk seats, move an assignment or unassign it without deleting the resource.
1. Select a suitable object
Open Map, choose the building and floor, and open its Map 2.0 editor. Select the room or object on the canvas, then choose Assign on the selected object’s action bar. There is no separate Assign mode.
The list only offers resources the selected object can represent. A room takes a room; a desk takes a desk; equipment or parking requires a matching eligible object. A combined-room group takes combined resources, not the separate rooms. If the resource is missing, check its type and the selected object’s type before creating another copy.
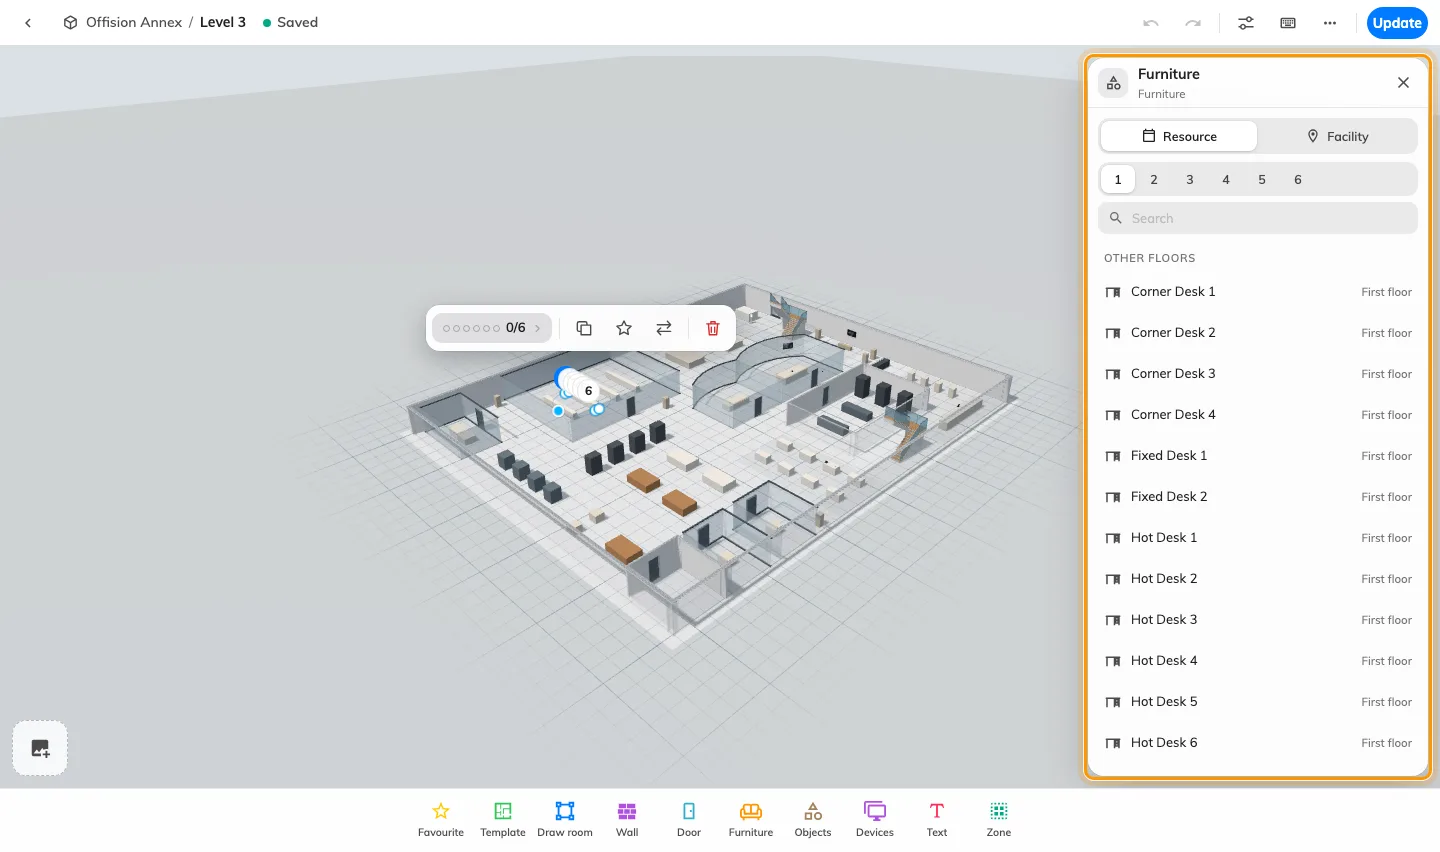
Select a Map 2.0 object and open Assign. The resource list depends on the selected object’s type.
2. Choose the resource
Use the search and check This floor, Other floors and No location. Choosing a resource from another floor moves its location to this floor; check the building and floor before taking it. A resource already assigned to another object shows that object’s name: choosing it transfers the assignment instead of creating a second copy.
On a desk with several seats, select the numbered seat first, then choose its desk resource. Each seat can represent its own desk; assigning one seat does not assign all seats.
3. Change or remove an assignment
The selected resource has a check mark. Choose another row to change it. Choose the checked row again to unassign it. If the linked resource no longer exists in the list, use Unassign beside the missing link.
Unassigning removes the link to the drawing; it does not delete the bookable resource. Drawing a room or naming furniture does not create one either.
4. Verify the result
Wait for Saved, then review and update when ready. Open the map people use and select the object: confirm the intended resource name, floor and booking details. On an already published map, draft assignments become visible after the update succeeds.
Set a facility’s map label
Select an assigned facility object and open Assign to reach its facility controls. Choose Text, Icon, Text + icon or None for the label, then use Choose icon when showing an icon. A custom map label or icon changes how the place is identified on this map; it does not create a bookable resource. On the published map, select the facility to check the linked details. Update the map after checking the draft.