

Set up a visiting purpose
A visiting purpose is the form every visitor meets — which details are asked for, whether a photo is taken, which terms and surveys they answer, and the key their record is stored under. About fifteen minutes.
A visiting purpose is the reason someone is coming, and it carries the form that comes with that reason. An interview, a delivery and a contractor visit are the same mechanism asked different questions: the purpose decides which details are collected, whether a photo is taken, which terms have to be agreed to, which surveys are answered, and which of those a visitor may leave blank.
It is chosen once — by the employee sending the invitation, or by the receptionist registering a walk-in — and everything downstream reads from it.
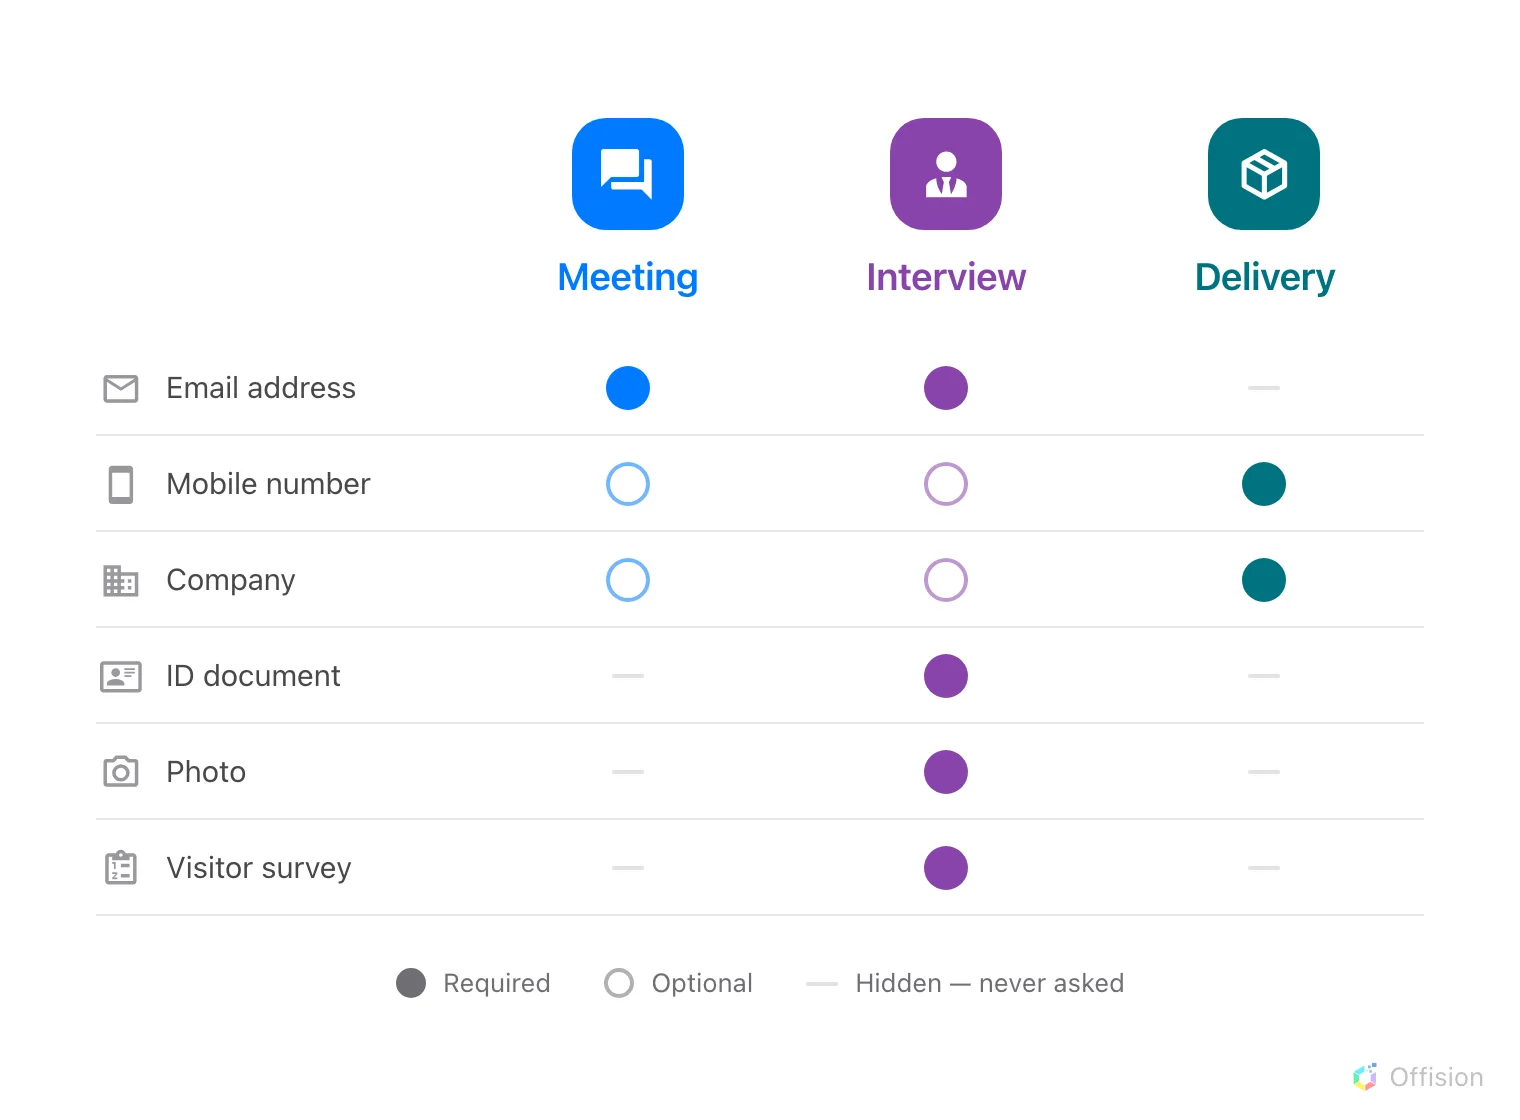
One mechanism, three sets of questions. Every purpose starts from the same list and decides which of it to ask for, and how insistently.
1. Open Visiting purpose
It is under Invite visitor settings in the Visitor Management menu, beside Visiting form, Visitor attributes and Visitor survey.
The list shows each purpose with its Required fields and Optional fields spelled out, and the surveys attached to it — enough to compare two purposes without opening either. The building determines which purposes are offered and which is pre-selected. Set these on Visiting location → Edit → Settings, rather than on the purpose itself.
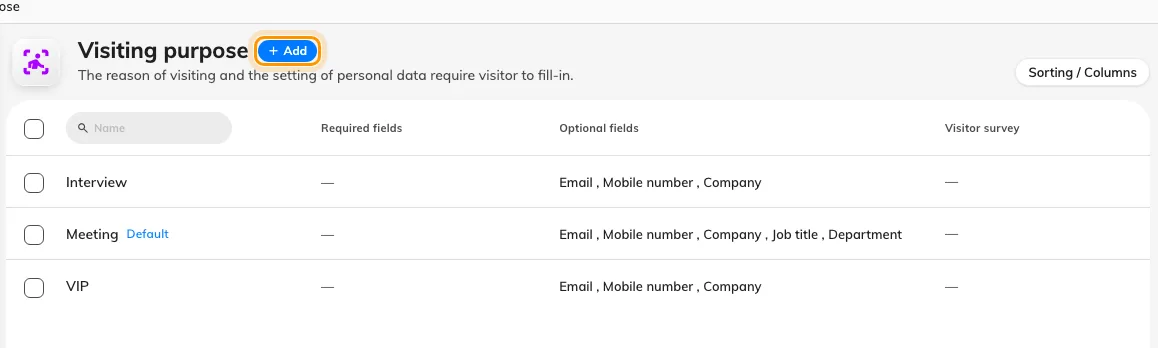
The purposes on this tenant, with what each one asks for shown on the row.
2. Name it
Add opens the editor on Basic information. Name is what an employee picks from when they invite someone, so name it for the visit rather than for the paperwork — Contractor, not Photo and ID required. It is multilingual: fill in every language your organisation uses, because a name left blank in one language silently falls back to the primary one.
Two fields underneath are optional and easy to skip on purpose:
- Scope — the organization unit that owns this purpose. Present only where organization units are enabled.
- Access ID — a stable short code so a spreadsheet import can name this purpose. Leave it blank if visits of this kind are never imported. It has to be unique across the whole organisation, and a duplicate is refused on save.
3. Confirm the key visitors are stored under
A new purpose starts on Email address, and for most organisations that is the right answer. This key decides whether the person at the desk today is the same record as last month — so if visitors here arrive without a work address, or an outside number already identifies them, change it before the first visit. It is one setting worth reading about first: How Offision knows two visits are the same person.
4. Choose which details to ask for
Visitor fields is the form itself. Every row carries one requirement, and this is what an invited visitor, a walk-in at the desk and someone registering at a lobby screen all see:
- Required when inviting — the employee sending the invitation has to supply it as well, not only the visitor.
- Required — the visitor cannot finish without it. The page says as much above the list: Required applies when the visitor fills in the form.
- Optional — asked for, may be left blank.
- Hidden — never asked for, and never stored.
Only Email address, Mobile number and Company offer that top rung. Every other row has three values, because the invite panel gives a host nowhere to type a job title or an ID document — demanding one there would block the invitation over a detail only the visitor can supply.
| Field | On a new purpose |
|---|---|
| Email address | Optional |
| Mobile number | Optional |
| Company | Optional |
| Job title | Optional |
| Department | Optional |
| Phone number | Hidden |
| Address | Hidden |
| ID document | Hidden |
| Photo | Hidden |
The row for the field your identity key is stored under is fixed at Required when inviting and cannot be moved, captioned Identity key — always asked for when inviting: a visitor record cannot be created without its key, so every form already holds that field to it.
Three settings on this page are not requirements at all:
- Separate first and last name splits the visitor’s name into two inputs instead of one. On by default.
- Reception can view the photo appears only once Photo is not Hidden. Turned off, the photo is still captured and still printed on the badge, but reception staff cannot open it. Where the photo is taken, which badge design prints it, and what it does not prove is The visitor photo.
- Custom attributes lists whatever extra visitor fields your organisation has defined, each with the same three lower values and each starting Hidden. Add or rename them on Visitor attributes; this page only decides whether this purpose asks for them.
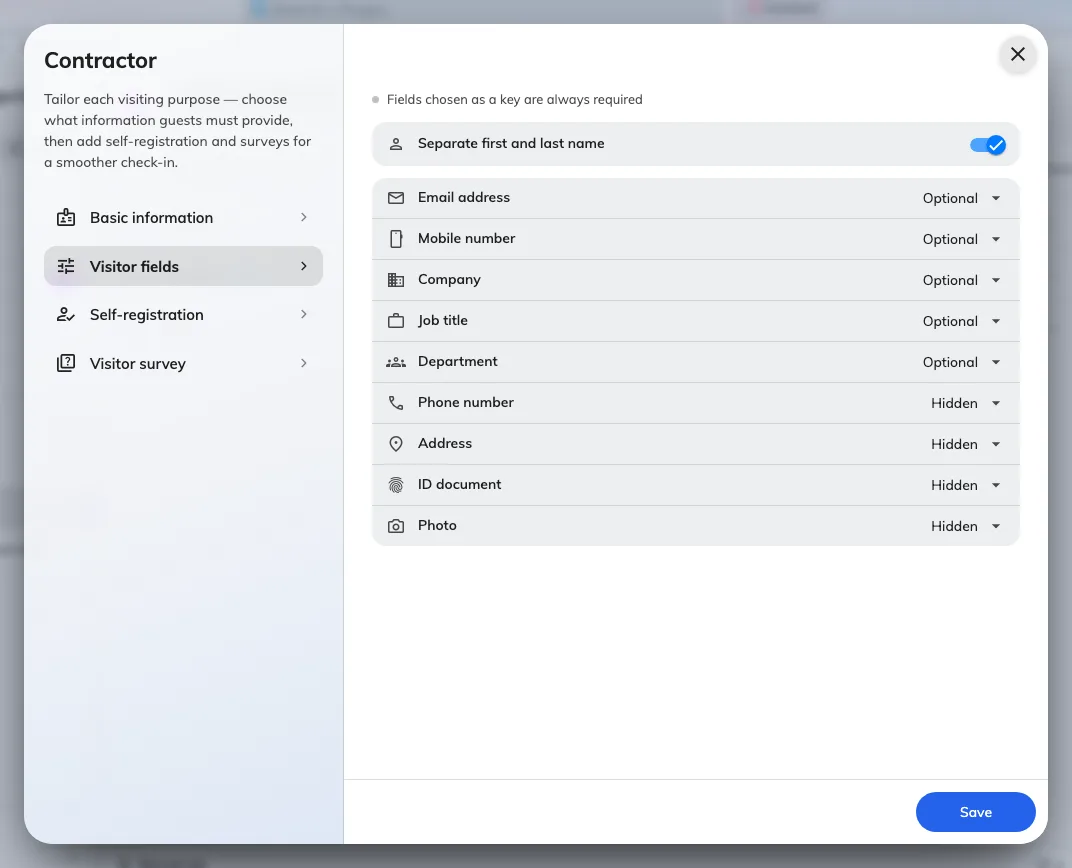
Visitor fields, with the requirement of each one on the right.
5. Add terms, if this purpose needs them
Self-registration carries two separate bodies of text, and they are shown at different moments:
- Visitor self-registration terms — shown to someone registering themselves on arrival, at a lobby screen or at the desk.
- Visitor pre-registration terms — shown to an invited visitor filling in their own details before the day.
Each has its own Terms and conditions / Message editor and its own Require scrolling to the end, which is on for a new purpose: the visitor cannot agree until they have reached the bottom. Leave a toggle off and nothing is shown at all.
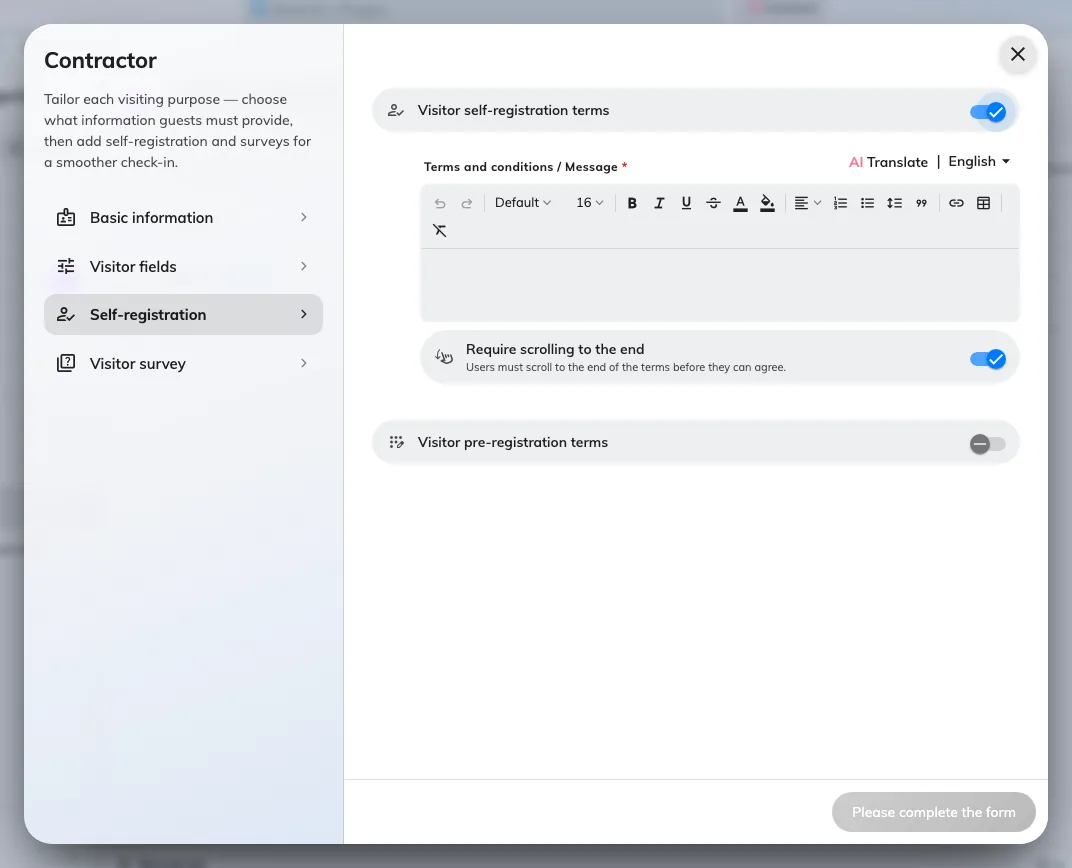
Self-registration terms switched on, with the editor and the scroll rule underneath.
6. Attach any surveys
Visitor survey is a tick list of the questionnaires already written for your organisation — a health declaration, a site-safety question, an NDA. Each one you tick becomes a step the visitor has to answer, in the invitation flow and at the desk alike.
No visitor surveys means none have been written yet; they are created on their own page, not here.
Open Visitor survey7. Save
Save closes the editor. The purpose can be offered on new invitations at buildings where it is available.
Selecting the row afterwards opens Edit, Duplicate and Delete. Choose building defaults or handle a deletion separately. A building using Specific purposes must offer the new purpose before it appears there.
8. Check it worked
Invite somebody using the new purpose, or open reception’s walk-in form and pick it. The fields you marked Required should be the ones marked as unskippable, the photo step should appear only if you asked for one, and each survey you ticked should be a step of its own.
If a field you set to Required is not being asked for, check that you edited the purpose the form actually selected — the default is chosen for you, and it is easy to configure one purpose and test another.
What a visiting purpose does not control
Nearly everything people look for here and cannot find is on the visiting policy instead, which is attached per location rather than per purpose. The split is deliberate: what a visitor is asked for should not change between buildings, and what a building allows should not change with the reason for the visit.
| What you are looking for | Where it is |
|---|---|
| Whether a visit has to be approved before a badge is issued | Visiting policy |
| How far ahead visits may be booked, and how long they may last | Visiting policy |
| All-day, cross-day and recurring visits | Visiting policy |
| Emailing the host on invitation, on arrival, on a walk-in arrival | Visiting policy |
| Restricting who may invite, or which email domains are accepted | Visiting policy |
| Whether visitors may register a vehicle | Visiting policy |
| Hiding the QR code on the badge, or taking the badge code from another system | Visiting policy |
| Which fields the employee fills in about the visit itself | Visiting form |
| What the printed badge looks like | Visitor badge settings — one design for the whole organisation |