

Set up a Qbic kiosk at the reception desk
A Luminen Pro 15 is a 15.6-inch touchscreen with a card reader in it, which is what a reception desk needs and a wall screen does not. How to pair one as a kiosk, and why its location on the floor plan is the step nobody should skip.
A reception screen is not a wall screen that happens to be lower down. People walk up to it and do something: register as a visitor, check in for an appointment, tap a card. That needs a screen big enough to read standing up, a touch surface, and a card reader in the same piece of glass — which is what a Luminen Pro 15 is.
Offision treats it as signage: a screen that plays a board. It is not a room panel and not the visitor self-service panel type; what it does is whatever the content you point it at does.
What to have ready
- A Luminen Pro 15, or the 10-inch Luminen Pro 10
- A PoE drop at the desk, or a socket and wireless coverage there
- Somewhere for it to stand or be mounted where people can reach the screen
- Visiting configured for the building
- About thirty minutes, including building the content
The Luminen Pro 10 is the same device at 10 inches, and the kiosk tile also covers a TD-1070 doing kiosk duty. A TD-1070 is a room panel by design, so it is the right choice only where the kiosk is small and mounted, rather than stood on a counter.
1. Build the reception content
The content exists before the hardware does. Go to Signage › Content, choose Add, and pick Reception & lobby.
Open Signage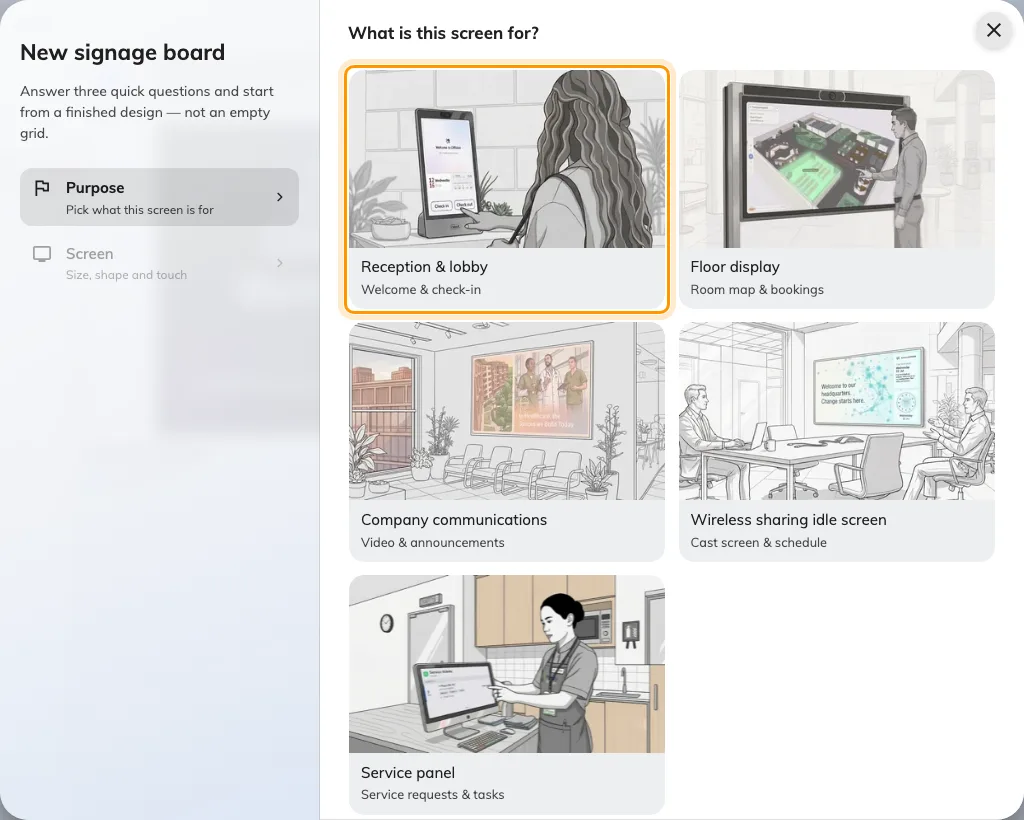
Reception and lobby, the first purpose. It seeds the design with a welcome screen and a walk-in code.
Answer the screen questions to match the kiosk: a landscape shape, and Touch screen on. That last one is what turns the self-service buttons on instead of replacing them with a QR code — a touchscreen paired to content built without it is a kiosk nobody can use.
What to put on the content — who the welcome screen greets, how the walk-in code behaves, what the self-service buttons do — is in Set up a lobby screen for visitors. Build it there, then come back here for the hardware.
2. Set the kiosk up
Stand or mount it at the desk and take the network cable to a PoE port. It boots into Android.
Then get the player onto the screen. A kiosk that has never been set up boots into its own Configuration screen: put the player address in the Content field there and choose PLAY, or install the Offision Android app on it instead.
https://app.offision.com/player
On a restricted network, a kiosk needs the same outbound hosts as any other device and no inbound rule at all — see Put Offision devices on a locked-down network.
Install the app here. A reception kiosk is the case where browser mode costs the most — the built-in card reader is not reachable from a browser, and the badge printer is not either, so a kiosk in browser mode is a kiosk that can neither read a card nor print a badge. The steps are Install the Offision app on a Qbic device; the choice behind them is Run the player as an app or in the browser.
The screen shows a six-character pairing code when it is ready.
3. Pair it as a kiosk
In the console, go to Devices › Signage › Devices and choose Add.
Open Signage devicesChoose the reception content from step 1, then Qbic kiosks under Certified devices.
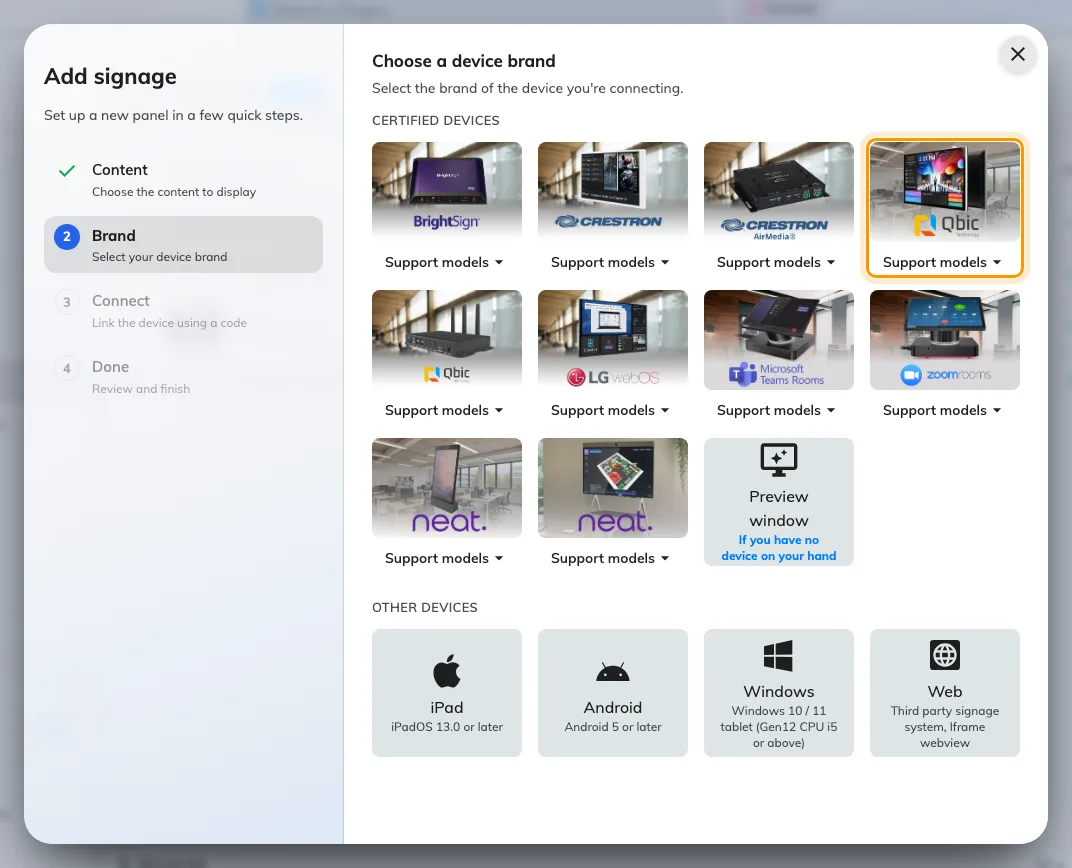
Qbic kiosks, fourth in the certified devices grid.
That tile covers Luminen Pro 10, Luminen Pro 15, TD-1070 and TD-1070 Lite — its Support models button links each of them to Qbic’s own page. The neighbouring Qbic signages tile is the one for the BXP players that drive a wall screen.
Type the six characters from the kiosk. The field submits itself on the last one.
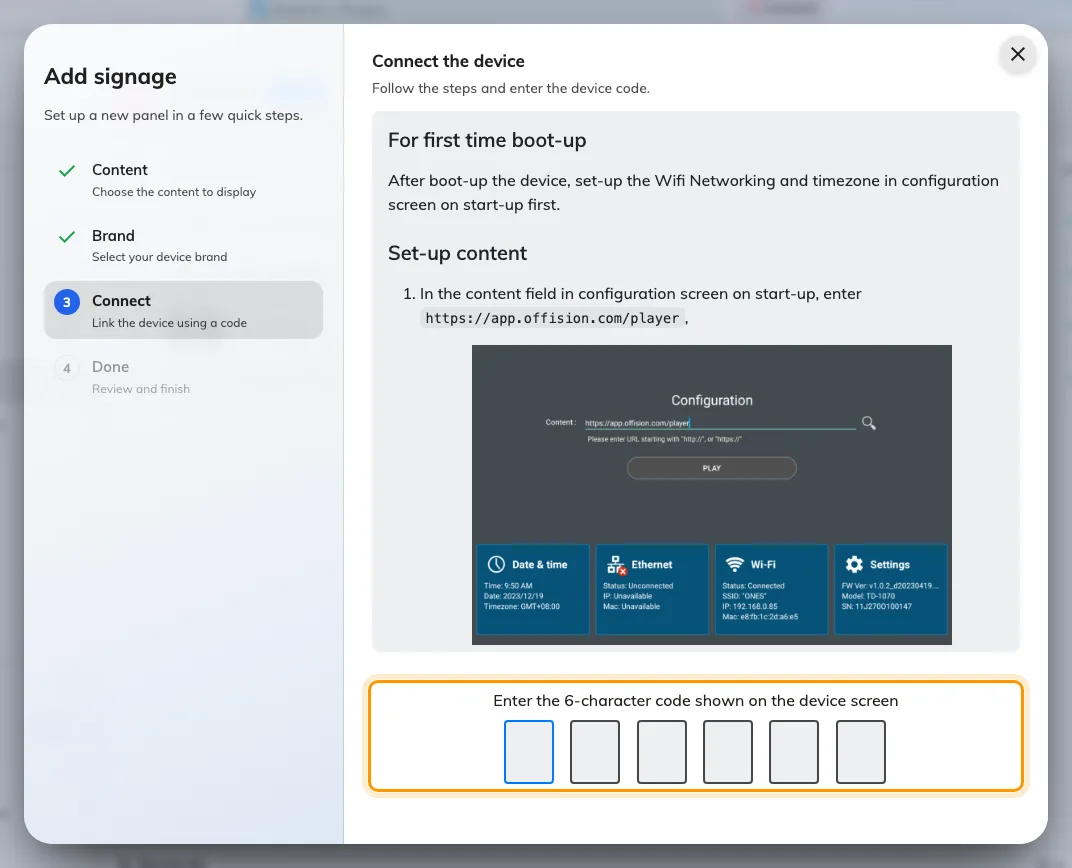
The Qbic guideline, and the field that claims the kiosk.
4. Give it a location
This step is not optional on a reception screen, and it is the one people skip.
The device’s location decides whose visitors it greets and, for anyone who registers on it, which building and floor they have arrived at. A kiosk with no location greets nobody. Place it on the floor plan — the wizard offers Set location as it finishes, and the same thing can be done later from the device’s own row.
How to place it, and what the location then controls, is in Set up a lobby screen for visitors.
5. Check it worked
A kiosk that only displays is half-installed, so check both directions:
- It greets. Invite a visitor for today, check them in, and watch the name appear on the kiosk.
- It accepts. Tap a self-service button on the kiosk itself and go through registration. The visitor should appear in the console as having arrived at this building.
- It reads a card, if staff will use it that way. Tap one on the screen’s face.
When it goes wrong
| What you see | Usual cause |
|---|---|
| The kiosk does not power on | The port is not supplying PoE, or the switch’s budget is spent |
| Tapping the screen does nothing | The content was built without Touch screen, so it has a QR code where the buttons should be. Rebuild the content |
| The welcome screen greets nobody | The device has no location, or the visitor was invited to a different building |
| A tapped card does nothing | The kiosk is in browser mode. The built-in reader is only reachable from the app |
| Registration finishes but the visitor arrives at the wrong building | The device’s location is on the wrong floor. Fix it on the device’s row |
| Badges do not print | The printer is connected to a device in browser mode, or to a different device than the one you are standing at — see Connect a label printer |
| The screen is portrait but the content is landscape | The shape is answered when the content is created, not on the device. Rebuild or duplicate the content in the right shape |
| The kiosk shows a room or content, and no pairing code | It is still claimed by an earlier record. Disconnect it there first — see Reuse a panel that was set up for something else |
What this does not do
- It does not configure visiting. Visiting types, approval and who gets notified are set up once for the building, and the kiosk only offers what they produce.
- It does not make the kiosk a booking panel. It plays a board; it does not show a single room’s status with a light bar. Moving the same hardware to that job means releasing it from this record first — see Reuse a panel that was set up for something else.
- It does not manage the device. Firmware, brightness and the kiosk launcher stay in Qbic’s own tooling.
- It does not replace a receptionist’s screen. The reception desk view in the console is a different thing, used by a person rather than by the visitor.
When a reception call does not connect
An Offision call can end because the person is busy, unavailable, or does not answer. The screen returns to the directory so the visitor can try another person or call again later; this does not mean reception check-in failed. Only one device answers a call. If another has already answered, a second device cannot start another conversation.
If the screen loses its connection, wait until it reconnects before trying again. Check the kiosk’s microphone and camera permissions when it cannot start a call. Teams and Zoom calls have their own provider flow; an Offision call’s status does not describe those calls.