

Connect a booking panel to Offision
A new panel is not told where your server is. It shows a six-character code and waits for somebody to claim it. What happens on the wall, what happens in the console, and what to change before the panel goes up.
A panel out of its box knows one address, and it is not yours. It dials a registration service that every Offision panel in the world dials, gets a six-character code, and waits for somebody to claim it. Typing that code into your console is the whole of the pairing: it is what tells the service which server this panel belongs to.
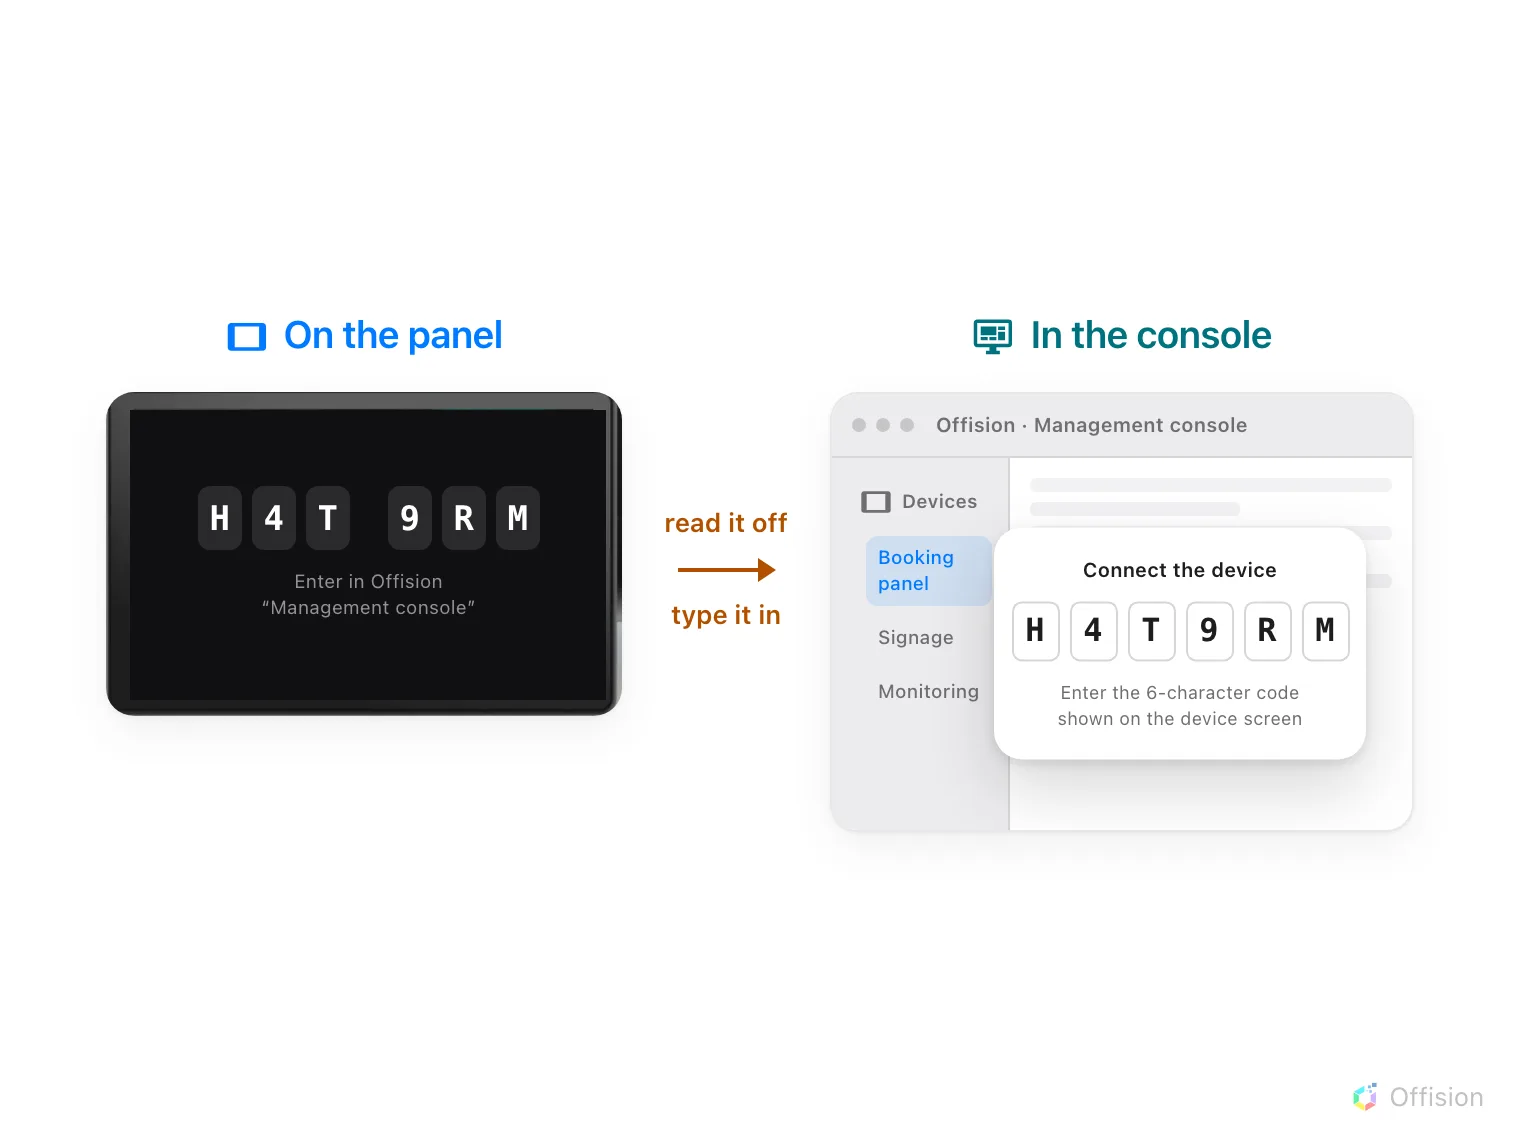
Pairing is one move: the six characters on the panel, typed into the console.
That is why there is no server address to type on the panel, and why a panel that has lost its network shows a code screen rather than an error about your server.
1. Let the panel boot
Power it on and leave it. After the brand animation it settles on a screen carrying six characters in two groups of three, above the line Enter in Offision “Management console” and the path it wants you to follow.
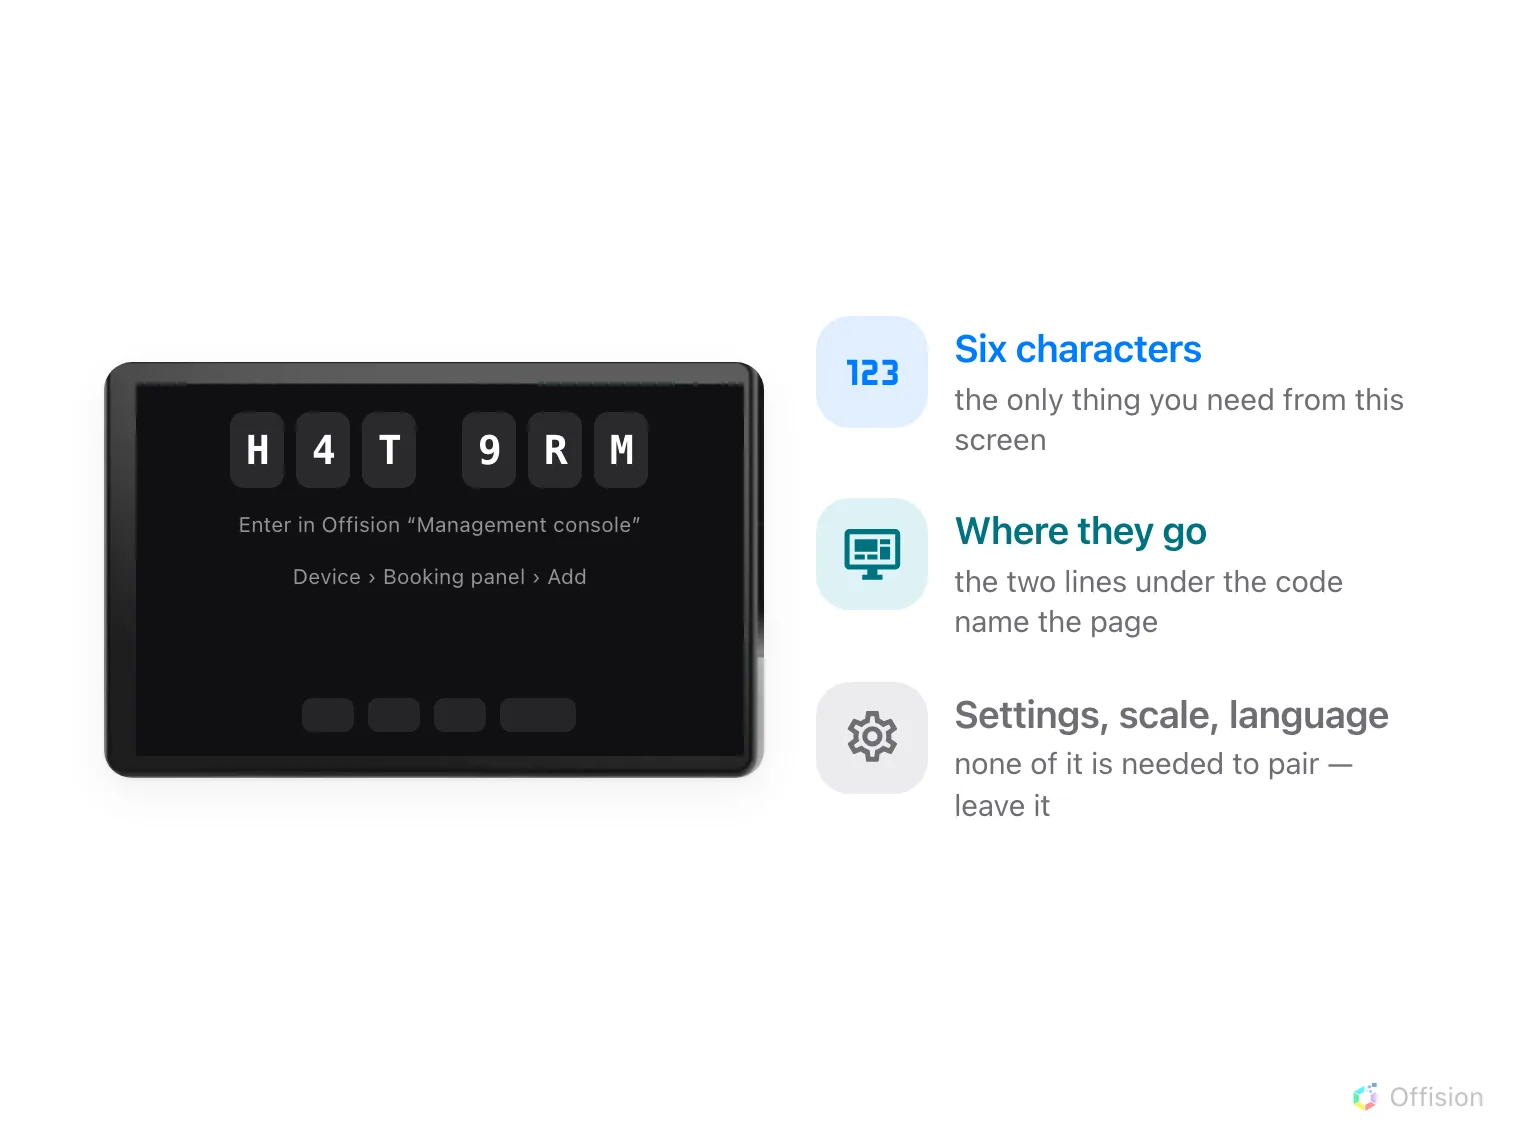
A panel waiting to be claimed. The six characters are the whole of it.
Nothing is typed here — and the settings the bar along the bottom offers are all easier to set later, from the console.
If the panel instead says it cannot connect to the server, it has not reached the registration service. That is a network problem at the panel end — the console cannot help, because the panel has not yet said anything to it. The same message can also replace a code that was already up: the code lives on an open connection, so when that connection drops the panel clears it rather than going on showing one the server has forgotten. A panel reconnecting shows a fresh code.
2. Open the wizard
Go to Devices › Booking panel › Devices and choose Add.
Open Booking panel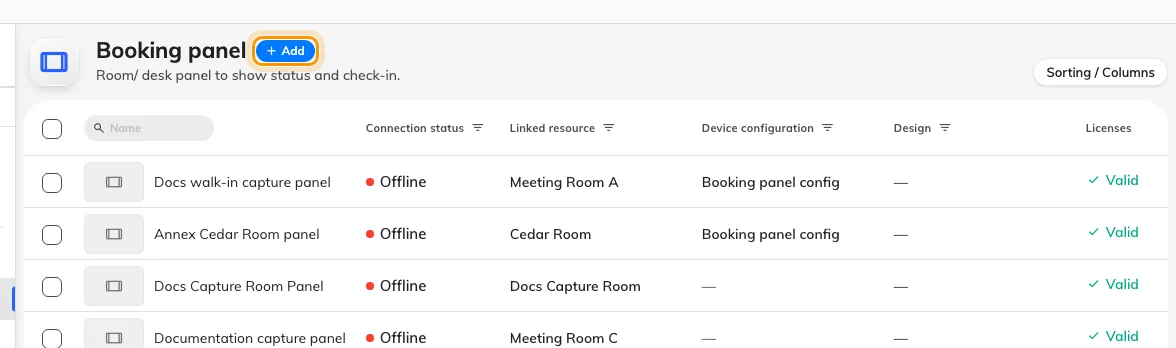
Every panel already paired, and the button that adds the next one.
The wizard asks four things in order — Design, Resource, Brand, Connect — and each one is locked until the one above it is answered. Only the last does anything irreversible.
3. Choose the kind of panel, then the room
Design asks where this panel is going, not what colour it should be: Room booking panel for the one by the door, Desk booking panel for a hot desk, Meeting assistant panel for the one on the table inside the room. Take Use this design when you have picked.
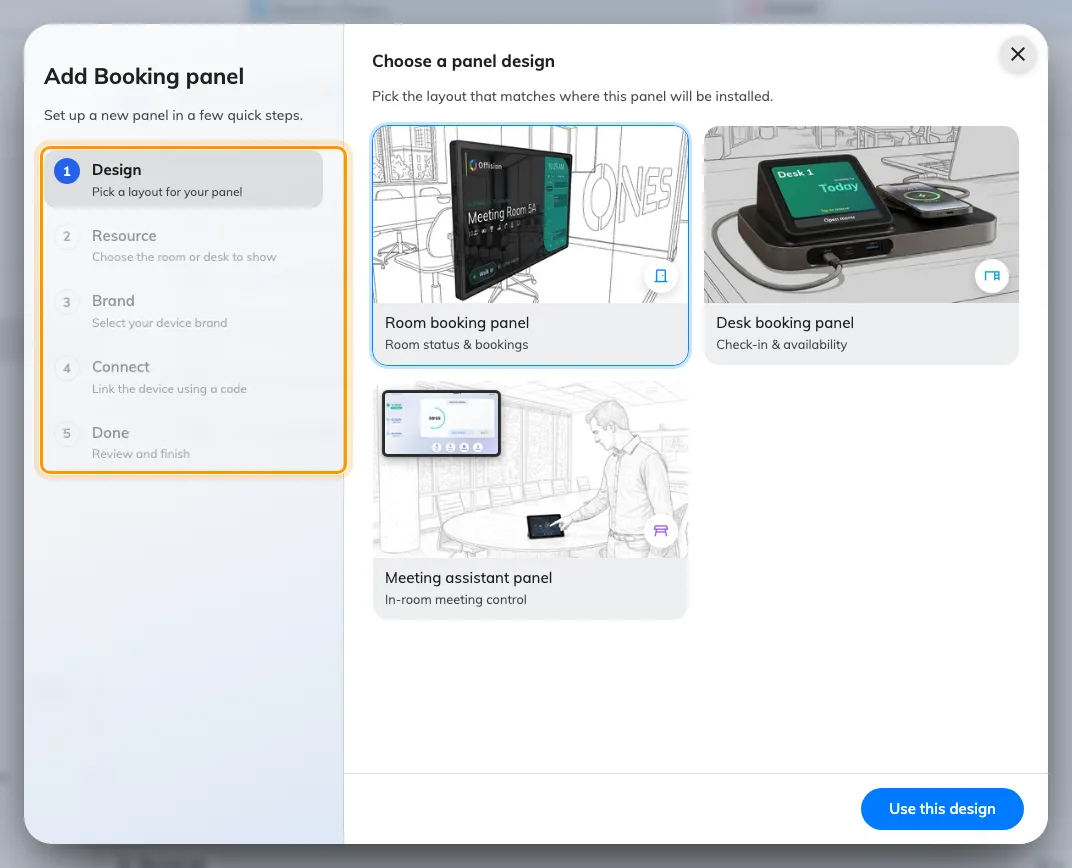
The five steps, with the first one open.
Room booking and meeting assistant are the same panel wearing a different design, and swapping between them later is an edit on the device. Room and desk are not: that follows the resource picked in the next step, and it is settled once the panel is paired — see Reuse a panel that was set up for something else.
None of it is where the panel’s look is decided — the logo, colours and text sizes all live in the panel configuration. See Show your company logo on a room panel.
Resource is the room, and it is the one answer worth being careful about: this is what makes the panel this room’s panel, and a panel on the wrong door is the commonest thing to have to undo afterwards. Rooms that already have a panel say so on the right. Pick one, then Next.
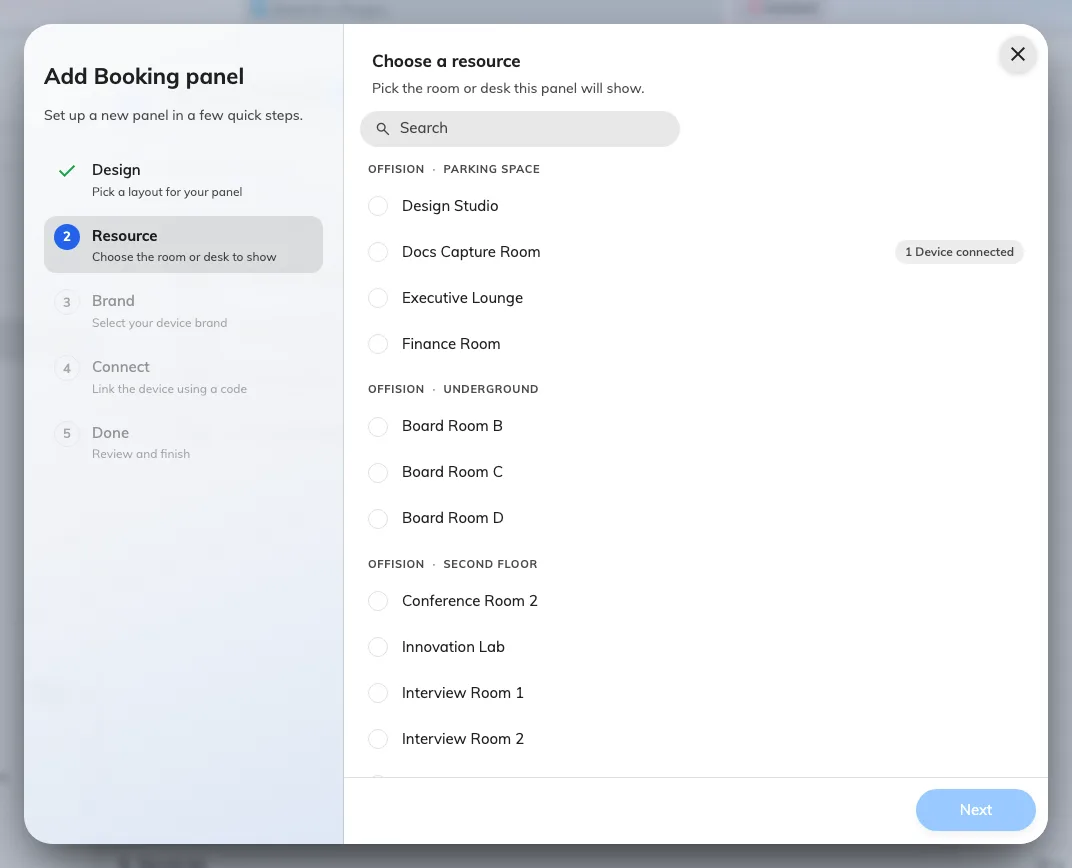
The room this panel will show, by building and floor.
4. Choose the brand
Certified devices is the hardware Offision tests against: Crestron room and desk panels, Qbic panels, desk panels and docks, IAdea panels, Cisco Room Navigator and Neat Pad. Other devices underneath covers an iPad, an Android tablet, a Windows tablet, or a third-party system loading the panel in a web view.
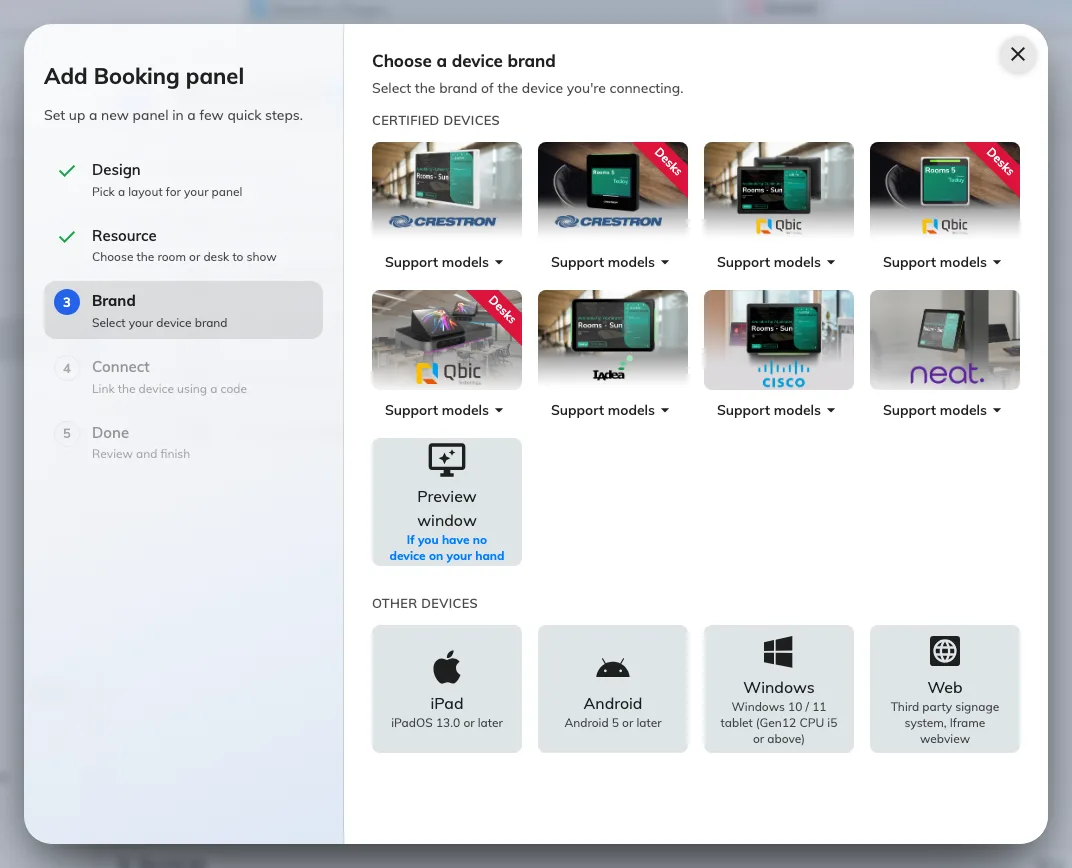
Certified hardware, the general options underneath, and Preview window for trying this without any.
The brand decides what happens next rather than what gets created: each one carries its own installation guideline, and the steps that get the app onto a Crestron panel are not the steps that get it onto a Qbic one. Read it before going further, and use Support models on a tile to check the exact model on your desk is one of them. Every certified model, with its screen size, PoE, Wi-Fi and card reader, is in Which booking panel hardware Offision supports.
Preview window — If you have no device on your hand — opens a panel in a browser tab instead. It pairs exactly like real hardware, which makes it the way to walk this page through once before anything is mounted.
5. Type the code
The Connect step shows that brand’s guideline with a six-box field under it. Type the characters from the panel; it submits itself on the sixth.
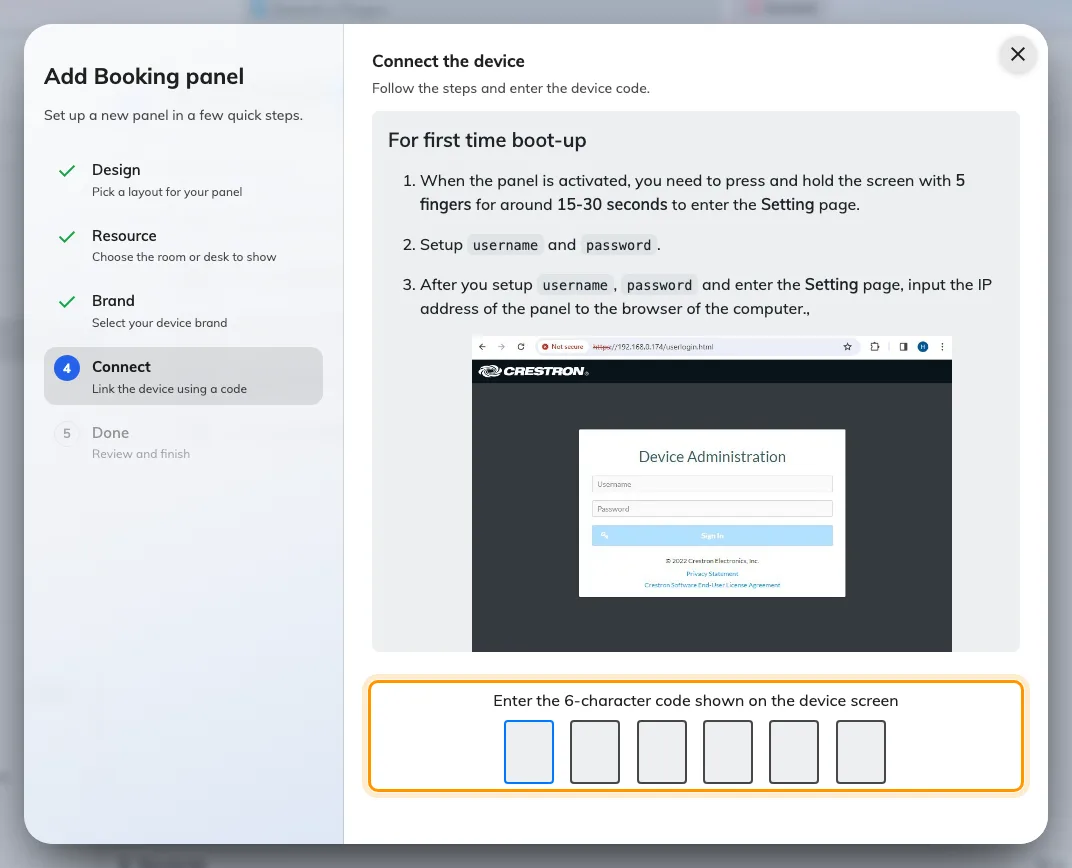
The guideline for the chosen brand, and the field that claims the panel.
Within a few seconds the panel stops showing the code and starts showing the room. If the code is refused, read it off the panel again rather than retyping what you wrote down: a panel that has been asleep, rebooted or off the network since you noted it is showing a different code, or the cannot-connect message instead of one. Either way the number on your notepad is dead.
6. Change the pass code it shows you
A few seconds after the panel lands on the room, it raises a dialog by itself: This is the pass code for this device, the four digits, and under them You need this pass code to access the settings page. Nobody asked for it — it appears because this is the one moment somebody is certain to be standing at the panel, and it closes itself on a countdown.
Change it while that dialog is still on screen. It carries a pencil in the corner of the digits, which opens Edit pass code without going anywhere else — a two-tap job here, and an awkward one later. Everything else about that code, including what it guards and how to replace one that has been lost, is in Set the pass code that unlocks a panel’s settings.
7. Check it worked
The panel now has a row in Devices › Booking panel › Devices, with its Connection status, its Linked resource and the configuration it follows. Selecting the row opens a detail panel with the same fields editable, a live Real-time screen, and Reboot, Reset passcode and Disconnect device.
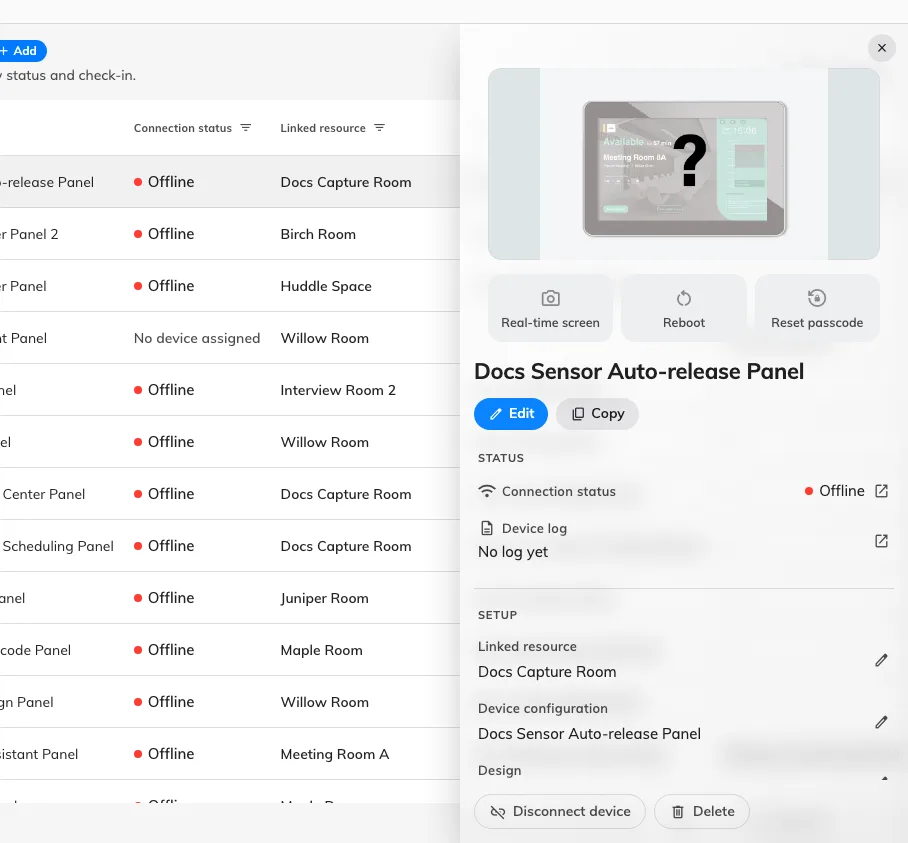
A paired panel: the room it shows, the configuration it follows, and whether it is talking to the server right now.
Connection status should read online within a minute of pairing. If it says offline while the panel is plainly showing the room, the panel has the room cached and has since lost the server — a different fault from one that never paired. What the panel keeps doing in that state, and how it recovers, is A booking panel keeps running when the network drops.
Then prove it end to end rather than trusting the row: book the room for yourself and watch the panel change while you are standing at it.
What this does not control
- How the panel behaves. Its buttons, its skin and the credentials it asks for all come from a shared panel configuration, not from anything set here — see How a panel gets its settings and How somebody proves who they are at the panel.
- What its colours mean. The panel starts showing status the moment it pairs; What the panel’s colours mean is what the colours are saying.
- Moving a panel to another room. That is an edit on the device — change its room in the detail panel. It does not need to be paired again.
- Using a panel that is already set up as something else. A signage screen or a reception kiosk is on another record, and a claimed panel shows no code to type here. Release it first — Reuse a panel that was set up for something else.
- Retiring or replacing one. Disconnect device on the device releases the hardware while keeping the record; Unpair device (formerly Reset), in the panel’s own settings, does the same from the panel’s end and wipes those settings too. Use the second when the panel is leaving, and the first to swap a dead panel for a new one — Replace a panel that has failed.
The wizard finishes with Connected → Done. Check Software versions in the device editor.