

Both maps
Set up a lobby screen for visitors
Build reception content, connect the screen that shows it, and give that screen a location — which is what decides whose visitors it greets and where a walk-in registers.
A screen in a reception area does two jobs at once: it greets the people who have arrived, and it registers the ones who turned up unannounced. Both come from the same content, and both depend on one field that is easy to walk past.
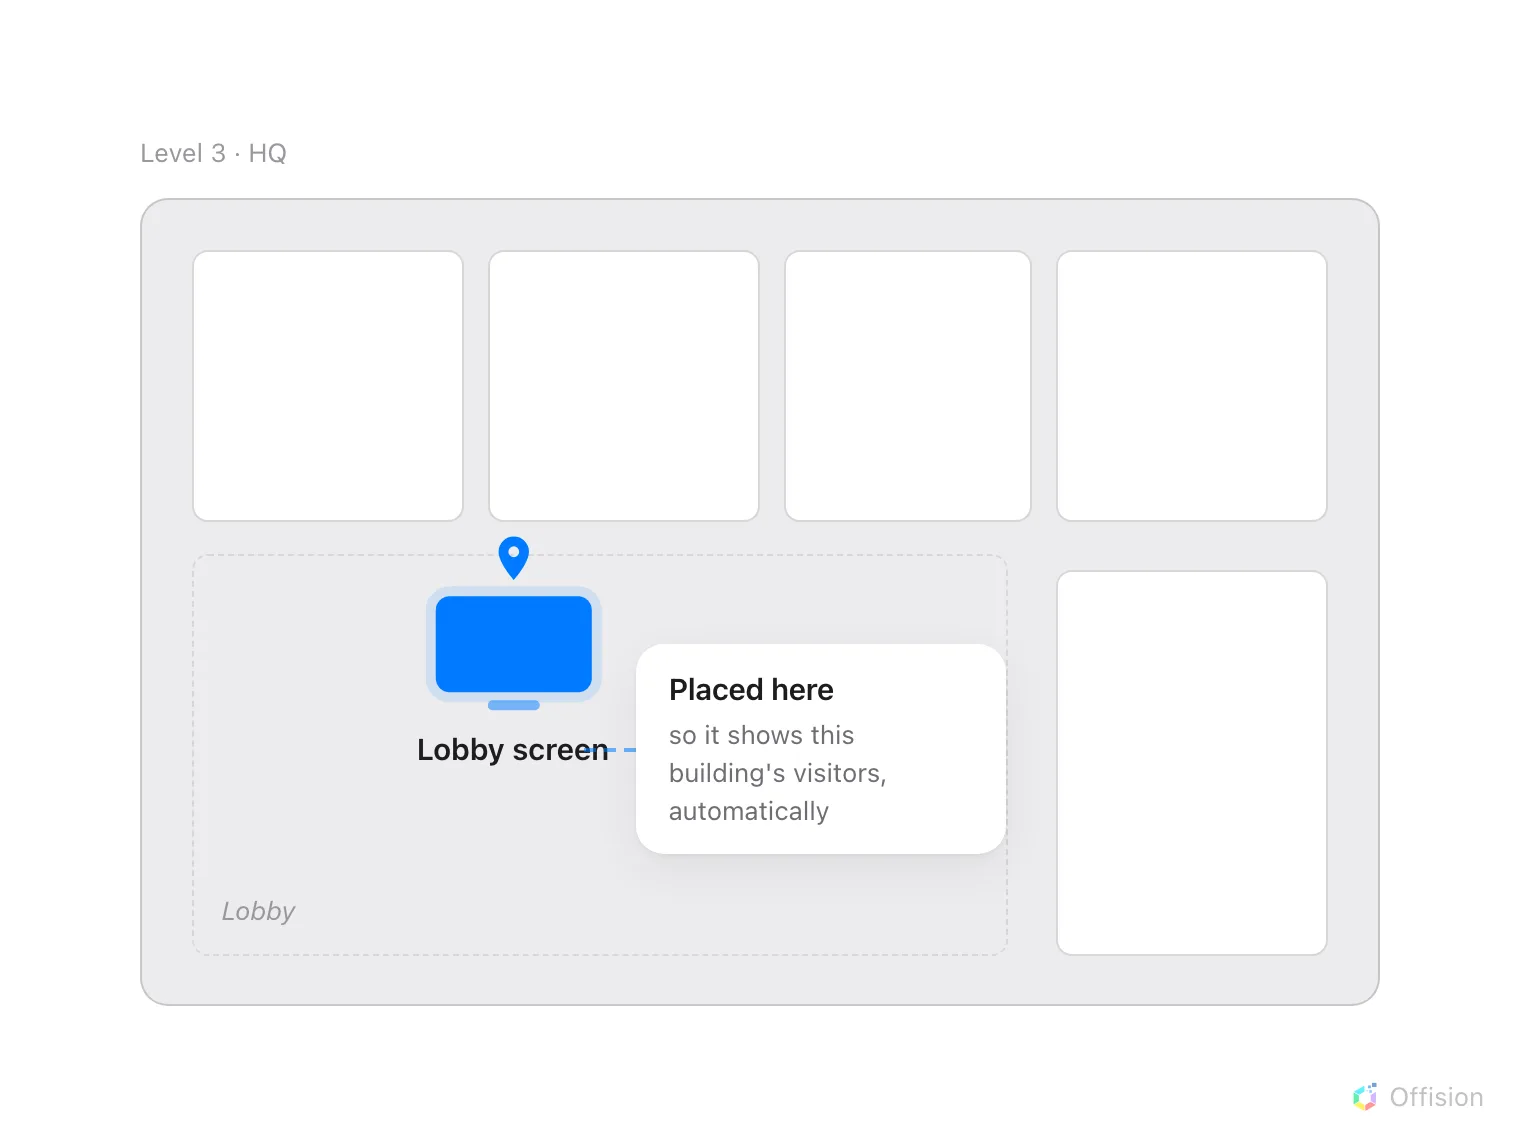
Putting the device on a floor plan is what tells it where it is — and everything on the screen that depends on a place works itself out from that spot.
This is what the four steps below add up to.
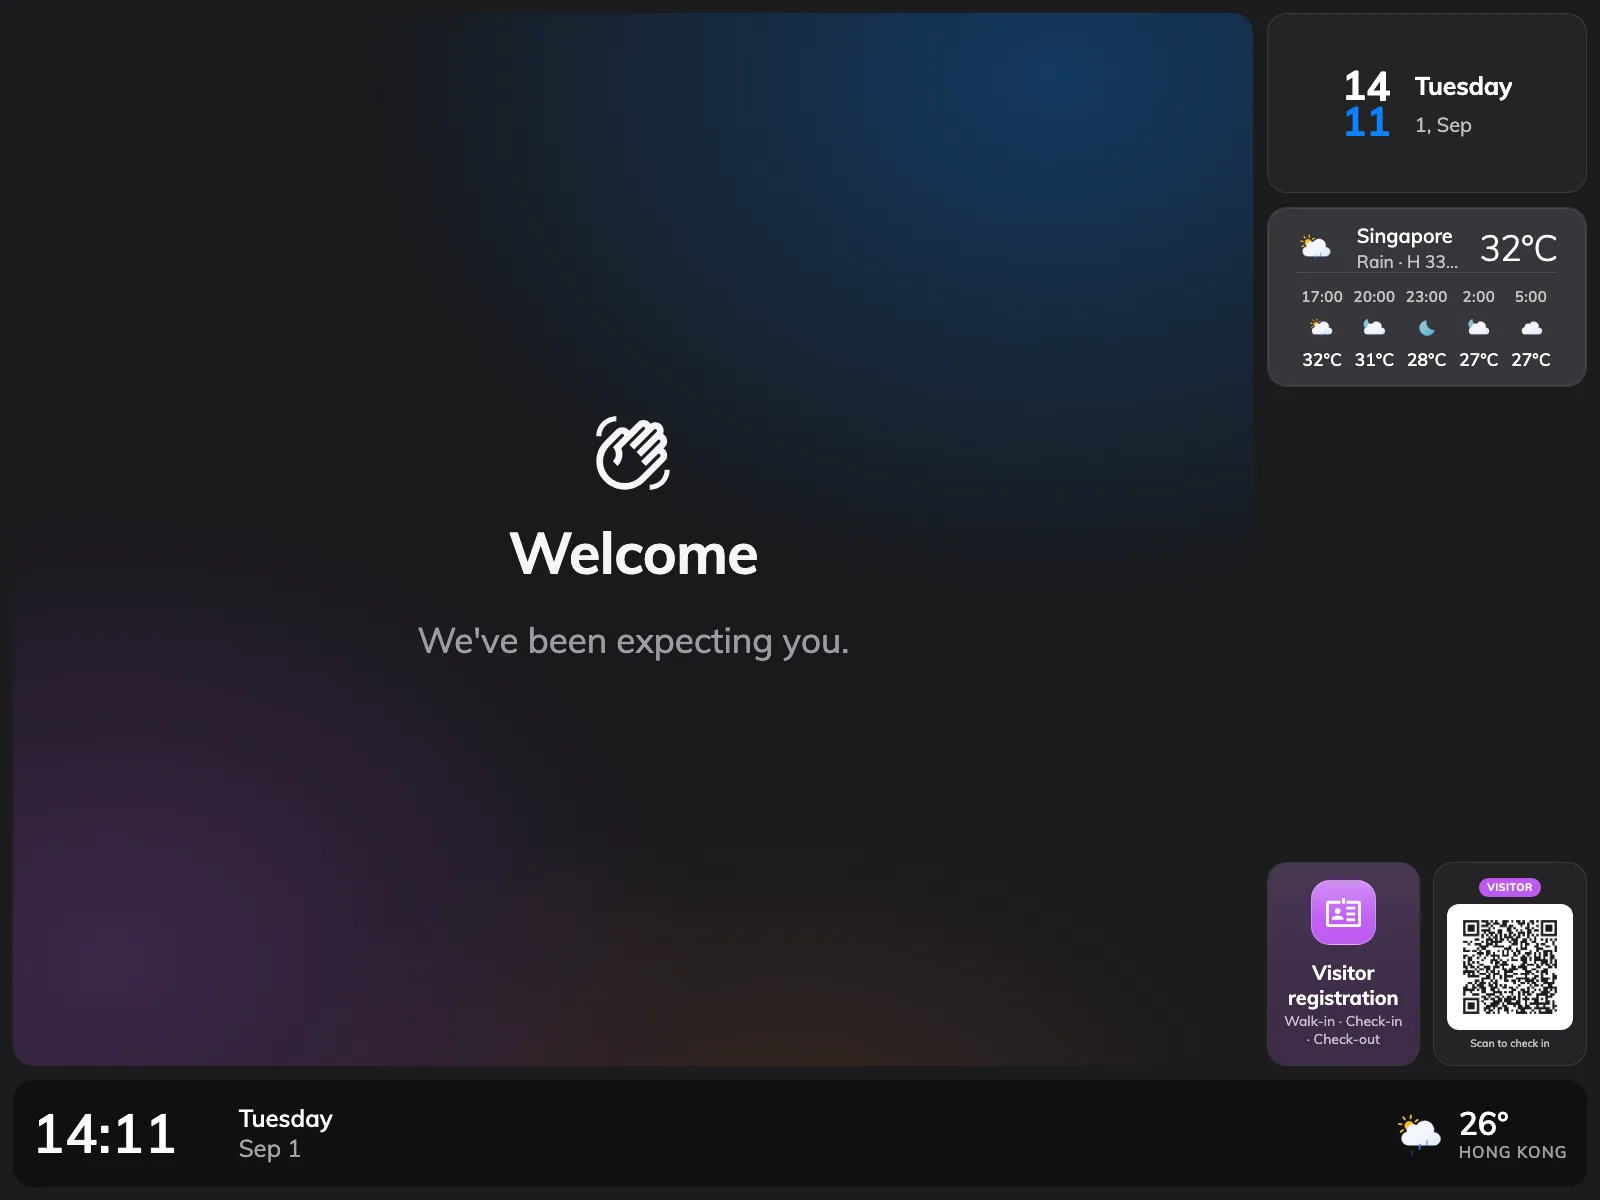
The finished screen between guests: the company welcome, with the walk-in code beside it.
The content is the design: the welcome screen, the visitor list, the walk-in QR code. It belongs to no building and no floor. A device is the hardware in the lobby, and it is the device that holds the Location. Every location-aware part of the content is set to Follow device location out of the box, so a device with no location falls back to all buildings — the screen greets everyone’s visitors, and a walk-in registers into nothing in particular. Nothing errors. It just quietly gets the wrong answer.
That is why step 4 below is a step and not a footnote.
1. Create the content
Go to Signage › Content, choose Add, and pick Reception & lobby.
Open Signage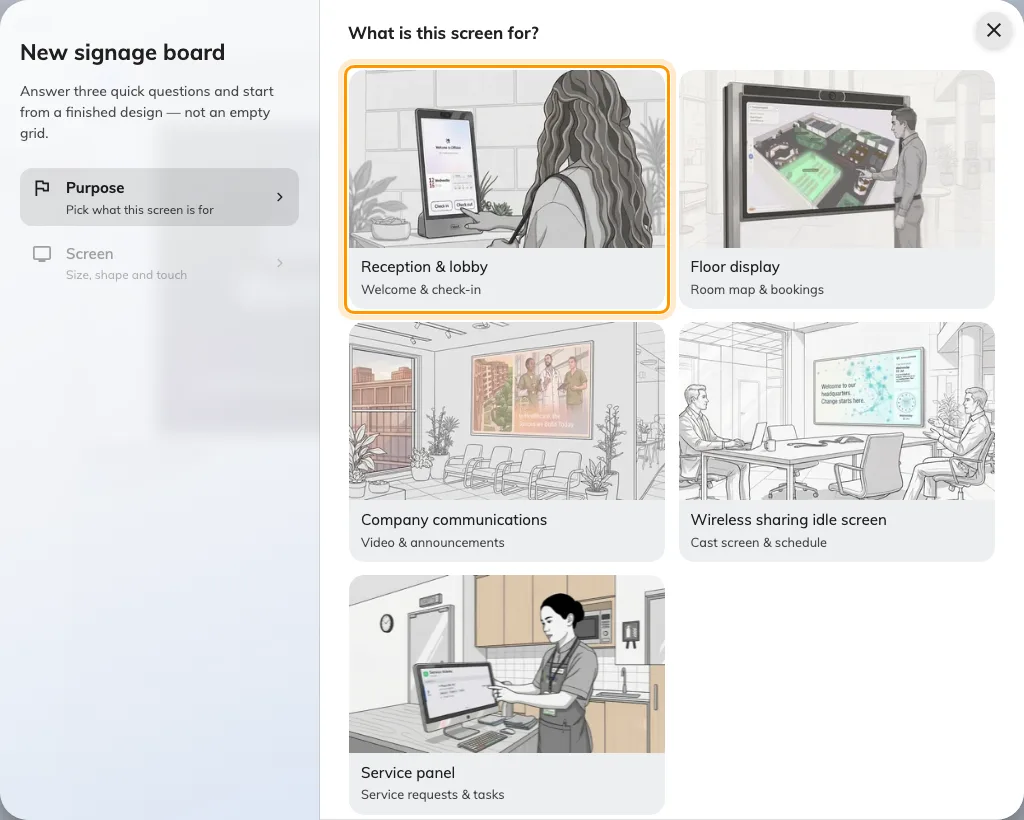
Reception & lobby seeds the welcome screen, the self-service buttons and the walk-in code in one click.
That purpose seeds the design with a visitor welcome screen, self-service buttons and a walk-in QR code already in place, which is most of this article done in one click. Pick the device you are hanging it on, answer Touch screen, and choose Create.
Be honest about Touch screen. On a screen nobody can touch, the self-service buttons are replaced by the walk-in QR code, because there is no point offering a button nobody can press.
The rest of the wizard, and everything about the editor it opens, is in Build signage content and put it on a screen.
2. Set up what visitors see
The editor shows a live preview on the left and its settings on the right, and everything is reached by clicking the thing you want to change in the preview.
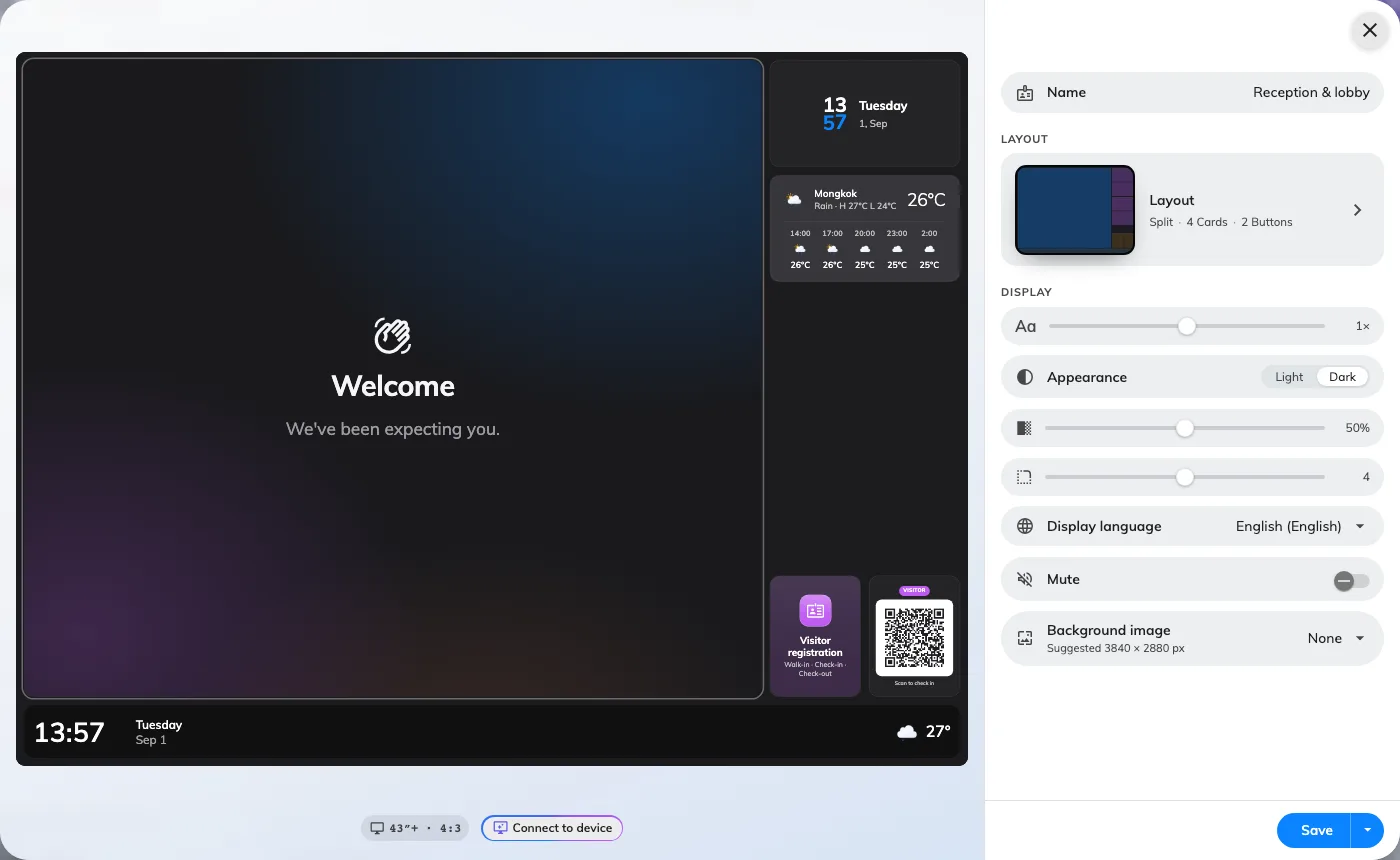
The editor: the live preview on the left, and the settings of whatever you click in it on the right.
Start with the page it opens on: give the content a Name, set its Appearance to light or dark, and choose the Display language.
The welcome screen. Click the large area of the preview to open the Visitor welcome settings. The one to think about is Show — checked-in visitors, or upcoming ones. A screen behind the reception desk usually shows who has arrived; a screen at the door usually shows who is expected. Below it, Greet decides whether the screen welcomes every arrival in its buildings or only the people who checked in at this screen. Both are on the widget’s Visitors page — Greet only when it runs as the takeover — with Location under them.
A guest who checks in at this screen is also shown the room they are going to and the floor it sits on, before the welcome returns. Four things have to be true for that to appear — Show a visitor the way to the room they are visiting.
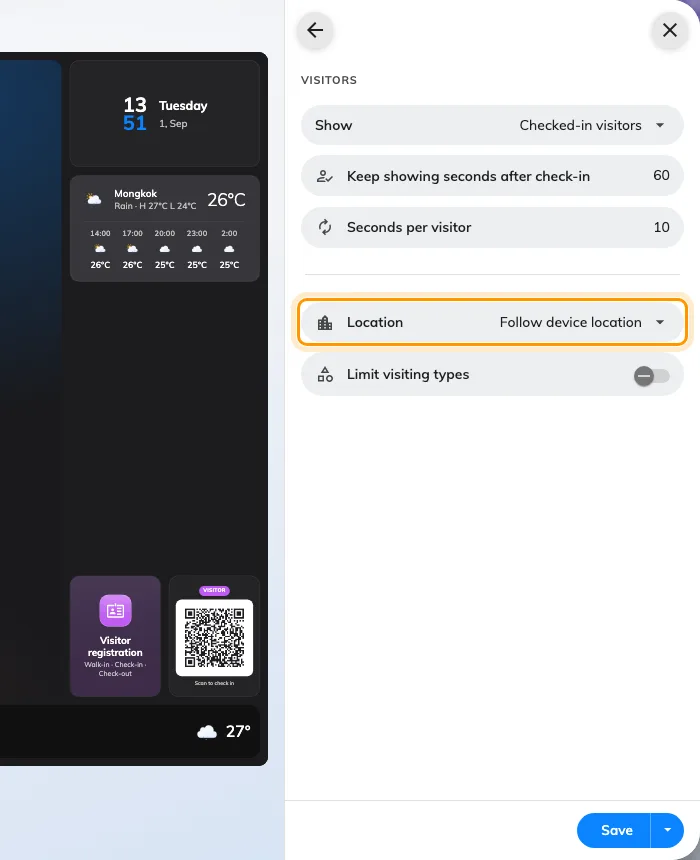
The Visitors page of the welcome screen: who gets greeted, and whose visitors count.
The walk-in code. This purpose already put it on a tile, so click that tile in the preview rather than adding one. Four settings matter here:
- QR action — whether scanning registers the visitor only, or registers and checks them in.
- Check in directly — skips the confirmation the visitor would otherwise tap through. This one is refused unless the code carries a valid access key, so it is not independent of the next setting.
- Access key type — how often the code behind the QR is replaced: daily, hourly, or every three minutes. A code on a public wall should rotate fast; a code behind a reception desk need not.
- Location — leave it on Follow device location. This is the setting the diagram is about.
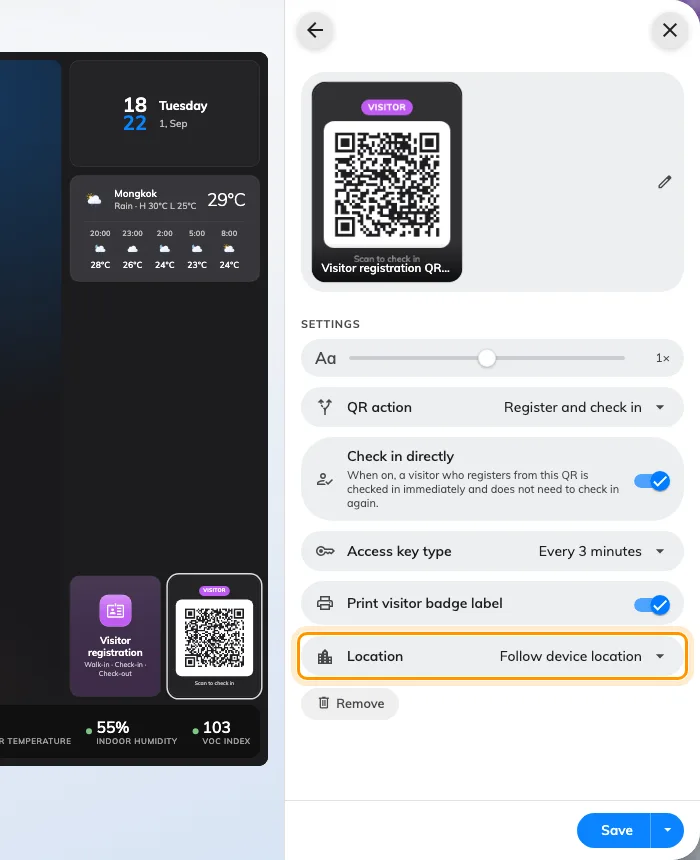
The walk-in code's settings. Location is the one to leave following the device.
Add Visitor self-service buttons and Guest Wi-Fi in the same way if the screen is touchable. Then Save.
That widget carries a QR code of its own, under Show QR code, with its own route — so a touchable screen does not need the separate QR widget above unless you want the code given a slot of its own. See Action widgets.
3. Connect the screen to the device
The content still shows nowhere. Nothing you did in step 2 touched hardware — content and device are joined in the Devices section, and only there.
Go to Devices › Signage › Devices › Add, choose this design as the Content, choose the Brand of hardware you are installing, type the six-character code the screen is showing into the Connect step, and go on to Location. The full walkthrough is in Connect a signage screen.
Open Signage devices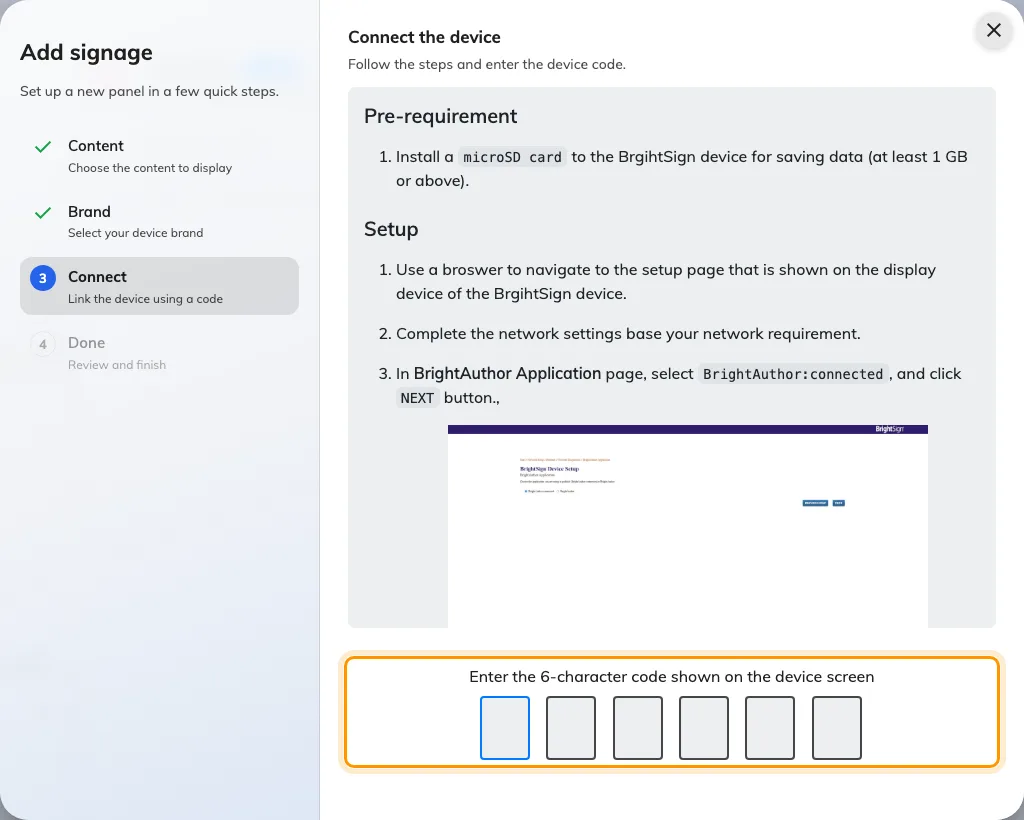
The Connect step: the six characters the screen is showing go here.
The moment the code is accepted the screen stops showing it and starts showing the content. A device carries exactly one design.
4. Set the device’s location
The wizard asks for this before it finishes, which is what keeps the screen you just lit out of the fall-through state from the diagram. Answer it while you are still standing next to the hardware.
Location comes straight after Connect and asks Where is this signage? over the floor plan itself. Pick the floor, then click on the plan; Next stays disabled until you have. Set later skips the step and asks once before it does. If you did skip it, open the device from Devices › Signage › Devices — the panel on the right has a Location row you can edit straight from there, and Edit › Basic has the same field. All of them open the same picker.
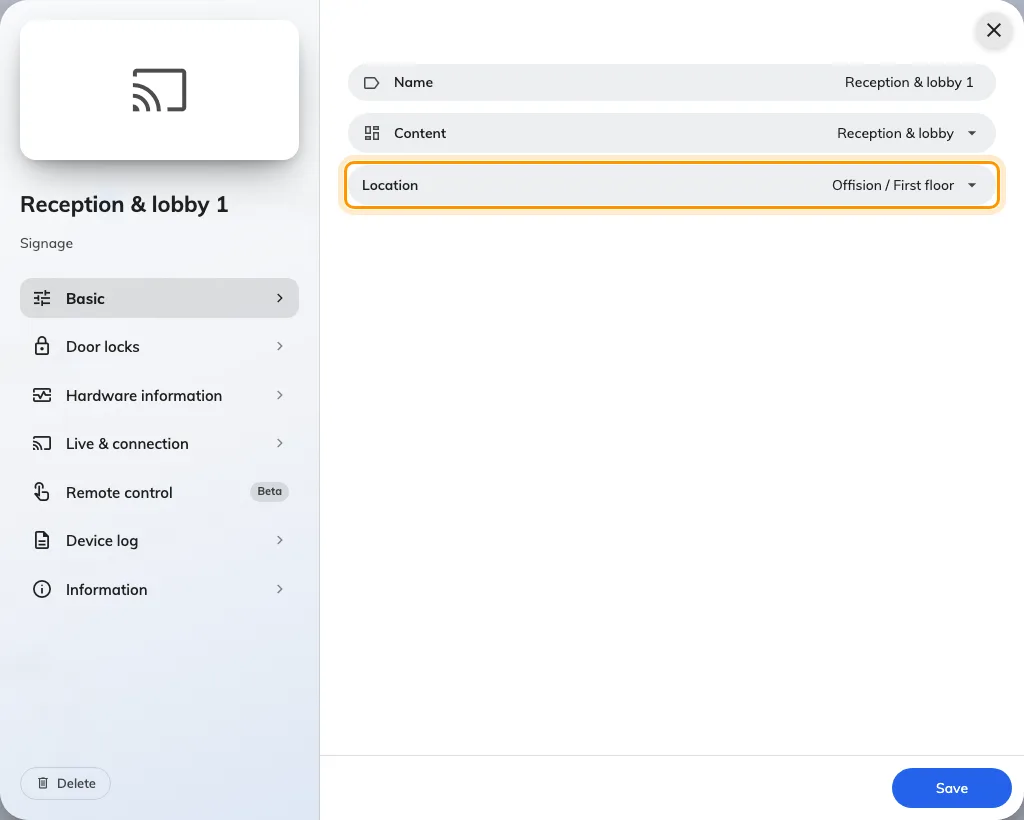
Location on a signage device, in the field that decides whose visitors it shows.
For a lobby, drop a point on the floor plan rather than tapping a room: the screen belongs to the entrance, not to any one space. What the two picks differ on is in Connect a signage screen.
Either way the device now resolves to a building, and every widget set to Follow device location narrows to it. In the device list, the Location column should read the floor and building. If it reads No location in amber, the picker did not save — the product flags it that way because an unlocated screen is a screen showing the wrong thing.
5. Check it worked
Go to Devices › Screen monitoring for a live picture of what the screen is actually displaying. It is the fastest way to confirm the content landed, without walking back to the lobby — see see what every screen is showing.
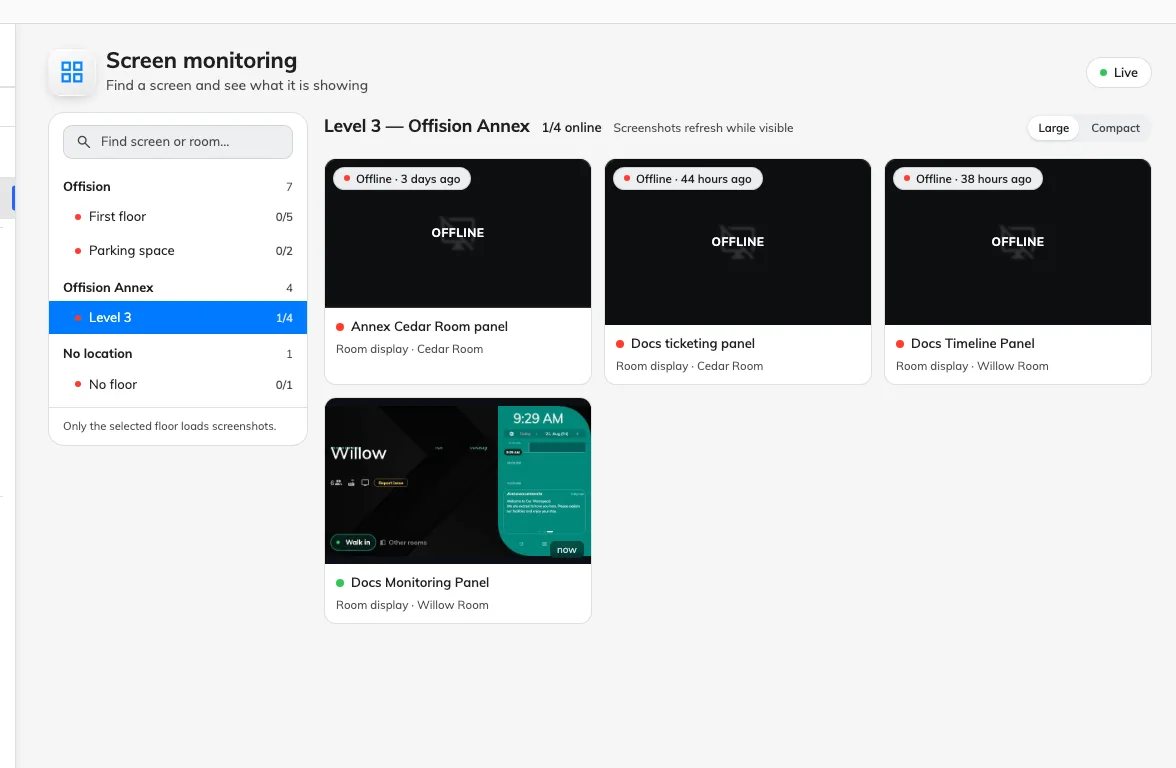
Screen monitoring: what the lobby screen is actually displaying, without walking to it.
Then test the path a real visitor takes: scan the QR code on the screen, register, and check that the visitor appears on the welcome screen — and, in the visitor list in the console, against the building you placed the device in rather than some other one. That last detail is the whole point of step 4, and it is the only check that proves it.
What this does not cover
The screen built here shows one thing all the time. Playing several in turn and scheduling by time of day are Scenes; the way the welcome screen interrupts whatever is playing is Takeovers. Which widget can sit where is Widgets and the places they go, and changing the shape, rather than what is in it, is Change a layout.
The badge a visitor is given when they check in is designed elsewhere and is company-wide — see Change the visitor badge design. The printer that prints it is connected on the screen itself — see Connect a label printer to a signage screen.