

Both maps
Find a desk on the floor plan
The map beside the home screen — switching it to desks, moving the time slider so "free" means free when you need it, tapping a desk to book it without leaving the map, and finding the person you came in to sit near.
A list of desks tells you which ones are free. It cannot tell you which one you want — by a window, away from the corridor, two seats from the person you came in to work with. That is what the map is for, and on a floor of identical desks it is the only way to choose that makes any sense.
The floor plan is the right-hand half of the home screen, and it opens there by default.
The screenshots show Classic map. The account can instead show Map 2.0; the drawing and resource assignments must belong to the family in use. Booking permissions still apply in either map.
1. Pick the floor, and switch it to desks
The control at the top left of the map names the floor you are looking at. Opening it lists the buildings and their floors — and along the top of that list, a small row of icons: Rooms, Desks, and whatever else your company has on plans.
That row is the one people miss. The map shows one kind of thing at a time, so until Desks is chosen you are looking at a floor of meeting rooms. Choosing the Desk filter on the left does it for you — the map follows the filter — and the row is how you overrule that.
Once it is on desks, each floor in the list carries its own count: how many desks are free out of how many there are, at the moment the slider is set to. That is usually enough to pick a floor without opening one.
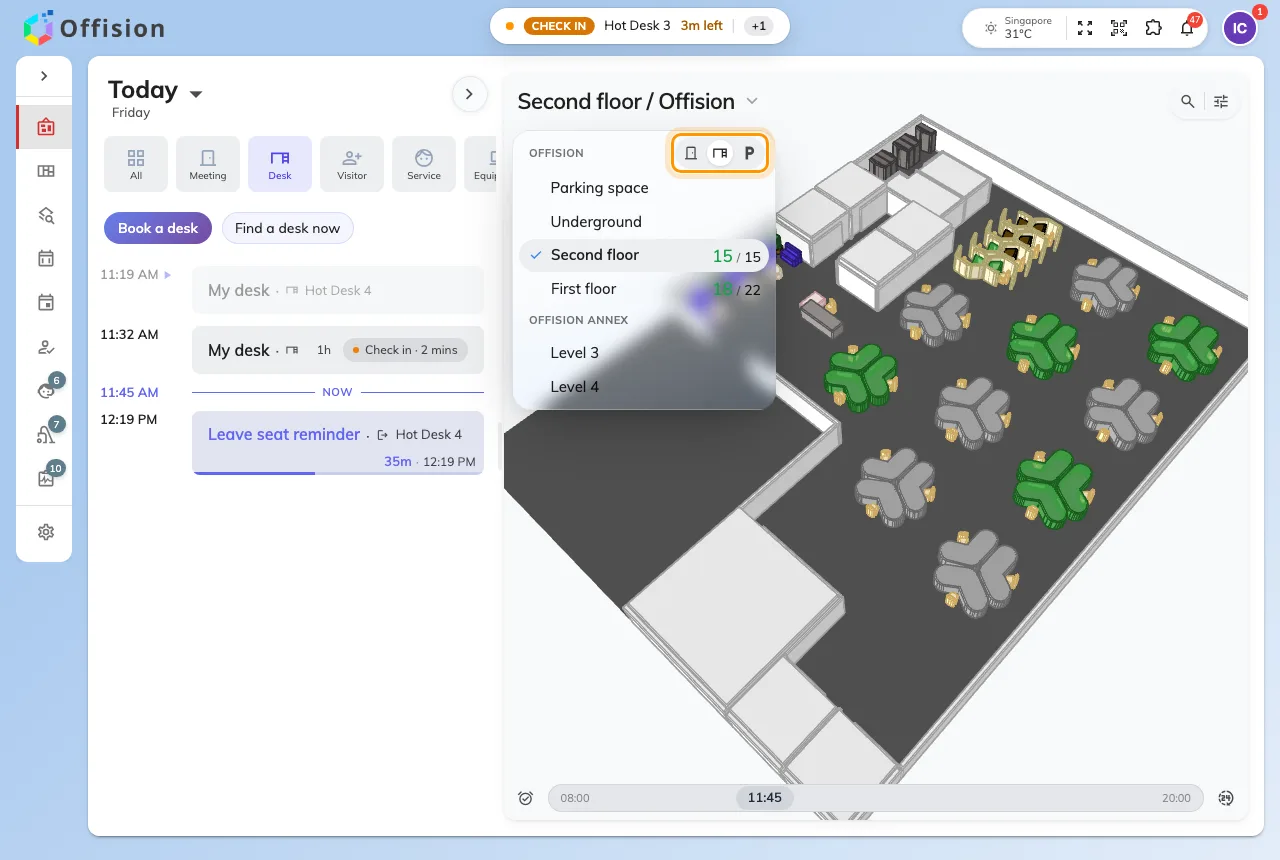
The floor list with Desks chosen. Each floor says how many are free out of how many it has.
2. Read the map — and move the time
Every desk on the plan is drawn in its own state: free, taken, or yours. It draws the desks and not the people in them — to put a face on every taken desk you have to ask for one, which is See who is in the office on a given day.
The slider along the bottom is the part worth learning. The map is not “now” — it is a moment, and the slider moves it in half-hour steps through the day. A desk that is free at nine and gone by eleven looks free until you move the slider to eleven. Drag it to when you actually need the desk before you judge anything on screen.
The button beside it snaps back to now, and to today.
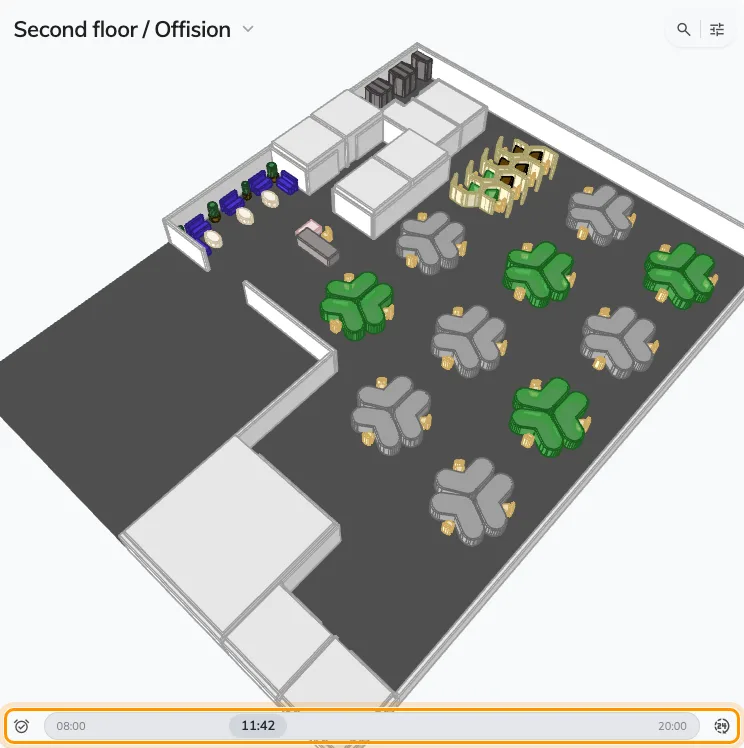
A floor of desks. The slider along the bottom is what the colours are true for — move it before you choose.
3. Tap a desk to take it
Tapping a desk zooms to it and opens a small card: which desk it is, and its day as a strip you can pick a period on. Drag out the hours you want on that strip and the booking is made from the map — you never open the booking form at all.
The card is also where a desk tells you it cannot be booked: one reserved for another team, or one that is walk-in only and can only be taken by standing at it, shows its day greyed out rather than refusing you afterwards.
The ⋯ menu on the card reports something broken about that desk, which is worth knowing the first time you sit down to a monitor that does not work.
A desk that belongs to somebody permanently shows their details instead of a timeline, including whether they are at it. There is nothing to book there.
4. Find a person, not a desk
The search control at the top right of the map answers the other question — not which desk is free but where is everybody. It finds a colleague, or a whole department, and puts them on the plan where they are sitting.
That is a subject of its own: see See who is in the office on a given day.
The sliders button beside it is the filter, and it narrows what the map draws — by category, and by what a desk has — so a floor of eighty becomes the six with a second monitor.
5. Check it worked
A booking made from the map is an ordinary booking: it is on your own schedule straight away, and with the Desk filter on the home screen it is the card next to today. If it is not there, the drag on the timeline did not land — try again with a wider drag.
When a desk is not on the map
The commonest disappointment here is a desk you know exists and cannot find on the plan. It is almost never a search problem.
A desk needs a link to the map people use, not only a floor. An administrator places a point on Classic or assigns a compatible object/seat on Map 2.0. Ask the floor manager to check that family’s drawing and assignments. See Add a desk, Map 2.0 assignments or Classic missing resources.
The same is true of a floor with no map available: the picker in step 1 will offer the floor, and the map beside it will be empty.
What this does not cover
- Booking a desk from the form instead. Searching by name, filtering by category, adding a parking space — see Book a desk.
- Getting to the desk. Directions across a floor are a separate thing from choosing a desk on it.
- Checking in when you arrive. The code stuck to the desk does that — see Check in and out by scanning the sticker.