

Invite a visitor
Booking a guest in from your own account: one form, reached three ways, the same on a computer and on a phone. What each field decides, and why the pass with the QR code usually arrives later than the invitation.
Anyone with an Offision account can book a visitor in for themselves — no admin console, no request to reception. It is one form, and the whole thing is four answers: when they arrive, where they are going, what kind of visit it is, and who is coming.
1. Open the invite form
On a computer, pick Visitor from the row of filters on the home page. The panel below it becomes the visitor day: whoever you have invited for that date, and Invite visitors above them.
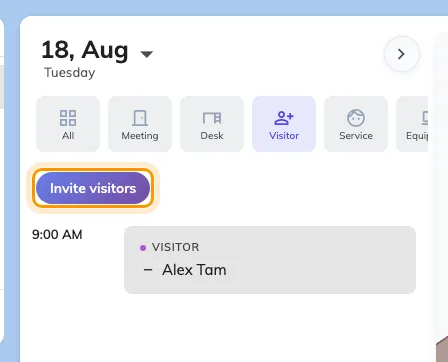
The Visitor filter: the day's visitors, and the button that starts a new invitation.
On a phone, tap + at the bottom right and choose Visitor. It opens the same form.
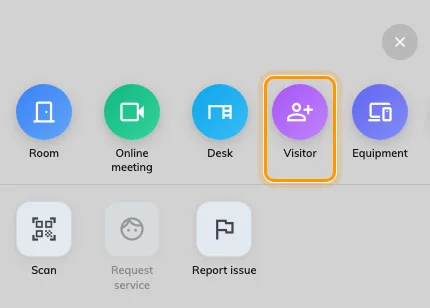
The phone's + sheet. Visitor is the fourth tile.
The form opens with today’s date and your company’s default visiting purpose already chosen. Where the company has one building open to visitors, the location is filled in too; with several it starts empty — the row carries a red dot, and opening it says No location yet until you pick one. Each row expands when you tap it and collapses to a summary when you move on, so the form always shows the answers you have given so far.
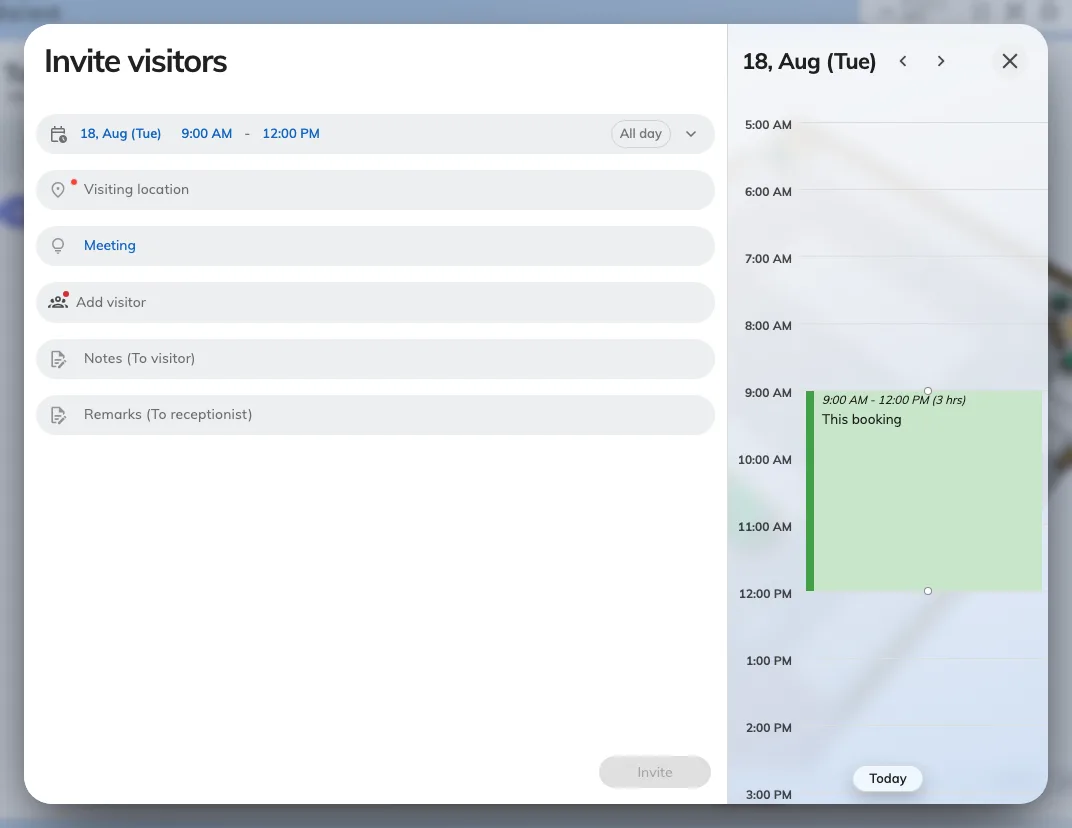
The invite form. Every row shows its own answer once you have given it.
2. Say when they arrive
The top row is Time: when they arrive and when they leave, with three pills under it. All day is for a guest who is around all day rather than at an appointment, Repeat turns the visit into a series for a contractor who comes every Tuesday, and Time zone is for a visitor whose day is in another one.
The times are not free-for-all: the building’s visiting policy can limit how far ahead you may book, how long a visit may last, and whether a visit may cross midnight. When something you have chosen breaks one of those rules, the form says so under this row and Invite stays greyed out until it is fixed.
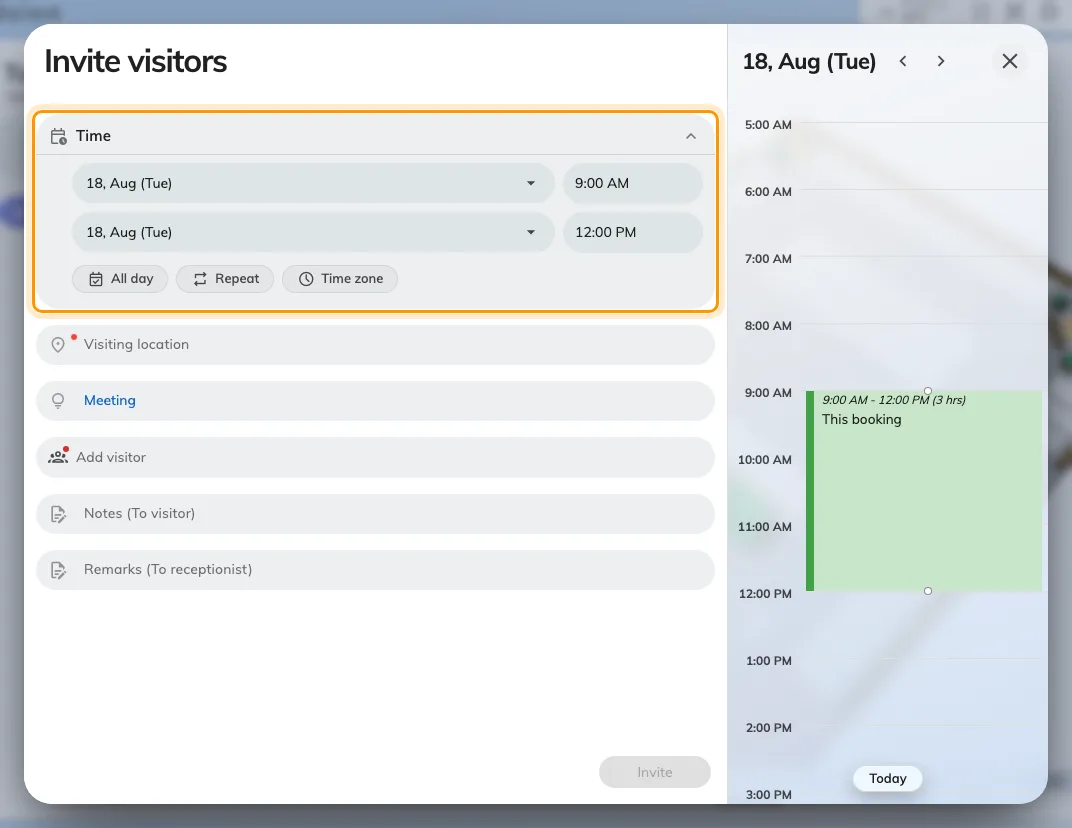
The visit period. On a computer the day beside it shows what else is on.
3. Choose where they are going
Visiting location is the place the visit belongs to, and it decides which reception desk sees the visitor when they arrive. Only buildings open to visitors are listed here — a company with ten buildings may put guests in three of them.
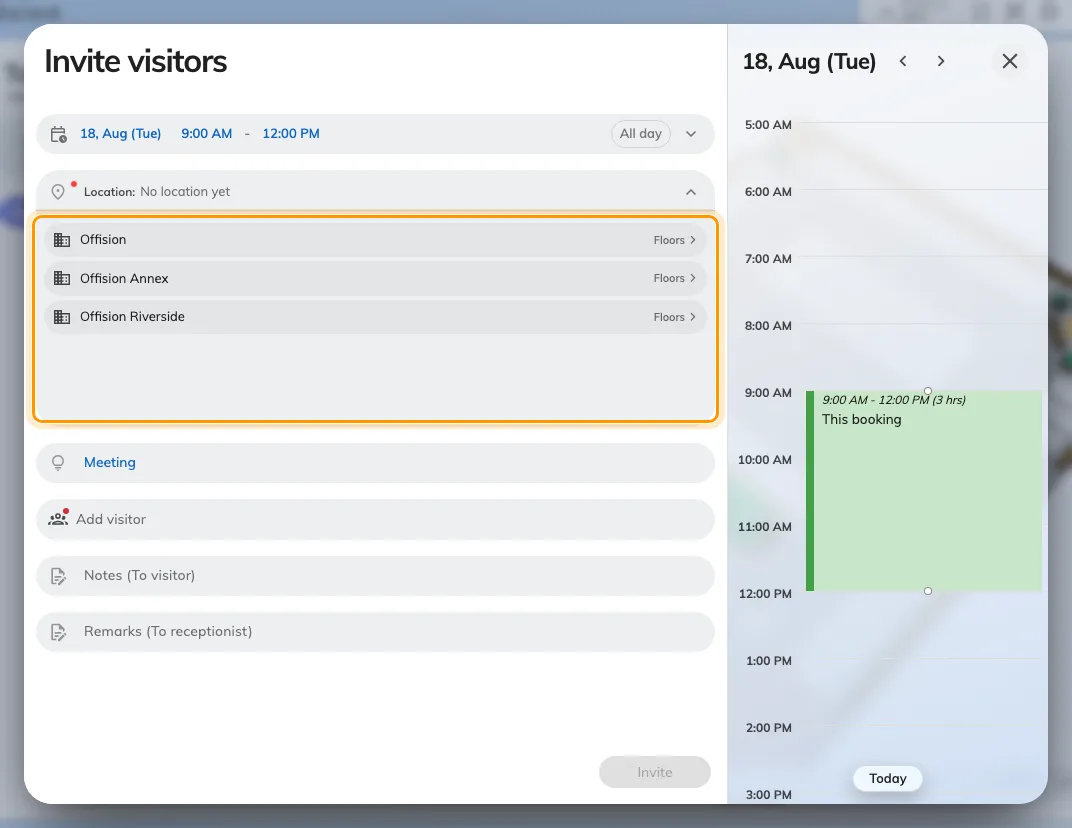
Visiting location. Only the buildings open to visitors appear.
A building on its own is a complete answer: tap its name and you are done. Where it has floors or rooms open to visitors, Floors on the right of the row drills in instead, and Rooms goes one level deeper — so you can be as precise as the visit actually is, and No specific floor keeps it to the whole building.
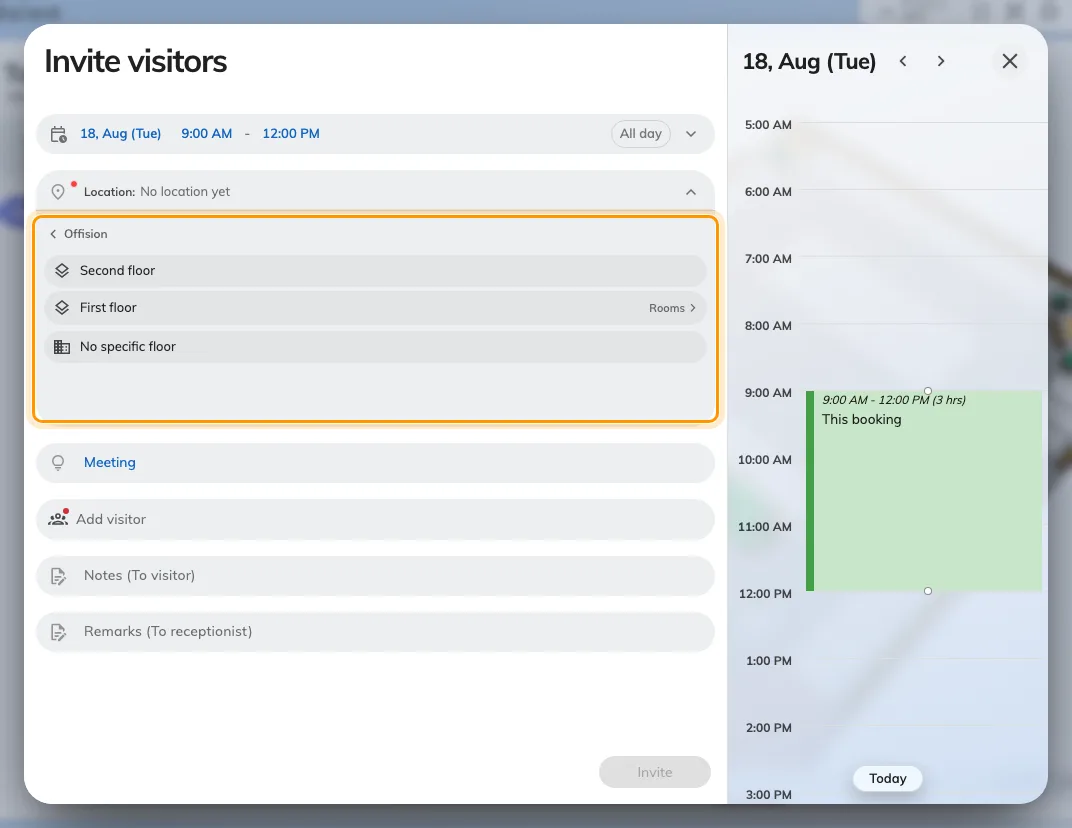
One level down: the building's floors, with the whole-building answer still offered.
Choosing a room here does not book that room. If you also need the room, book it as a meeting and invite the visitor from the booking instead — see Invite a visitor while booking a room.
4. Pick the visiting purpose
The purpose is the most consequential field in the form, and the one people skip past. Your company defines a small set — Meeting, Interview, VIP and so on — and each one carries its own rules: what you must know about a visitor before you can invite them, whether the visit needs approving, and what reception asks for at the desk, including a photo and any visitor survey.
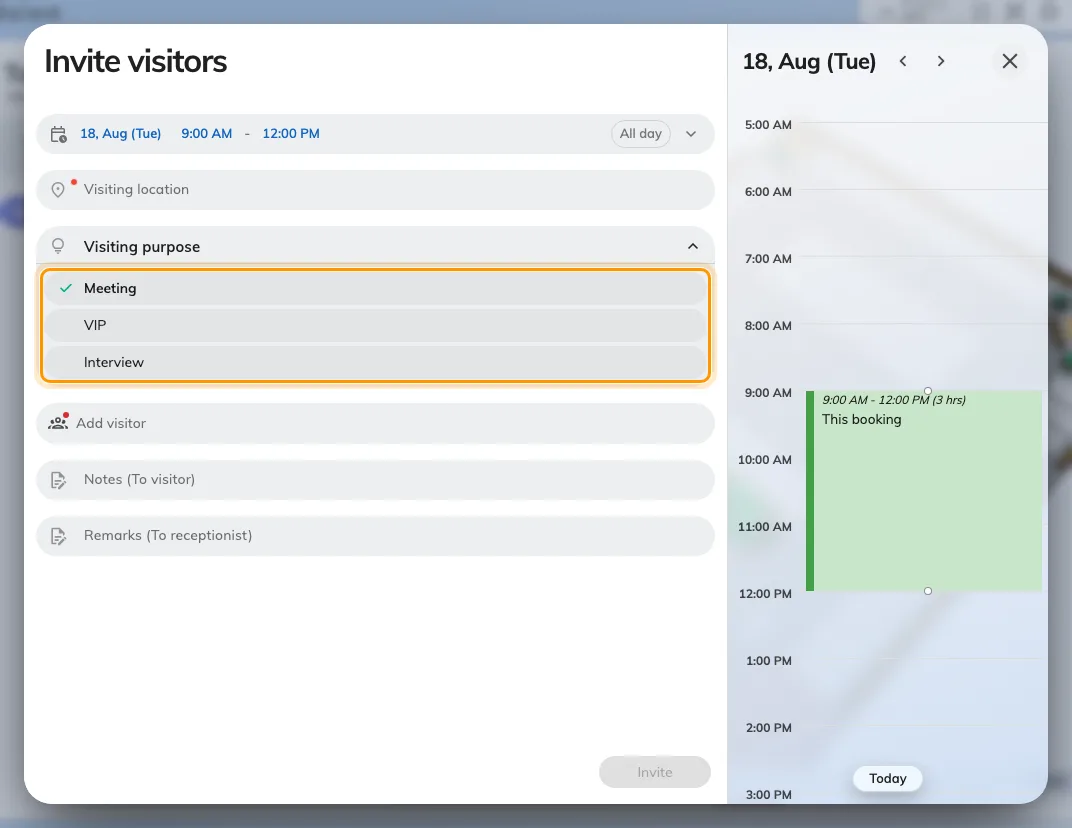
The visiting purposes your company has defined. One is the default.
Change what a purpose asks for in the admin console.
Open Visiting purpose5. Add the visitors
Add opens one visitor at a time. Email address is normally the field that matters: it is both who the person is and how the invitation reaches them, which is why the form will not let you finish without it. Visitor name and Company are what reception and the badge show.
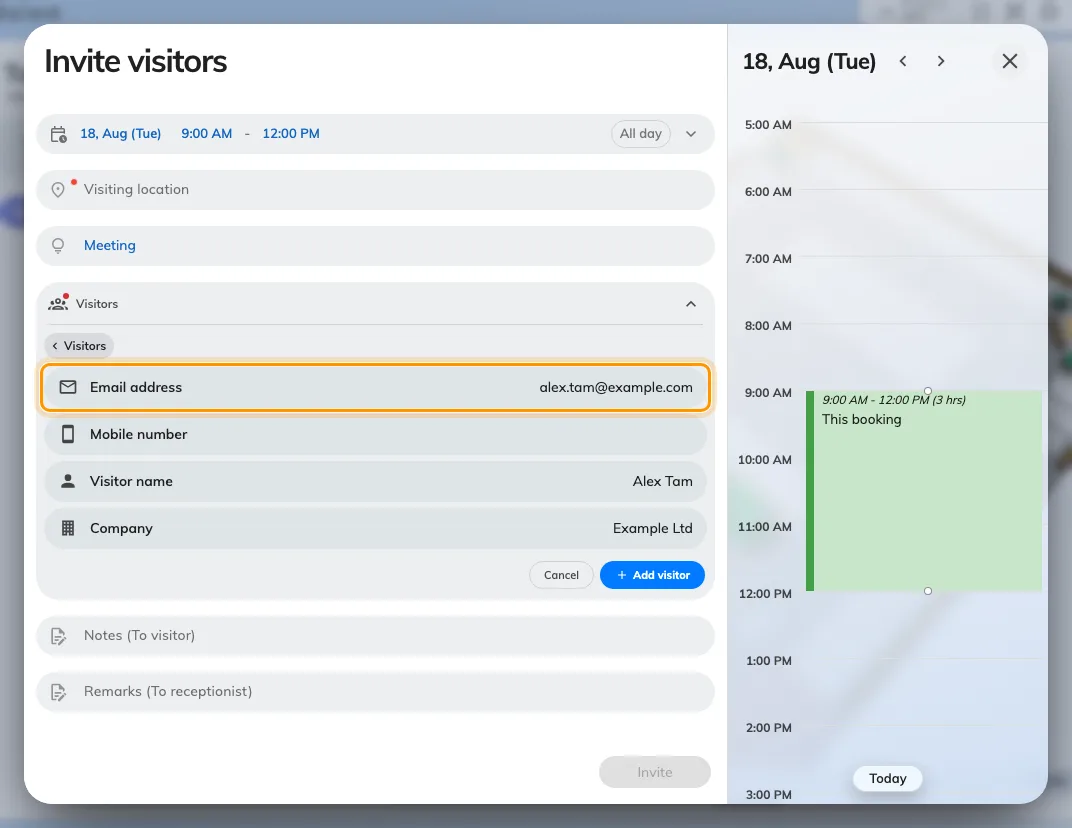
One visitor. The address is both who they are and how the invitation reaches them.
Which field is mandatory comes from the purpose. A purpose can be set to identify people by mobile number instead — the invitation then goes by text message — or by name and company for visitors who have no contact details you are allowed to hold, or by a Customize key such as a contractor number. When a purpose offers more than one of those, a row of choices appears above the fields and you pick one per visitor.
A visitor Offision already has on file fills in as you type their name, and their identifying field arrives locked: you can correct their company, not who they are.
For a group, Import takes a spreadsheet — the menu also has a sample file worth downloading first, because the columns are positional.
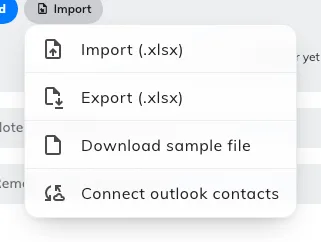
Import, export, and the sample spreadsheet. Computers only.
6. Anything else the visit needs
Three optional rows sit below the visitors, and two of them are more useful than they look:
- Visitor Vehicles — a plate number and a vehicle type. The row appears only where the location you chose allows it, so if you cannot see it, that is the answer. See Collect a visitor’s vehicle plate.
- Notes (To visitor) goes out in the invitation, so it is the place for “come to the west entrance”.
- Remarks (To receptionist) is never shown to the visitor. Put “they are bringing equipment” here.
- Inviter appears only if you can act for someone else, and names the person the visit belongs to.
7. Send it
Invite sends the invitation and closes the form. A card confirms it — Invitation sent, or Waiting for approval where the purpose you chose needs someone to approve the visit first. Until it is approved, nothing reaches the visitor.
8. Check it worked
Go back to the Visitor filter and pick the day of the visit. The visitor should be listed at the start time; tapping the row opens the visit, and that panel is also where you Edit it, Delete it, share it, or send it to your own calendar.
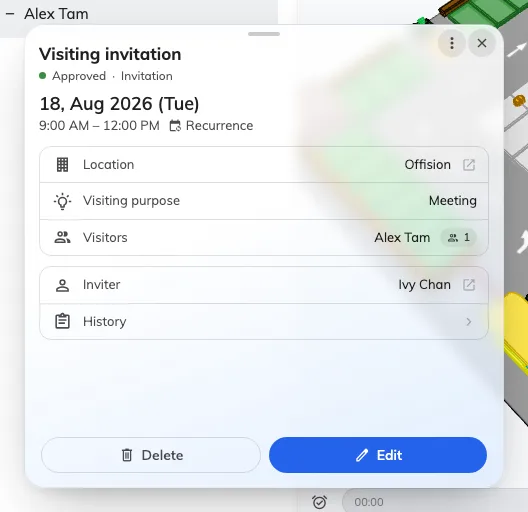
The visit after it is booked: its state, its purpose, and who it belongs to.
Approved on that panel means the visitor has been told. That is the confirmation worth trusting — not the fact that the form closed.
What the visitor receives
Two separate messages, and the gap between them is the thing people ask about:
- The invitation, straight away. It carries a calendar invitation they can accept, your Notes (To visitor), and where to come.
- The visitor pass — the QR code they show at reception — on your company’s badge schedule, not straight away. If that schedule says “the day before”, a visitor asking where their code is has simply been invited early. Invited by mobile number, they get it as a text message instead.
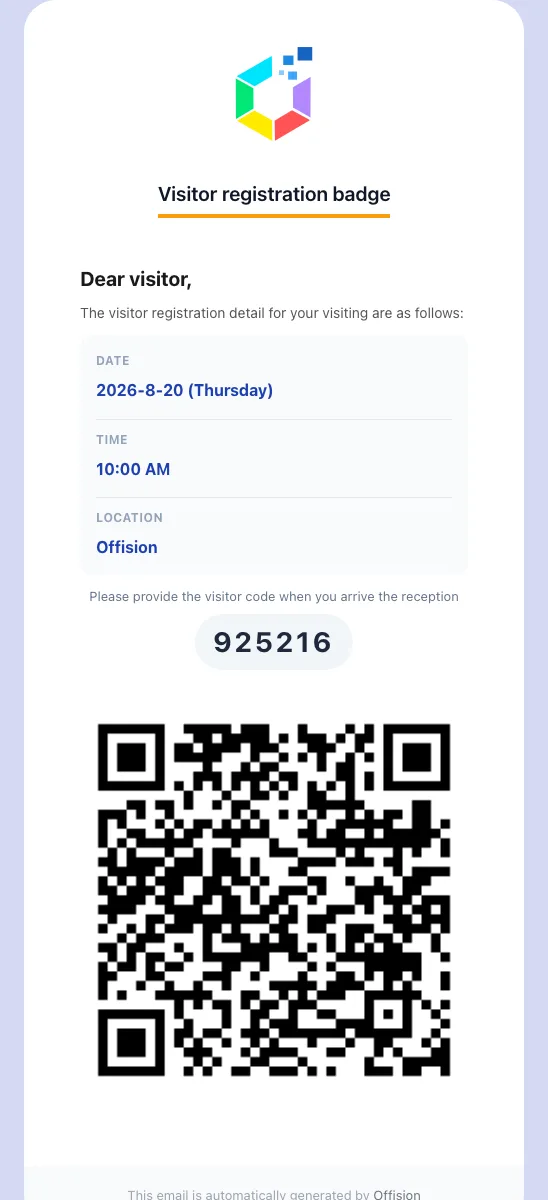
The visitor pass: when and where to come, the registration code, and the QR code reception scans.
Both the schedule and what the pass looks like are company-wide settings — see What appears on a visitor badge.
Open Visitor managementWhat the desktop app and a phone change
Nothing about the invitation itself: the desktop app and the mobile app are both shells around these same screens, and the form, the rules and the emails are identical in all three. Four things differ in practice:
| Where | What changes |
|---|---|
| On a phone | The day panel beside the form is hidden, and so are the date arrows in its header — there is not room for them |
| On a phone | Import, Export and Connect outlook contacts are gone; a spreadsheet of visitors is a computer job |
| On a phone | The visit panel gains Share, which hands the details to your normal share sheet |
| In the desktop app | Nothing, for inviting. Its extra trick is printing badges at reception, which is a receptionist’s screen and not this form |
What this does not control
- Whether the visit needs approving, and who approves it. That belongs to the visiting purpose, not to you.
- What reception asks for on arrival. Photo, surveys and the check-in itself are the desk’s, and are set on the purpose — see Check a visitor in by scanning their code.
- What the badge looks like, and when it is sent — see What appears on a visitor badge.
- Booking the room. A room chosen as the visiting location is where the visit is, not a reservation of it.