

Sign visitors in through a hosted WiFi login page
For controllers with a captive portal, such as Ruckus Cloudpath: visitors join the guest network and a branded Offision login page in their browser checks their visit before letting them online.
Done looks like this: a checked-in visitor joins the guest network, the login page appears in their browser, and the details from their badge put them online.
1. Add the network entry
Open Visitor WiFi, choose Add, and pick Ruckus Cloudpath from the brand menu. Picking the brand creates the entry immediately — that is what mints its OAuth client — so closing the dialog without saving still leaves the entry in the list.
Open Visitor WiFiOn the same page, fill in WiFi SSID — the network name your controller broadcasts, which is what the badge and the lobby board show — and, if the network needs a password to join, WiFi password. Then set the sign-in rules, Username type and Password type; every field is in the settings reference.
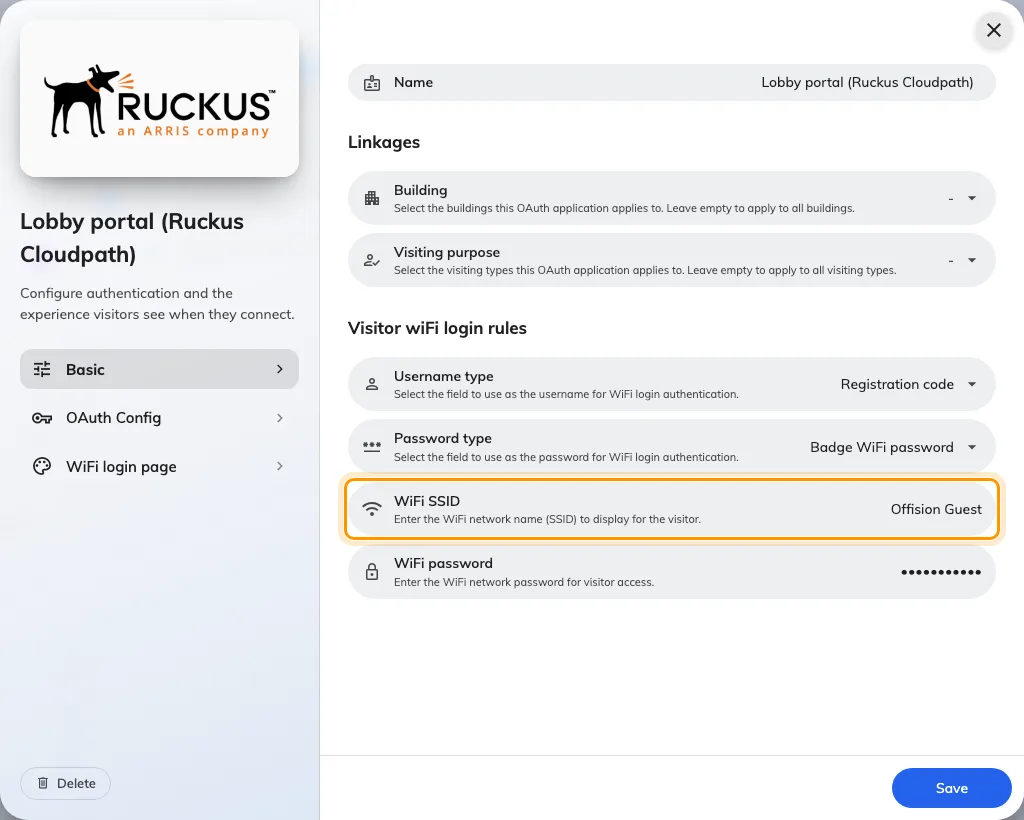
A Ruckus Cloudpath entry's Basic page — this mode has the WiFi SSID field.
2. Copy the OAuth values into your portal
Open OAuth Config, the second page of the dialog, and copy each value into your controller’s Custom OAuth 2.0 form: Consumer key (Client ID), Consumer secret (Client Secret), Access token endpoint URL, Authorize URL, Data URL and Scope.
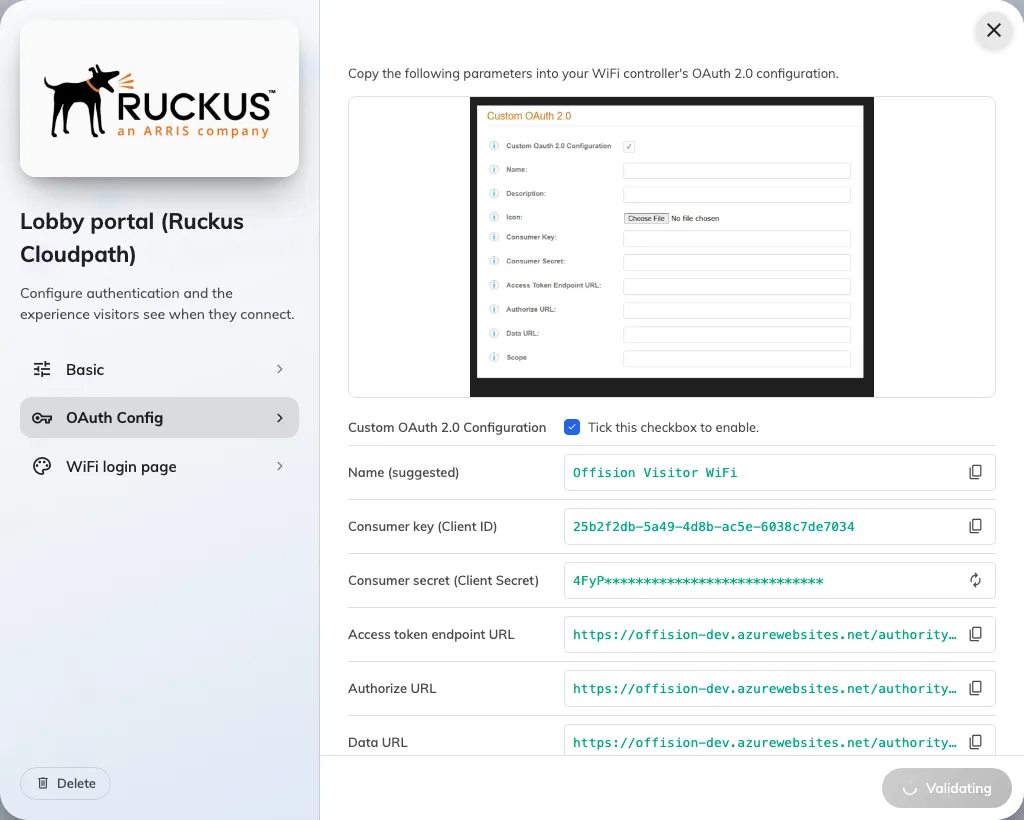
The OAuth Config page — each value has a copy button.
Then add your portal’s callback address under OAuth redirect URL. Sign-in fails without it.
3. Design the login page
Open WiFi login page, the third page of the dialog. This is what the visitor sees in their browser: Logo, Page title, Welcome message, Footer text and Background Image, each translatable per language.
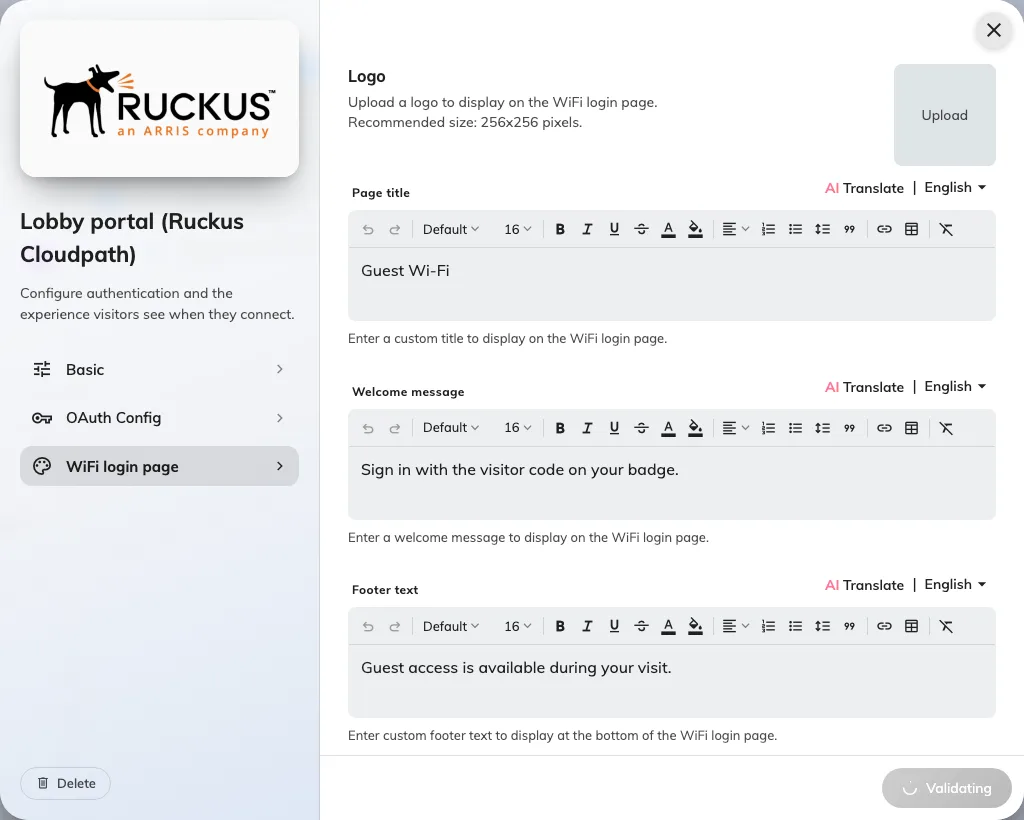
The login page design — the browser page visitors sign in on.
Use the welcome message for the one instruction that matters: where the code is on their badge. This is what the finished page looks like to a visitor:
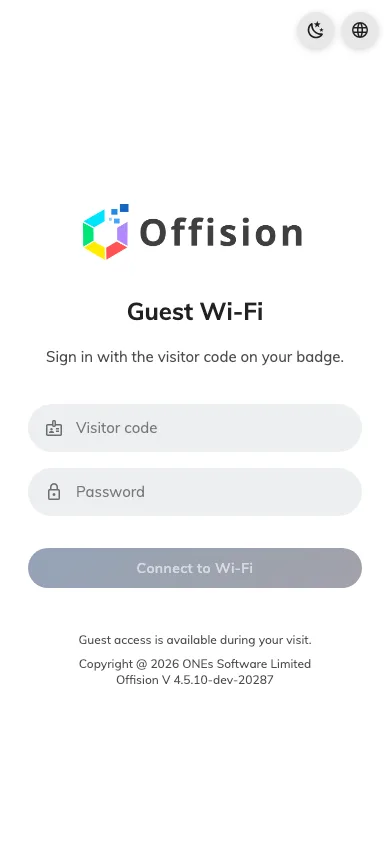
The hosted login page — the field is named after your Username type.
4. Point the portal at the login page
On the controller, set the guest network’s captive portal to the OAuth sign-in you configured in step 2. Visitors who join the SSID are redirected to the Offision login page.
5. Check it worked
Check a visitor in, join the network, and wait for the login page. Sign in with the badge details — the page names the field after your Username type, so a registration code appears as Visitor code. Confirm they get online, then check out and confirm sign-in is now refused.
When it goes wrong
| What you see | Usual cause |
|---|---|
| The login page never appears | The portal’s redirect is not pointing at the OAuth sign-in, or the OAuth redirect URL is missing from the entry |
| Sign-in refused for a real visitor | Not checked in yet, or the visit period has ended |
| Every sign-in refused | No Visitor WiFi Integration license on the entry, or the portal still holds an old secret |
| The badge shows the wrong network name | WiFi SSID on the entry does not match what the controller broadcasts |