

Change the visitor badge design
Pick a different layout for the badge printed at reception, and put your logo on it. About five minutes.
1. Open the visiting settings
The page is Settings in the Visiting section. It is not pinned by default, so it sits behind Show more in the sidebar. The badge options are the second card down, under Visitor badge setting.
Open Visitor management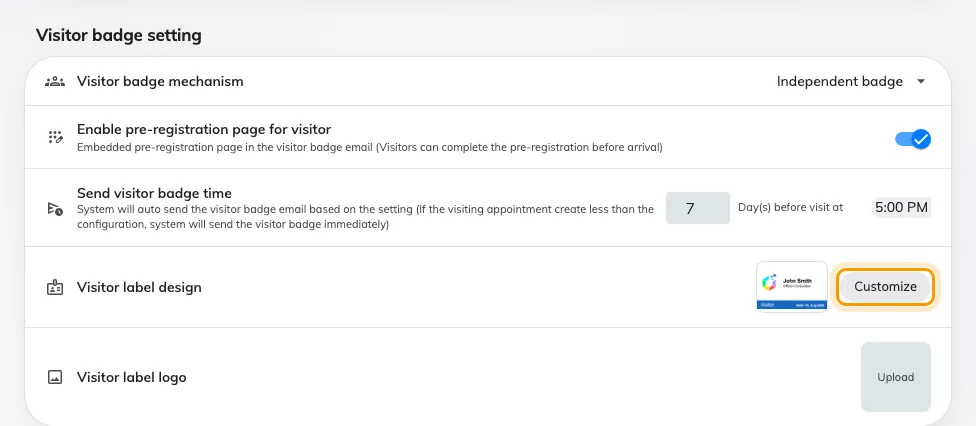
The badge card, with Customize beside the current design.
2. Add your logo first
Visitor label logo takes a 200 × 200 image. Set it before choosing a design, for a reason that catches people out: while it is empty, badges do not print without a logo — they print the Offision logo. That fallback applies to the gallery previews and to real printed badges alike, so an unset logo ships your visitors a badge branded with the product.
3. Choose a design
Select Customize next to Visitor label design. The gallery opens in two groups — Suggested first, then Other styles. Each tile is a live preview drawn with sample visitor details, so what you see is what will print.
Pick the tile you want and choose Confirm.
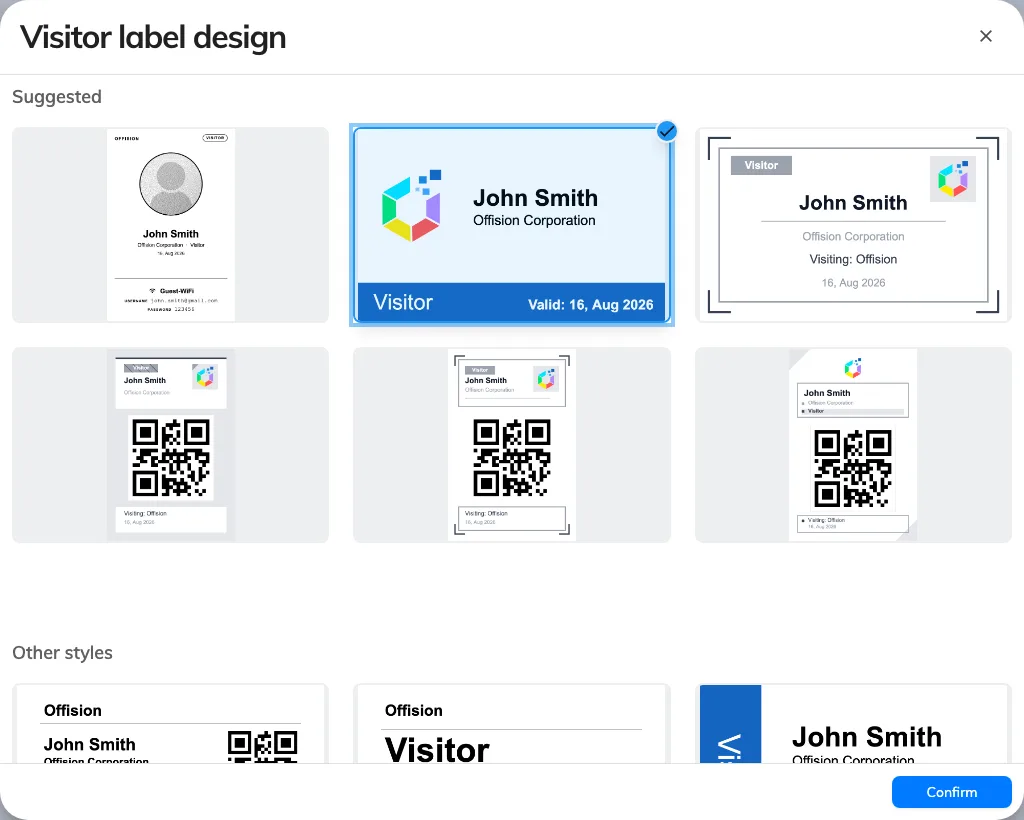
The design gallery, with the current design selected.
Some things to weigh while choosing:
- A portrait design with a photo needs photos. If your visiting types do not collect one, the layout prints with the space closed up. See The visitor photo.
- The photo and Wi-Fi design prints no logo. Its layout has no room for one, so step 2 has no effect on it.
- Nothing here changes the badge size or orientation. Every design is drawn portrait, and the printer decides the stock.
4. Save the page
Confirming the gallery only fills in the setting — nothing is stored until you save the page itself, with the save bar at the bottom. This is the step people miss, and it is why a design sometimes appears to revert on the next visit.
5. Check it worked
Print a badge. Open Visitor badge under Visiting, pick any visit, and print from there — the reception app and the lobby board both draw from the same setting.