

Create a user group and add people to it
Group people so permissions, room access and quotas are set once instead of per person. Covers naming, the permissions a group grants, and the two ways to add members. About five minutes.
A user group is how one decision covers many people. Permissions, which rooms a team may book, how much quota they share, which doors open for them, who receives an announcement — every one of those can be pointed at a group instead of at a list of names you maintain by hand.
1. Open the group list
Directory › User groups. The list carries the four things worth knowing about a group at a glance: its Category, its Permissions, its Users, and its name.
Open User groups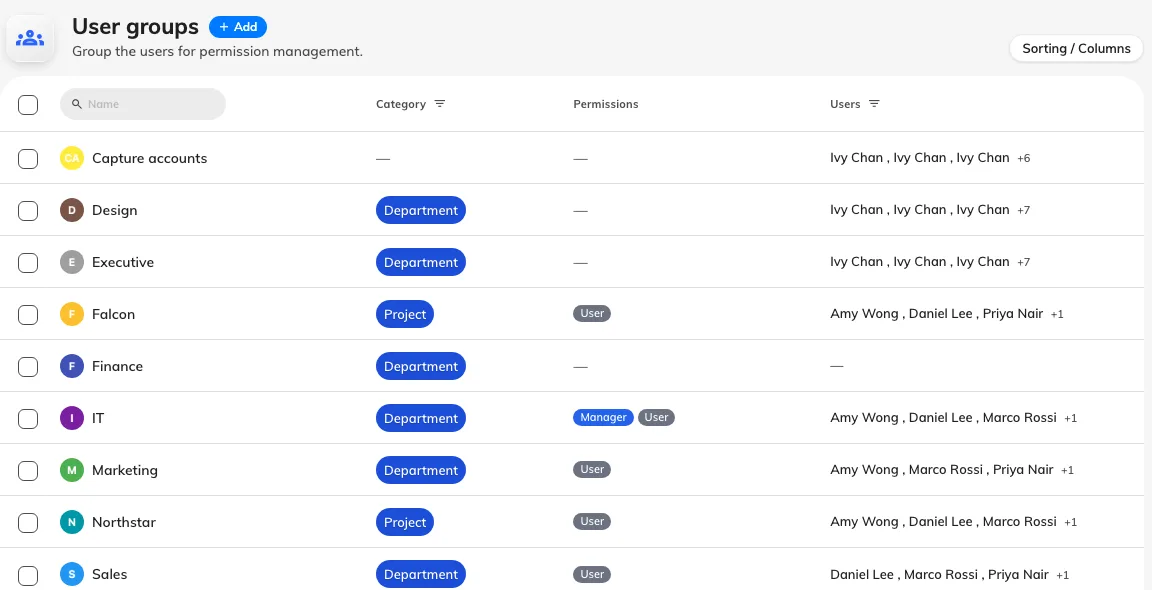
One row per group, with the permissions it grants and who is in it.
2. Add the group
Add opens a dialog with Basic, Permissions and Information down the left.
On Basic, only the name really matters. Two things about it:
- Name it after something that outlives its members. “Finance”, “Reception”, “Floor 12” survive reorganisation; “Amy’s team” does not.
- The name must be unique, and it is checked as you type rather than on save.
User group categories is optional and can be left alone for now — it sorts groups and decides whether people ever see this one in the Offision app. That is Sort user groups into categories. It is the field behind the list’s Category column.
Branch management appears here only where branches are enabled, and scopes the group to one branch of the organisation — what a branch is, and what it scopes.
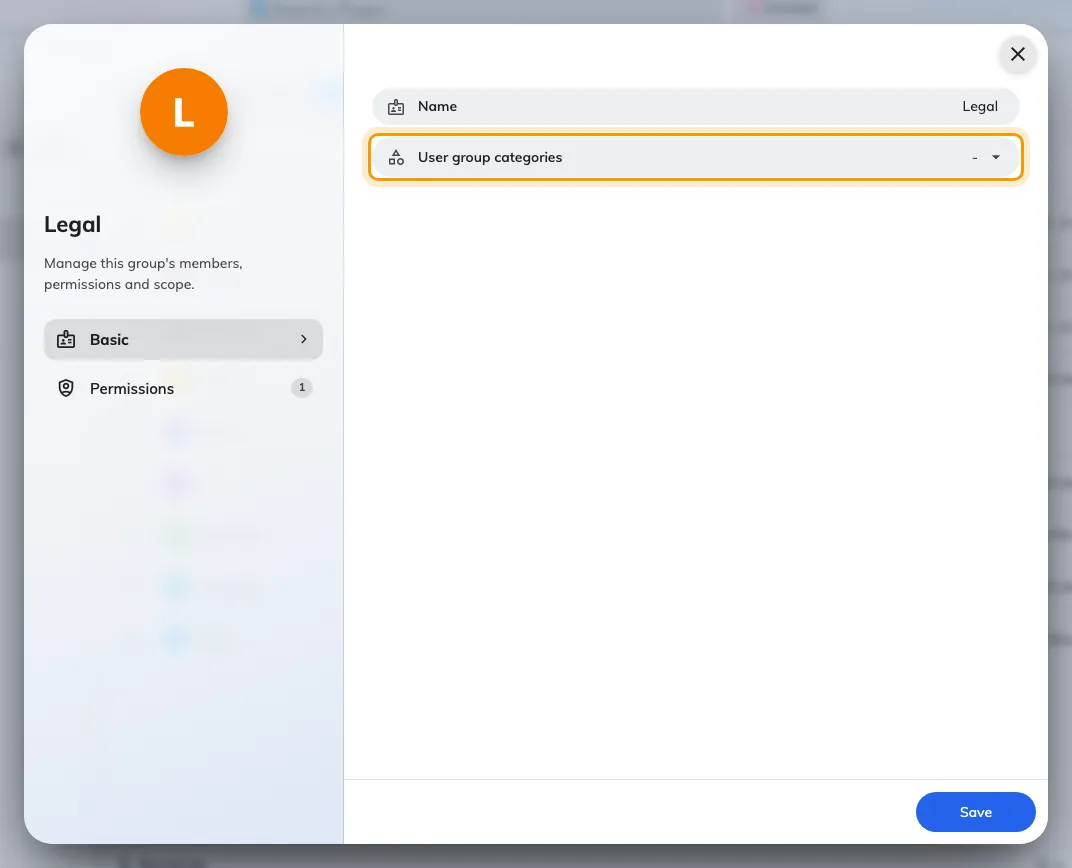
The Basic page. Category is optional; the name is not.
3. Decide what the group grants
The Permissions page is the part with consequences, and it splits in two.
User Portal access right is the single switch User — permission to book resources through the app and the door panels. It is on by default, and it is the right answer on its own for most groups, including every group that exists only to name a department.
Management console access right is everything else, listed with a Read and a Write column, so a group can be given sight of a module without the ability to change it. A group cannot grant Global administrator; that one is only ever set on a person.
The thing that catches people out is that permissions add up. A person keeps whatever they were given directly, and gains everything from every group they belong to. There is no way for a group to take a permission away.
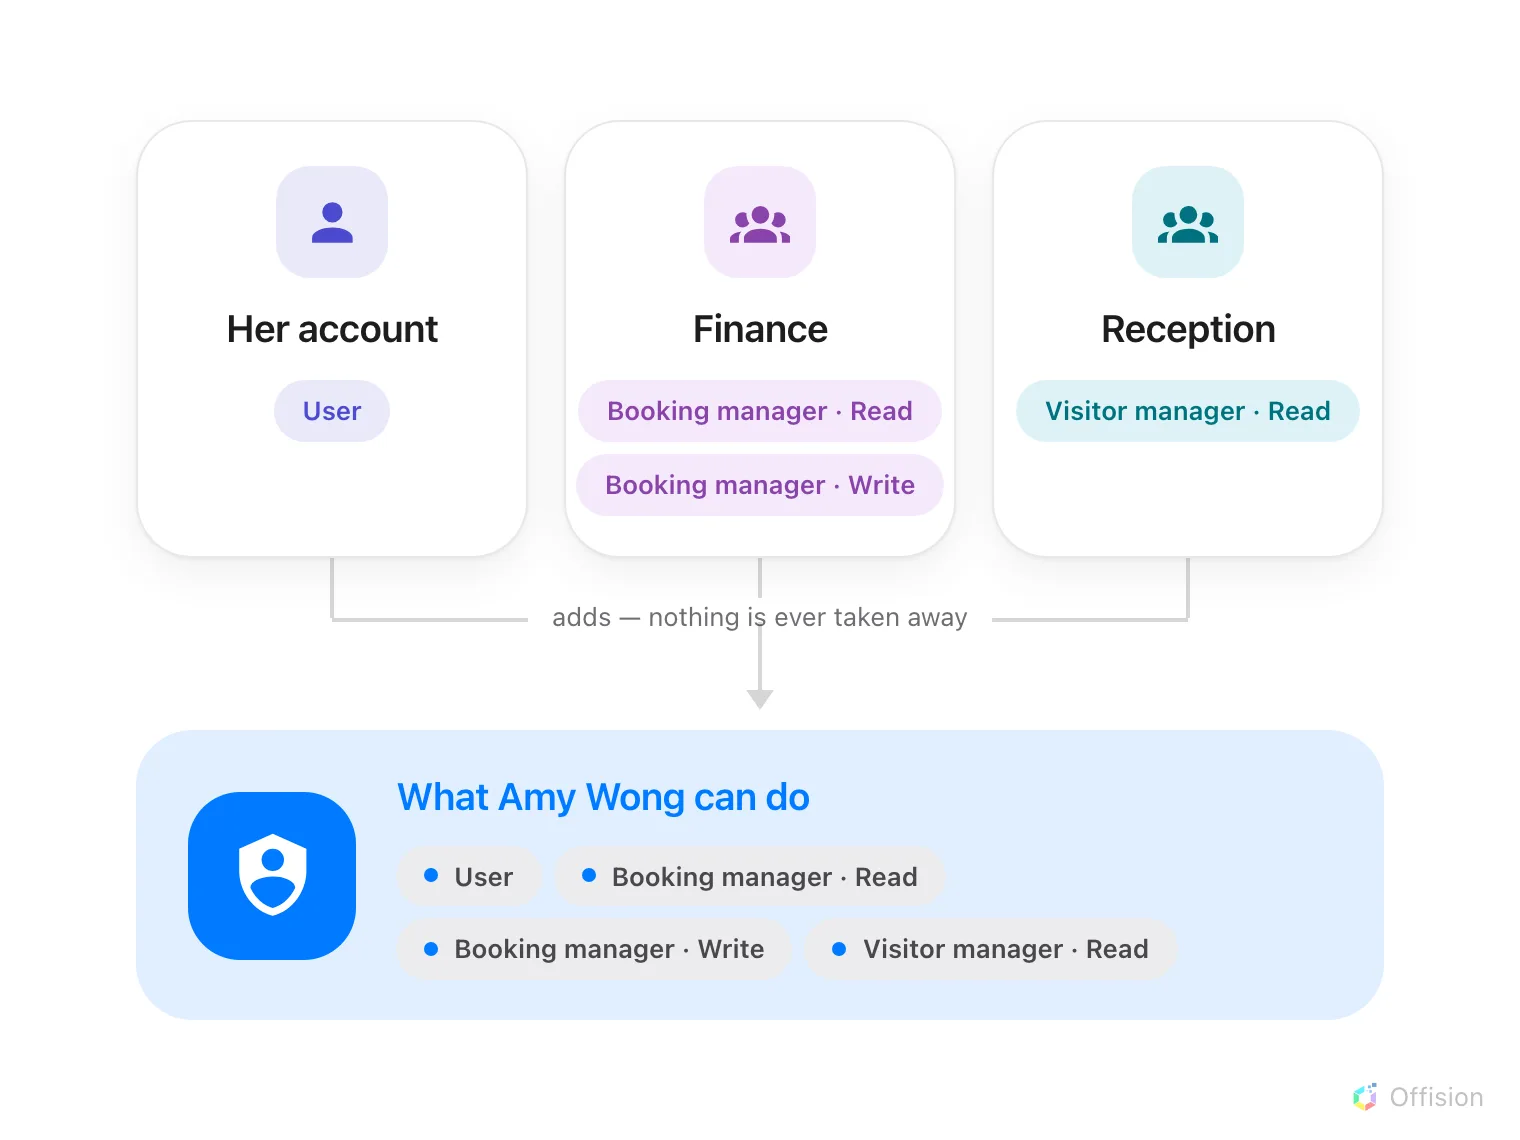
A person's permissions are their own plus every group they are in — so taking a permission away means finding every group that grants it.
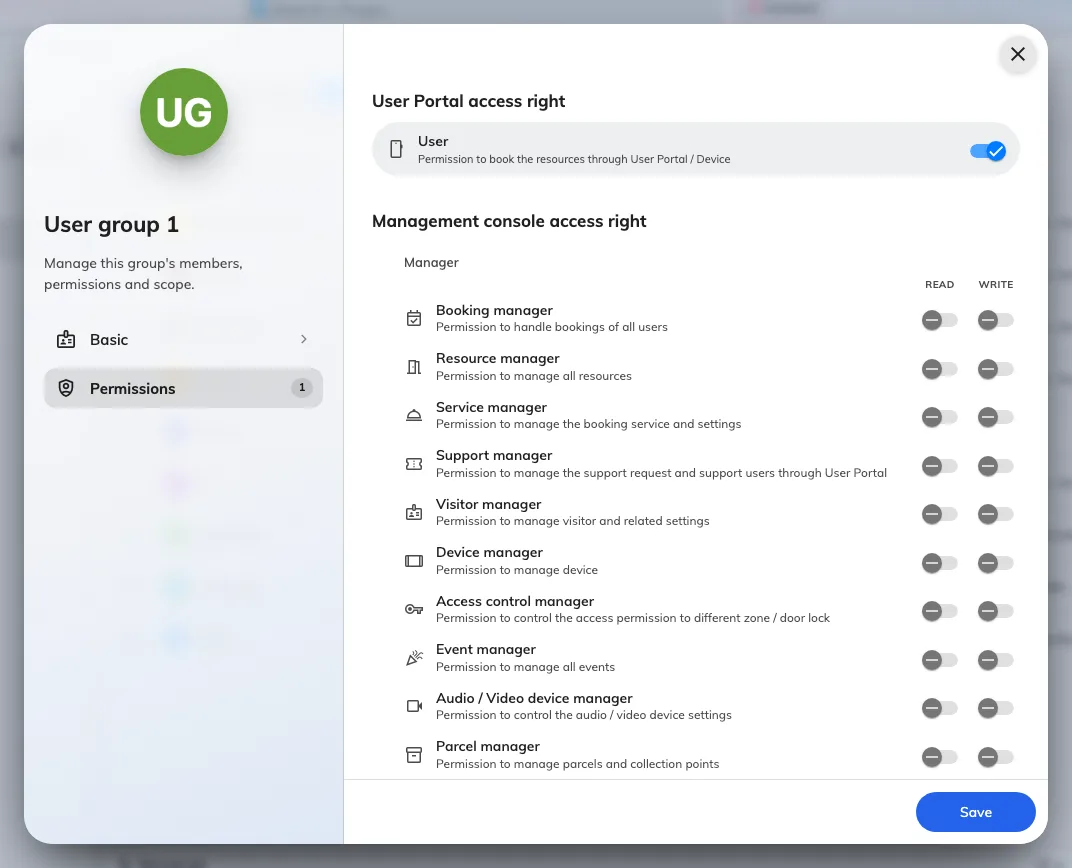
Most groups need only User. Manager roles come in Read and Write pairs.
4. Put people in it
Two ways in, and they write the same thing — use whichever matches what you are holding.
Many people into one group. Select the group in the list, then click the Users row in the panel on the right. Batch set users searches by name, email or card number, and what you leave selected when you save is the membership — anyone you clear is removed.
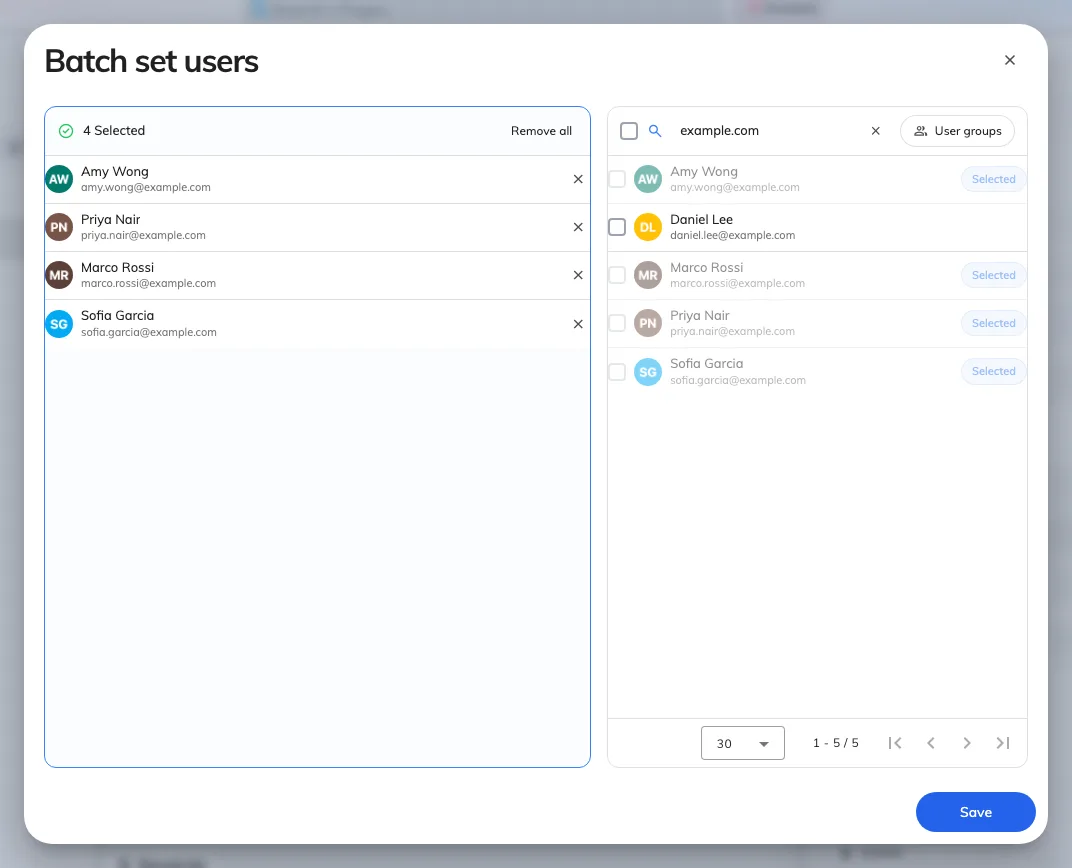
Batch set users. The selection you save replaces the whole membership.
One person into many groups. Go to Directory › Users, select them, and click the User groups row in their panel. This is the one to reach for when somebody moves teams.
Open Users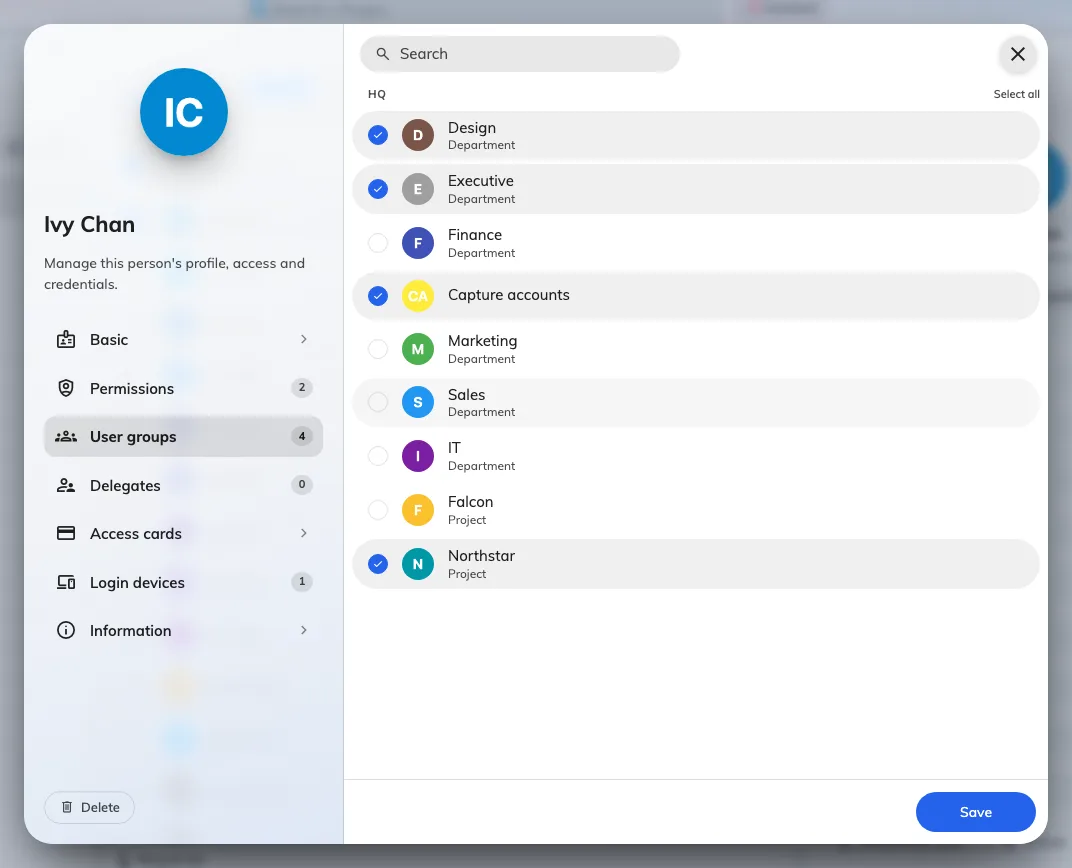
The same membership from the person's side, when someone changes team.
5. Point something at the group
A group on its own does nothing but hold permissions. It earns its keep when other screens reference it:
- Rooms only one department may book — a team space naming the group. See Give a department its own rooms.
- A shared booking allowance — a user group quota policy spends from one pool for the whole group rather than per person.
- An audience — announcements, activities and lobby boards all take groups where they ask who something is for.
- New starters, automatically — if you sync people from Microsoft 365 or Google Workspace, the default native user group is the group every newly synced account joins. See Sync people from Microsoft 365.
6. Check it worked
Reopen the group and read the Users count in the panel — it should match what you selected. Then ask one member to sign in: if the group grants a manager permission, the module appears in their menu; if it only grants User, the change is invisible to them, which is correct.