

Give each campus its own administrators
Split one account into a branch per campus, region or office, move the buildings under them, and put each site's administrators on their own branch so they manage their rooms and never see anybody else's. About twenty minutes.
One account can run several campuses, offices or regions, each with its own administrators, each seeing only their own buildings. The mechanism is branch management: a tree of branches, with every building and every person filed under one of them.
1. Turn branch management on
Open Branch management and use Turn on branch management. The page then shows the tree, which at this point is a single root named HQ.
Open Branch managementRename the root here if your organisation calls its centre something else. Every branch you add will hang off it.
2. Add a branch for each campus
On the root row, open the ⋮ menu and choose Add branch. The form asks for two things: a Name, and Belong to — the branch this one sits under.
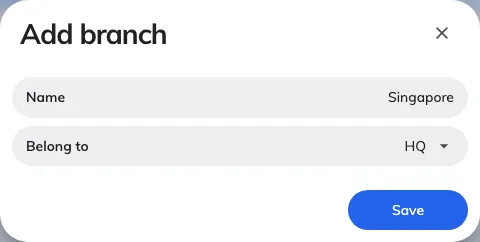
A branch is a name and a parent. Nothing else is set here.
Add one per campus. Where an organisation has regions above its sites — Asia over Hong Kong and Tokyo — add the region first and then set it as the Belong to of each site, so an administrator can later be given the whole region or one campus of it. Depth costs nothing, and a branch with children cannot be deleted later, so shape it now.
3. Move each building to its branch
Open Locations, select a building, and edit it. The Branch management field appears on the building form once branches are enabled.
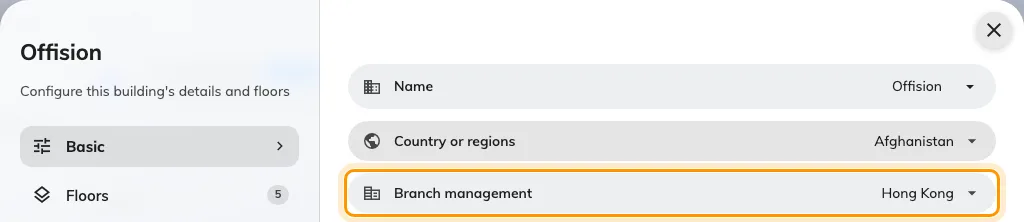
The building's branch. Its floors and the rooms on them follow it.
A floor has no branch of its own and neither does anything standing on it, so moving the building carries its floors, rooms, desks and panels with it. See Add a building and its floors for the rest of that form.
Anything created after this point inherits the branch of whoever creates it, so a campus administrator adding a room gets their own campus without being asked.
4. Put each administrator on their branch
Back on Branch management, the Users column on each row holds the administrators scoped to it. Use + on the campus row to add them — it sets the branch on every person you pick, which is the same field as the Branch management row on their user record.
Give them the console permissions they need in the usual way, on their Permissions page. The two decisions are separate and both are required: permissions say which modules they may open, the branch says which campus they open them onto.
5. Check it worked
Sign in as one of the campus administrators and look at three things.
The branch list in the top bar, between the company name and the page, should hold their campus and the branches above it — and no sibling campus.
Locations should hold their own buildings plus any the branches above them own. This is the clearest check, because the list is short enough to read: a campus administrator under Asia sees Offision and Offision Annex because those are theirs, and the head-office building because HQ is above them. Offision Riverside, which belongs to Europe, is not there at all.
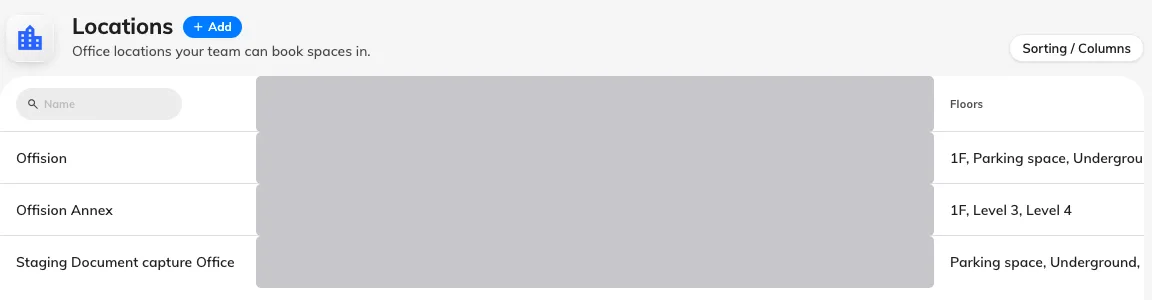
Locations as a campus administrator sees it — their own buildings and the one above them. The other region's building is not in the list. The address column is redacted here, not empty.
Management calendar, under Booking, is the same rule in the screen they will actually work in — the board holds the rooms in those buildings and nothing from the region they cannot reach.
If they can still see everything, they are on the root branch — check step 4 rather than their permissions. If they can see another campus’s rooms but not change them, that campus is above theirs rather than beside it; check the Belong to you set in step 2.