

Classic map
Create a map for a floor
Four ways to start a floor — a sample, an empty canvas, an image of your own plan, or a map file — and the one question the editor asks that everything else depends on. About fifteen minutes.
1. Pick the floor
Open Map. The floor selector lists your buildings and their floors. Select a floor to see its map. A floor without a Classic map is marked No map (No floor plan in earlier layouts).
Open Map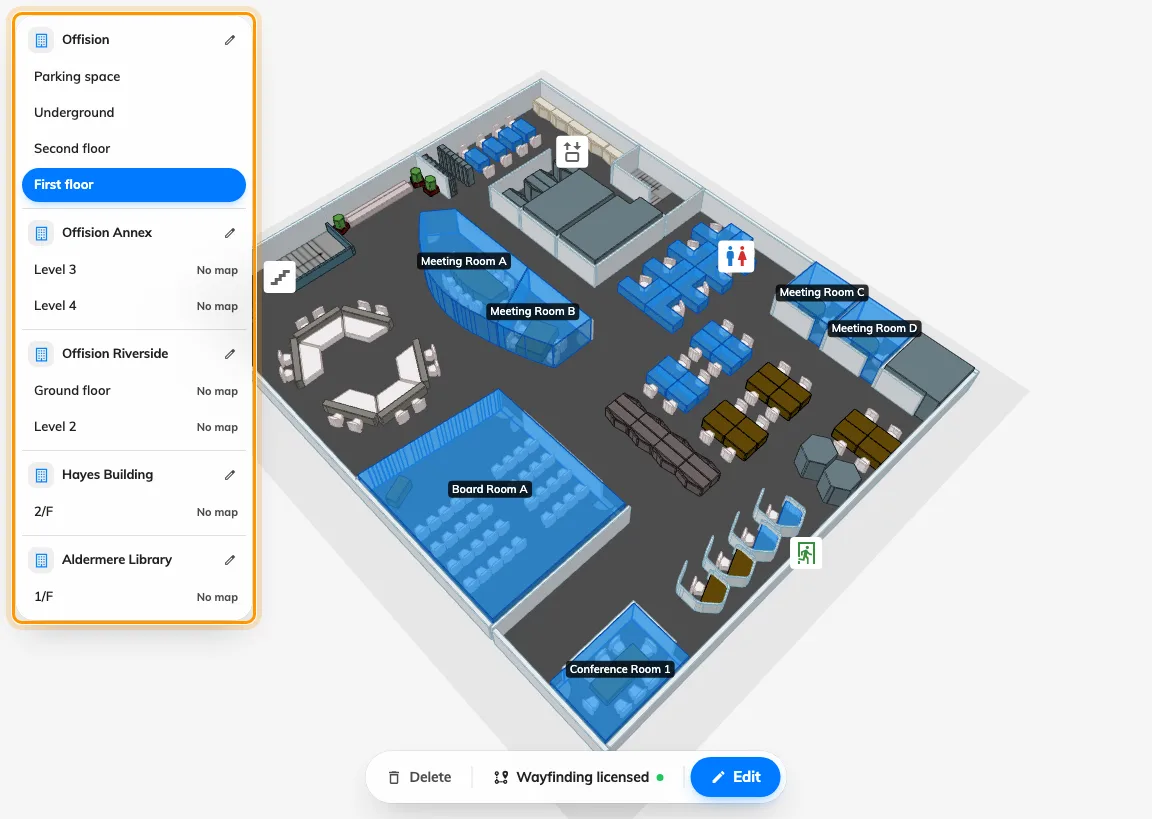
Select a floor to preview its Classic map.
Then Create map on a floor with nothing on it, or Edit at the bottom of one that already has a map.
2. Choose how to start
The editor opens on a screen with two columns, and which one you use depends on whether you already have a plan.
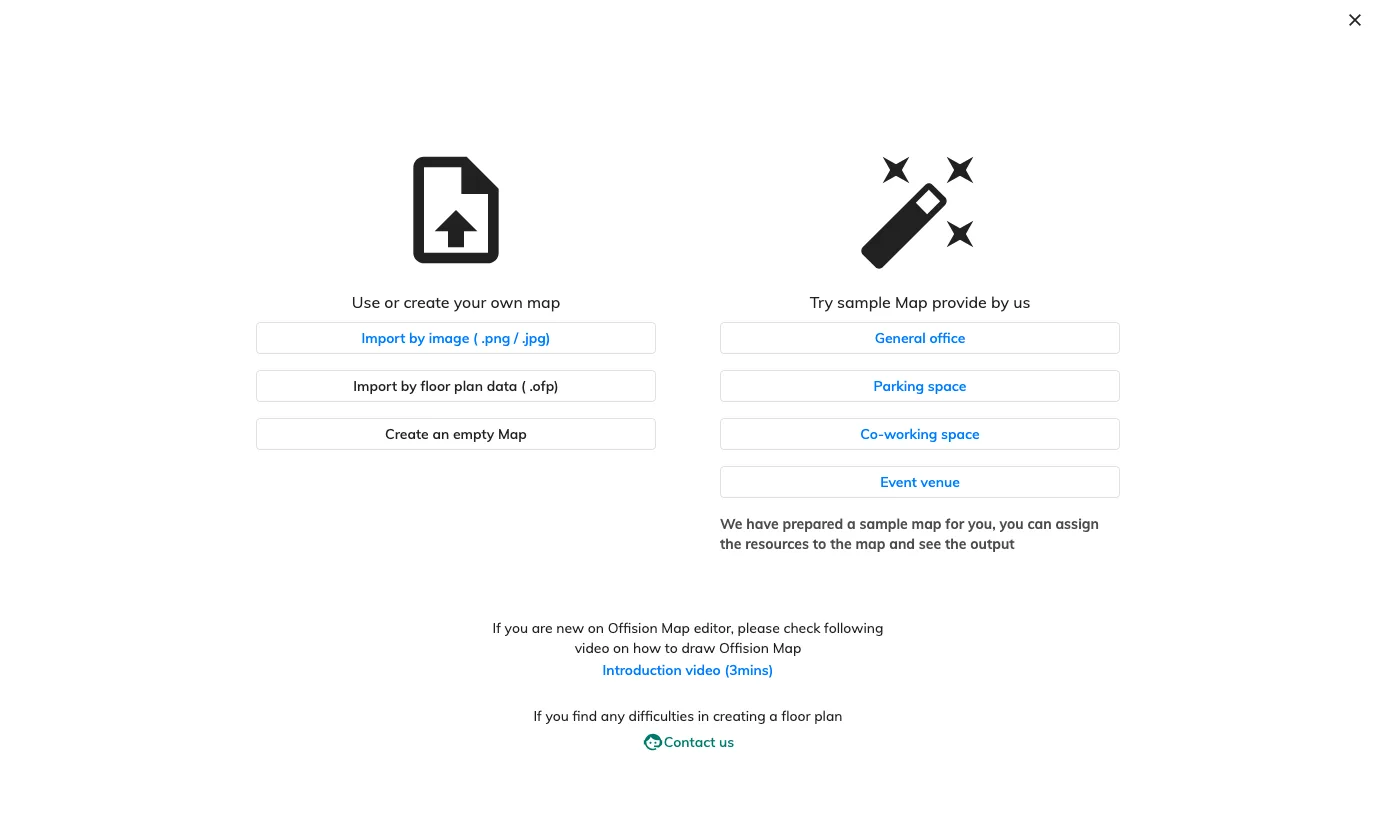
Four ways in. The left column is your own plan; the right is ours.
Use or create your own map
- Import by image ( .png / .jpg) — the usual choice. You bring a picture of the plan and trace over it. PNG and JPEG only.
- Import by floor plan data ( .ofp) — an Offision map exported from another floor or another tenant, which arrives complete.
- Create an empty Map — a blank floor to draw from scratch. Reasonable for a simple rectangular floor, slow for anything else.
Try sample Map provide by us
Four ready-made floors — General office, Parking space, Co-working space and Event venue. They are worth ten minutes even if you intend to draw your own: a sample gets you to the part that matters, which is linking your rooms and desks to it, before you have committed to anything.
3. Make the floor image, if you need one
The image is only ever traced over, so it does not have to be beautiful — it has to be straight, to scale, and readable. Two three-minute walkthroughs are linked from the import dialog itself, and they are the shortest route if you are starting from a PDF or a printout:
Keep the long edge at or under 4096 pixels. Larger images are scaled down before they are drawn, so the extra pixels cost loading time and buy nothing — and on panels and kiosks the limit is lower still.
4. State the floor’s real width
After you choose an image, the editor asks for the actual floor dimensions and gives you a Scale slider, in metres or feet.
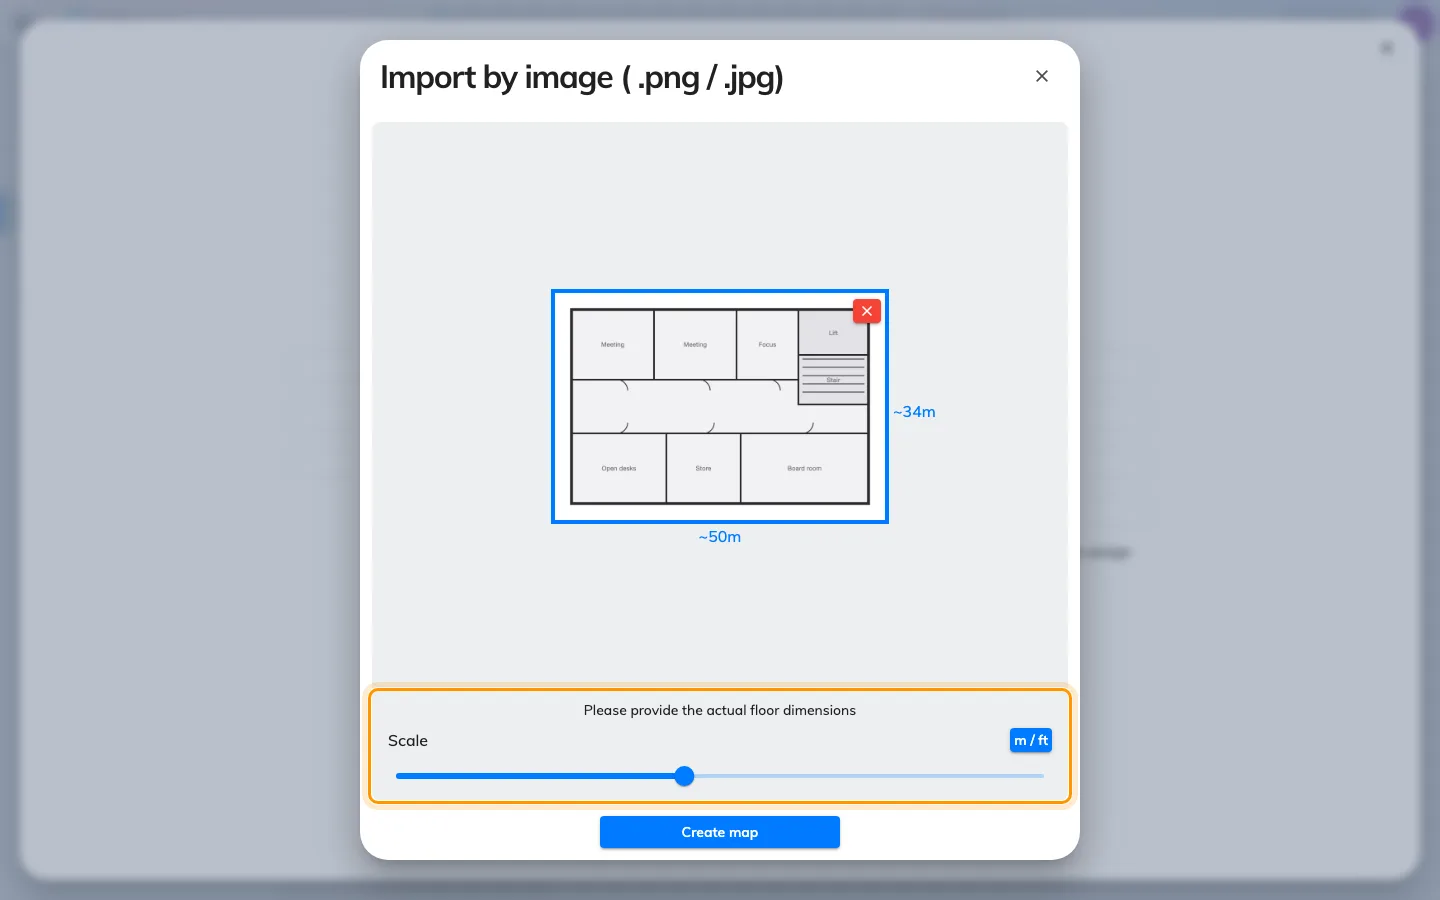
How wide the floor really is. Everything else is measured from this.
This is the most consequential click in the article. It is not the image’s size; it is how wide that floor is in the building. Every measurement afterwards — object sizes, heights, the clearance a walking route keeps from a wall — is derived from it, so a floor entered at half its real width produces a map that looks perfectly normal and is wrong everywhere it matters.
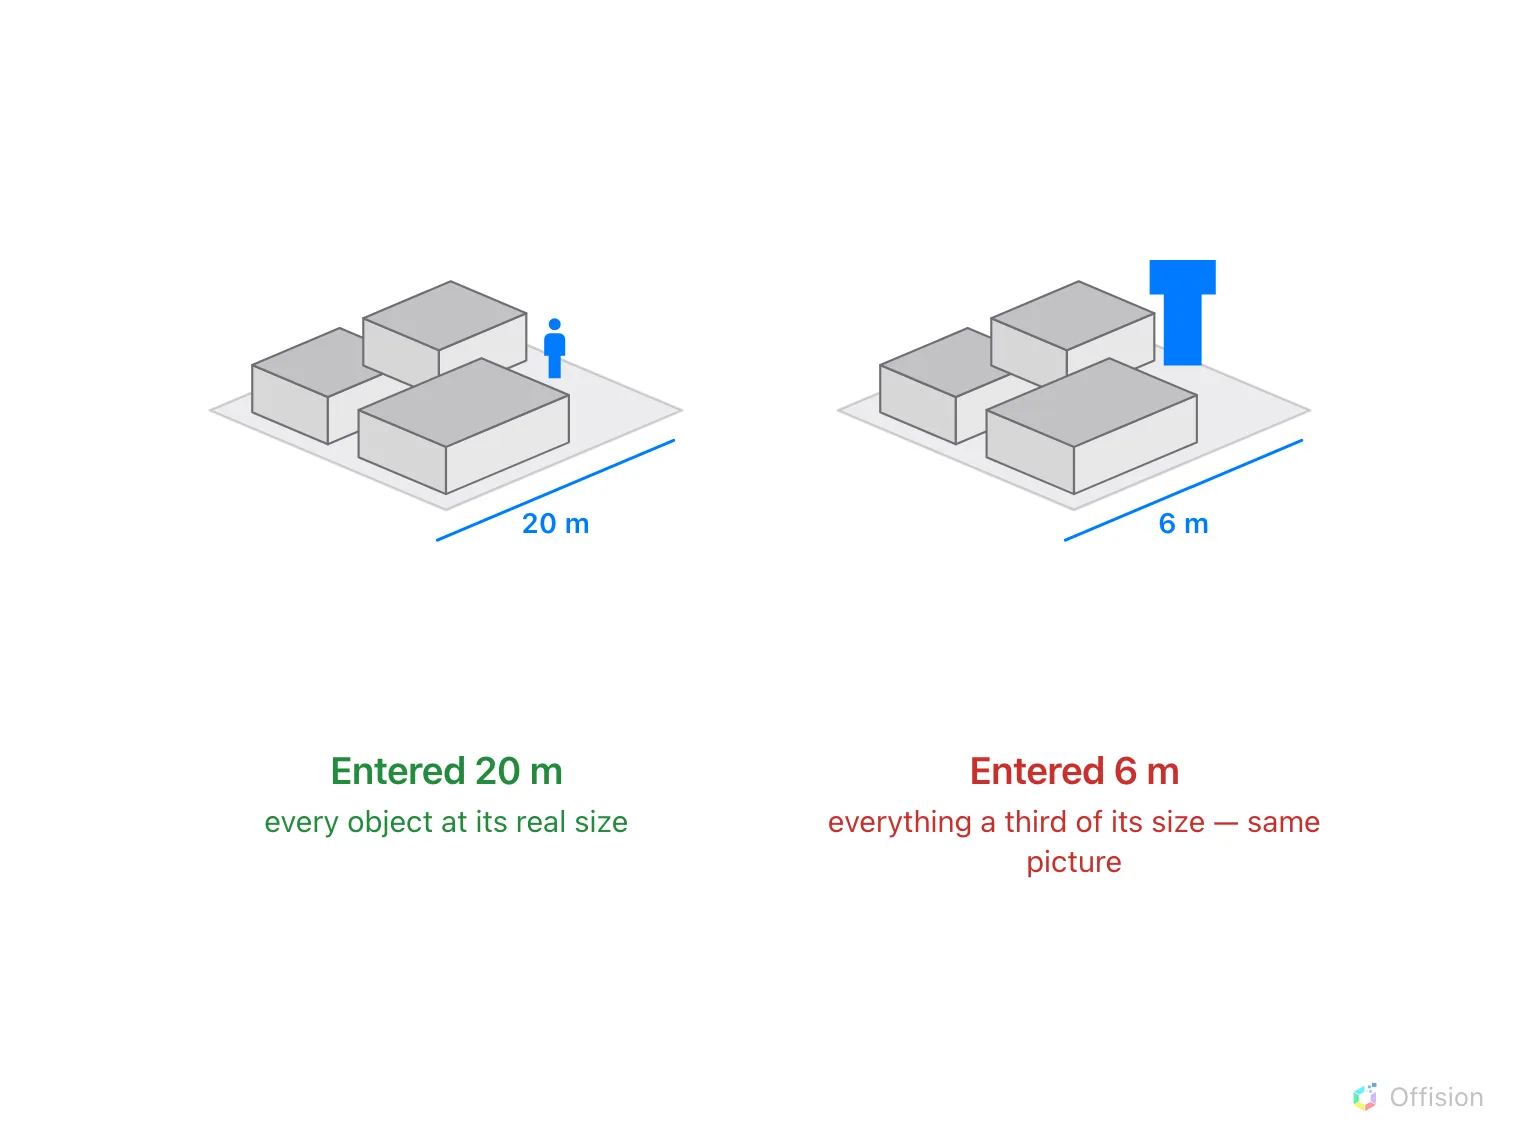
Enter the wrong width and the picture still looks right. Only something of known size gives it away.
Take the number off the plan you are tracing rather than estimating it. Then Create map.
5. Draw, then save
You land in Design mode with your image behind the canvas, ready to trace. That is its own article — see Draw the rooms and furniture.
Nothing reaches the server until you save. Save keeps the editor open; the arrow beside it offers Save & Close. Closing with unsaved work asks first, and a session that ends badly is offered back to you next time.
6. Check it worked
Close the editor and select the floor again. Its preview should show your map in 3D — which is also the fastest way to notice that the scale is wrong, because a floor at the wrong width looks obviously too tall or too flat once it has walls.
What this does not cover
- The rooms and desks themselves. A new map has shapes on it and nothing linked to them — see What an Offision map is made of for what that link is and why it is a separate job.
- Replacing a plan later. Importing again over an existing map warns you that it overwrites, and it means it. To change only the picture behind the drawing, use Update floor image in the tool rail instead.
- Other floors. A map is one floor. A building with four floors is four maps
— though an
.ofpexport from one is a reasonable starting point for the next if the floors are alike.