

Classic map
Frame the default 3D view
The angle a floor opens at, everywhere it is shown — drag the map until it looks right, or start from a tilt and a turn, and know what to do when somebody has saved a bad one.
A floor is a three-dimensional thing shown on flat screens of very different shapes, so somebody has to decide which way it faces when it first appears. That decision is made here, once, and every surface that draws the floor inherits it.
1. Open View angle
The fourth mode. The canvas is replaced by the real 3D map — the same one the app and the screens in the lobby draw — and the tab carries a badge saying which projection this floor is on, 3D or 2D. A floor set to read flat has no camera to frame, and the panel offers it nothing but the turns; everything below assumes 3D. See Show the floor plan flat, in 2D for the other one.
2. Frame it
Drag to rotate, scroll to zoom, and drag with the secondary button to pan.
Two rows of presets do the same job without a steady hand, and each reads the live camera back beside its own label as you drag:
- Tilt — five elevations, from straight overhead down to eye level: Top down, High, Tilted, Low, Very low.
- Turn — four arrows either side of where the camera is now: a quarter turn (90°) and an eighth (45°) each way.
Recenter, under them, re-fits the whole plan in the frame. That is the way back when a drag has wandered off the floor.
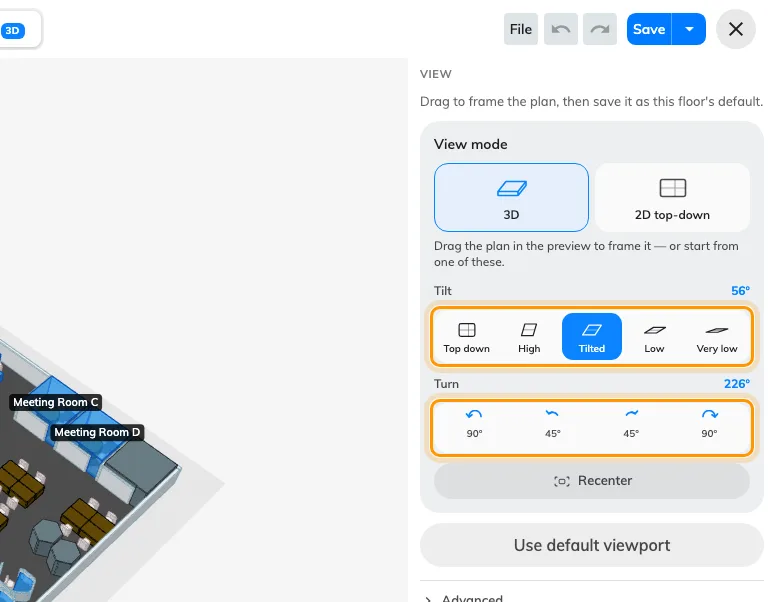
Tilt sets the elevation; Turn nudges the camera round the floor.
What to aim for, given where this ends up:
- Show the whole floor. Somebody arriving at a lobby board needs to find themselves, and a view cropped to the interesting half is no use to them.
- Point the entrance towards the bottom. A map is easiest to read when the way in is nearest the viewer.
- Tilt, do not flatten. Top down throws away the heights you just set; Very low hides the far side of the floor behind the near walls. Tilted — the middle stop — is what the samples use.
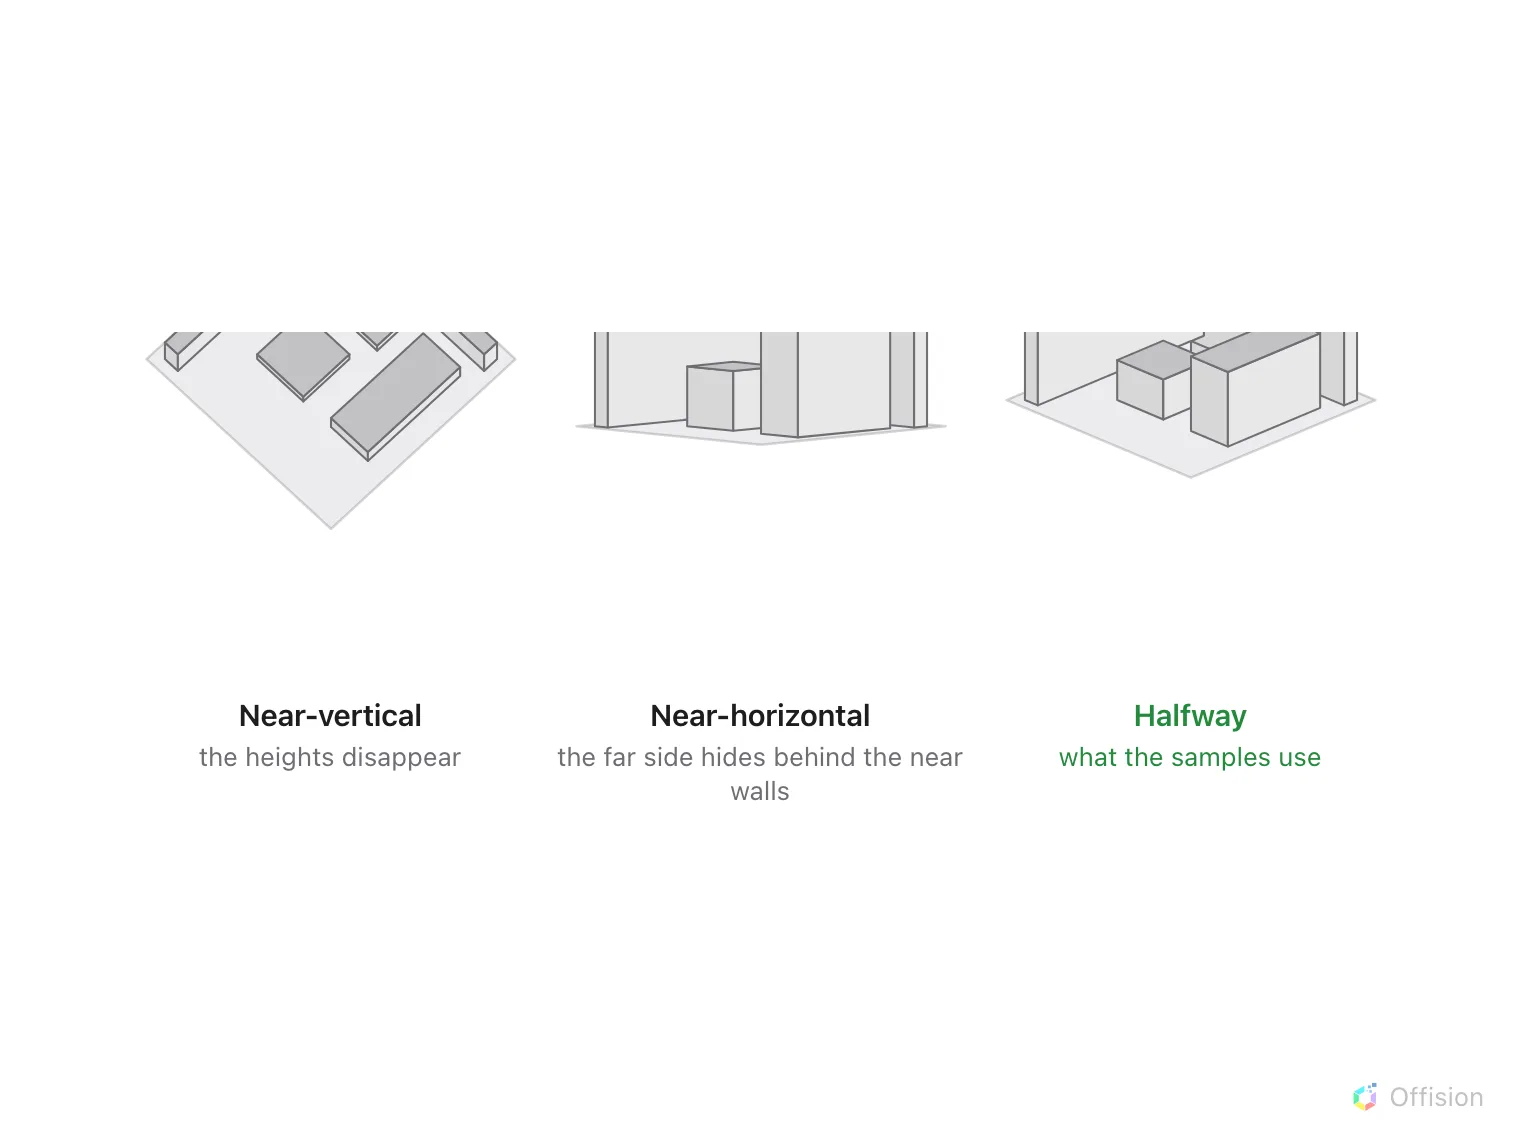
Halfway keeps the heights and the far side both visible.
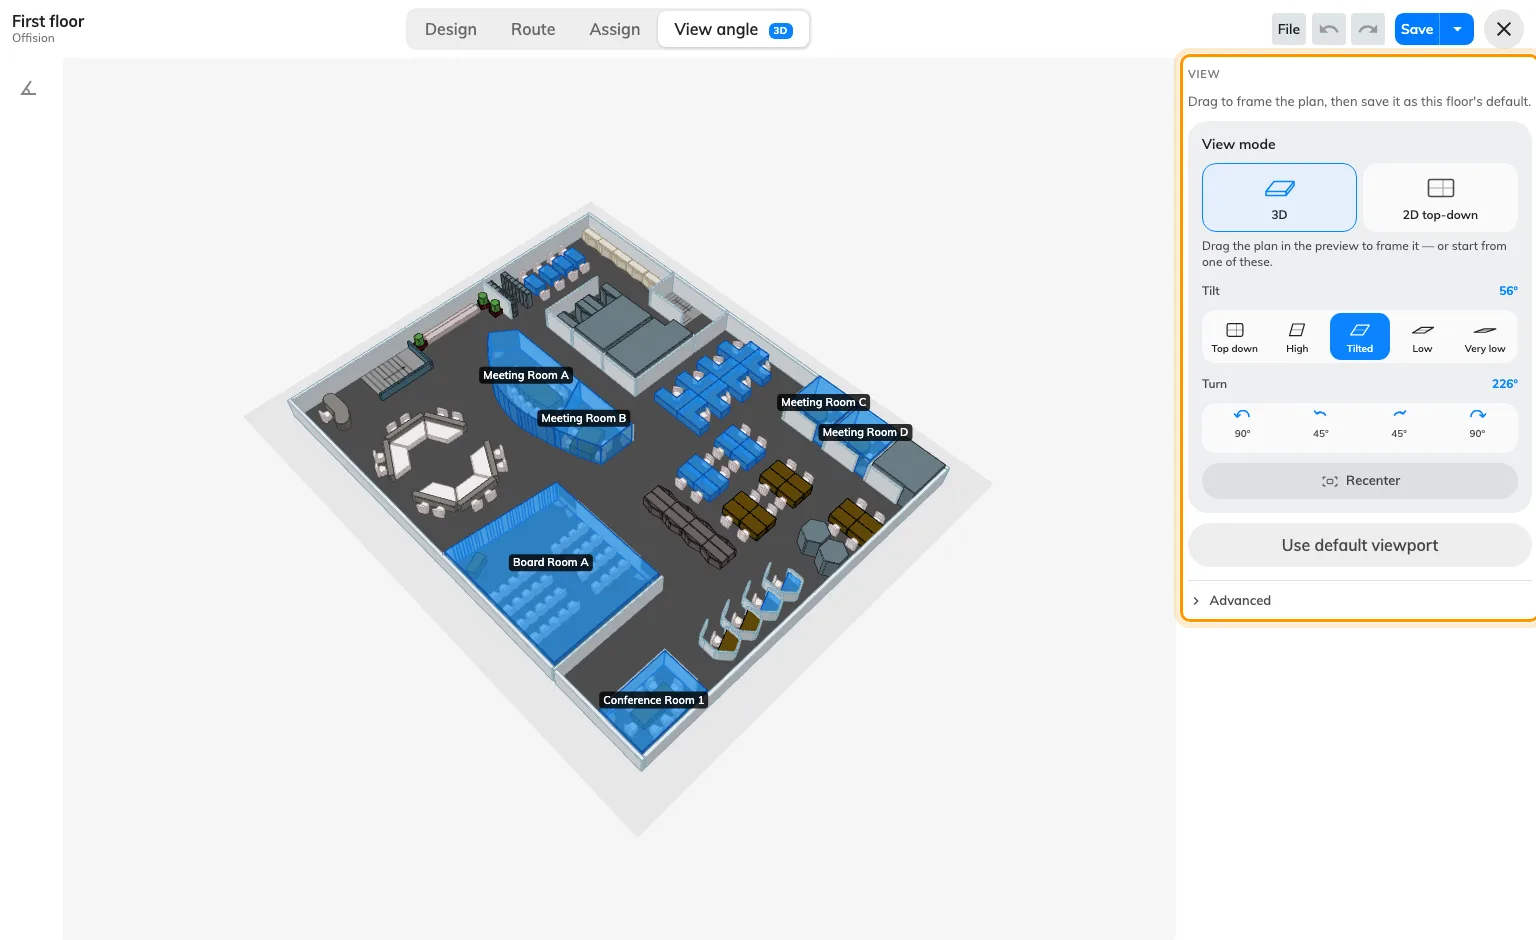
Frame it on the left; the panel on the right follows the camera.
3. Save it
There is no separate button for the camera. The panel keeps whatever angle the map is left at, and Save in the header commits it, exactly as it does for the drawing.
Use default viewport goes back to the automatic angle and clears what was saved. That is the fix when a floor opens somewhere strange and nobody remembers why: reset it, frame it again, save.
Advanced opens the six raw coordinates the panel used to lead with — Position and Target, each with an X, Y and Z. They mirror the camera while you move it, and typing in them moves the camera: useful for nudging one axis without disturbing the framing, and for copying a good angle onto another floor.
4. Check it worked
Close the editor. The preview beside the floor list should be at the angle you chose. Then open the floor on the app’s map — same angle. That is the whole point of the setting.
What this does not control
- How anyone looks at the map afterwards. This is the opening view, not a lock. People can still orbit and zoom for themselves.
- Whether the floor is drawn in perspective at all. The View mode card at the top of the same panel decides that, and it is saved with the plan — Show the floor plan flat, in 2D.
- The signage widgets’ own framing. A board or a signage screen showing a floor plan can be given its own angle in its editor, which overrides this one for that screen.
- Anything about the drawing. The camera is not part of the floor; changing it moves nothing and breaks nothing.