

Show terms and documents before submission
Open the saved page, choose Confirm, then Terms and conditions. Enable the terms and set a title that describes the content, such as room-use conditions. The title names the content; the agreement wording is the separate sentence the guest accepts. Choose typed text for a short set of conditions that should be readable directly in the booking journey. Choose a PDF when the guest needs the existing formatted document. These are alternative content sources: changing the content mode clears the other source. Check the text or file again after switching. A PDF takes precedence if saved data contains both a document and text. Choose Inline to show the content within Confirm. This works well for brief conditions the guest should review alongside the booking recap. Choose Dialog when a separate reading area is more suitable; the agreement’s linked words open that area. Use a meaningful document title so the guest understands what they are opening.
Why use this feature
Terms explain the conditions of using the room before the guest commits. The agreement control asks the guest to accept those conditions at the same point they review the room, time and cost. Supporting documents provide detail, while separate acknowledgements make distinct commitments clear. Use this feature to align expectations about arrival, use of the space and the host’s instructions before staff have to resolve a misunderstanding.
1. Choose what guests need to read
Open the saved page, choose Confirm, then Terms and conditions. Enable the terms and set a title that describes the content, such as room-use conditions. The title names the content; the agreement wording is the separate sentence the guest accepts.
Choose typed text for a short set of conditions that should be readable directly in the booking journey. Choose a PDF when the guest needs the existing formatted document. These are alternative content sources: changing the content mode clears the other source. Check the text or file again after switching. A PDF takes precedence if saved data contains both a document and text.
Choose Inline to show the content within Confirm. This works well for brief conditions the guest should review alongside the booking recap. Choose Dialog when a separate reading area is more suitable; the agreement’s linked words open that area. Use a meaningful document title so the guest understands what they are opening.
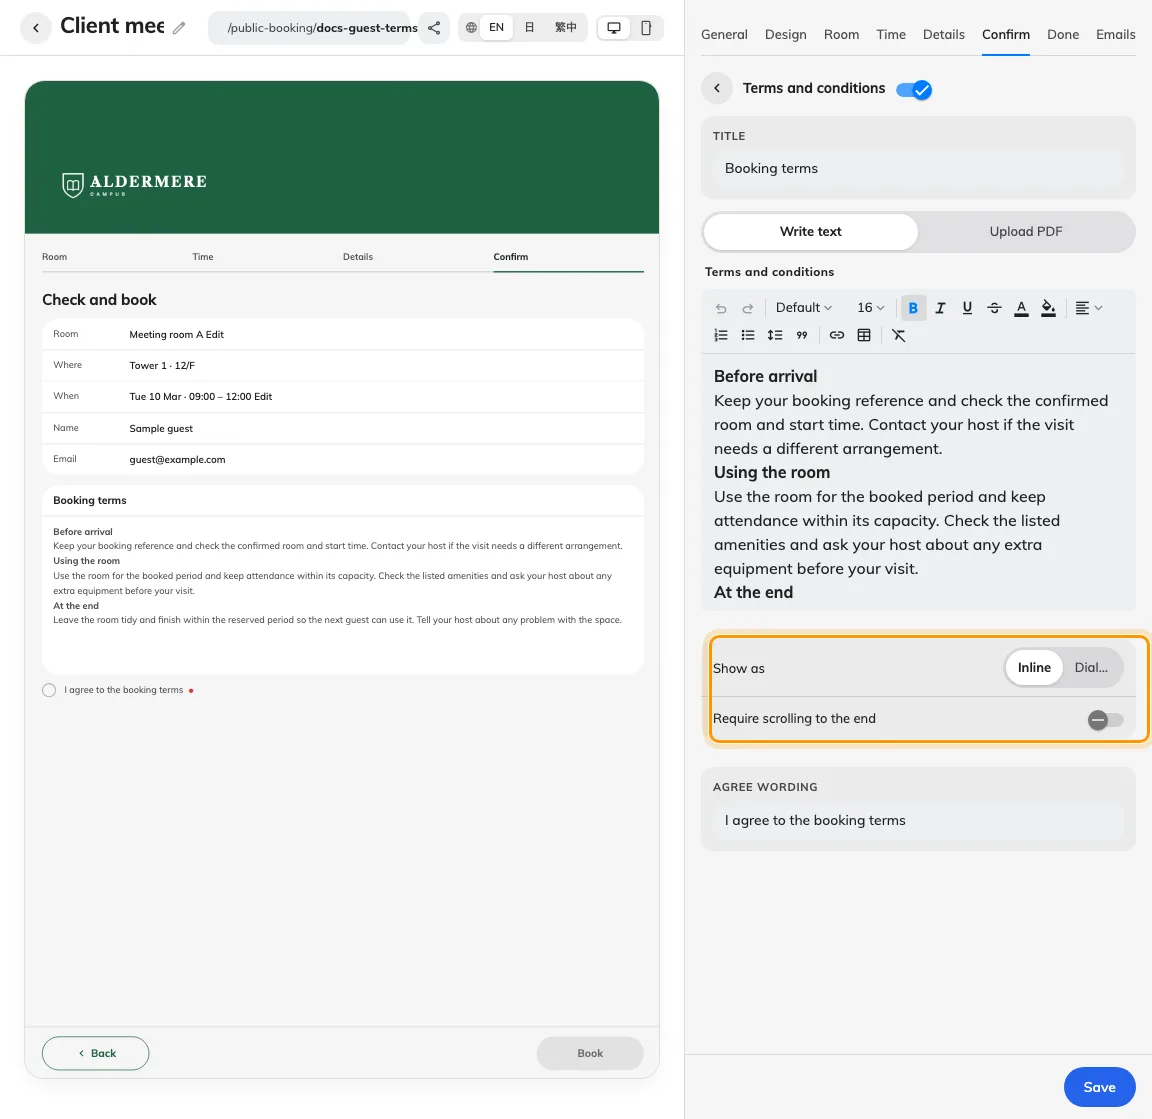
Terms have their own content and display settings.
2. Configure reading and agreement
Write an agreement sentence that names the conditions being accepted. In Dialog mode, set the words in that sentence that open the terms. Keep those words recognisable in each language rather than using a vague “here”. Enabling terms makes their acceptance required for submission.
Use the scroll-to-end requirement when the guest must reach the end of the supplied text or PDF before agreeing. In Inline mode, reading happens in the terms content area; in Dialog mode, the guest opens the terms and uses the agreement action after reading. A short document may already fit without scrolling. Reaching the end and accepting are separate actions: scrolling alone is not agreement. When no text or document exists, there is no content to apply a scroll gate to.
Use additional acknowledgements for distinct confirmations, such as a separate instruction the guest must acknowledge. Each acknowledgement can have its own wording, supporting content or document, and required flag. Optional acknowledgements can remain unchecked; a required one must be fulfilled. Questions such as the purpose of the visit belong in the booking form, where the guest supplies an answer.
Provide the title, content, agreement and linked words in every enabled language. Review the actual uploaded PDF too: changing the page language does not translate the file’s contents.
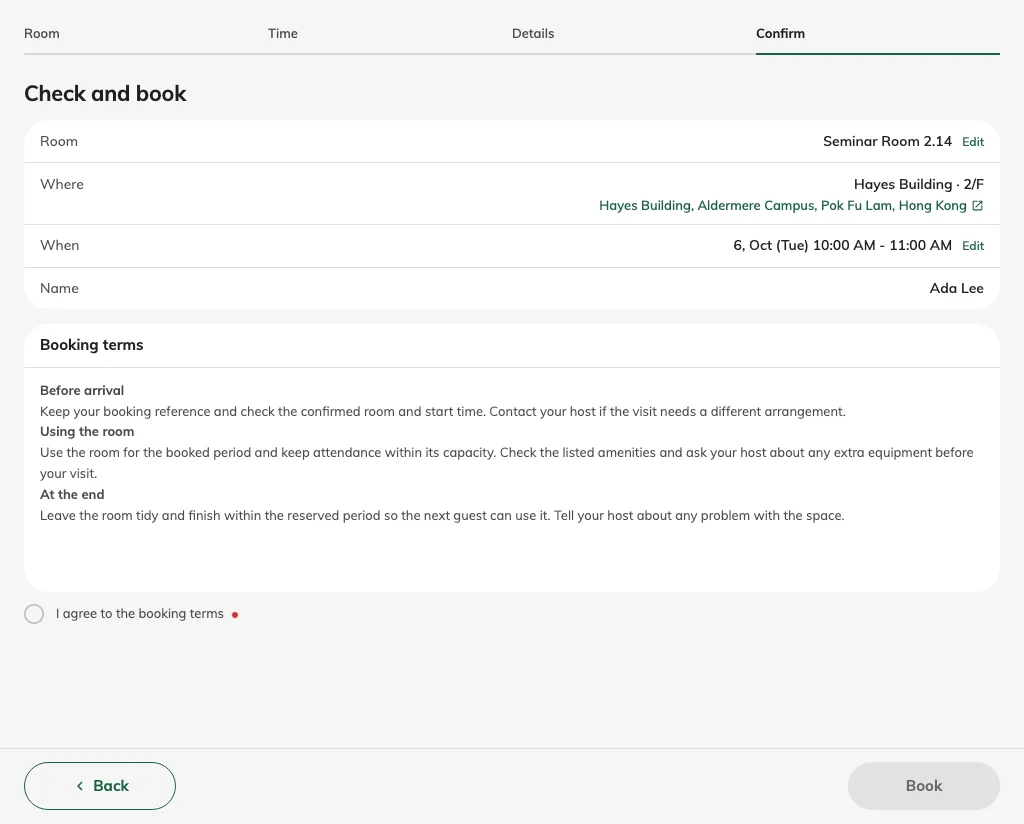
Before agreement, the required terms remain unchecked and the booking action is unavailable.
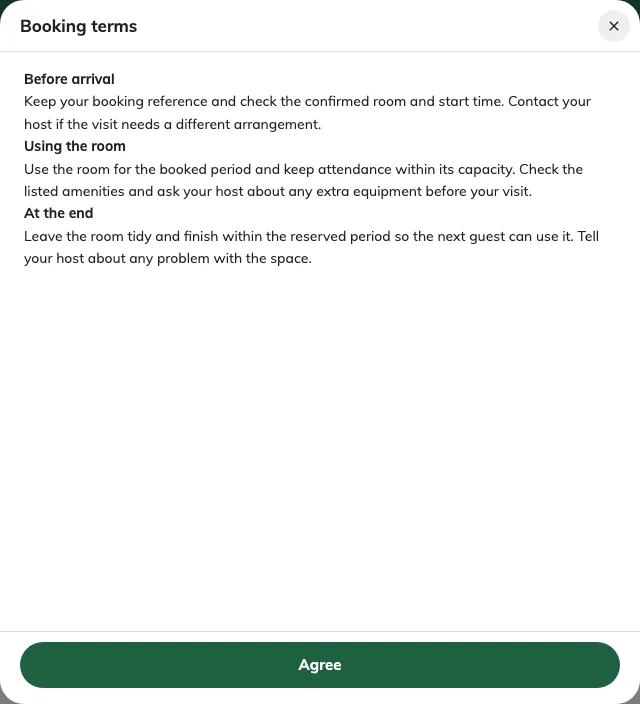
Dialog mode opens the terms in a separate reading area with its own agreement action.
3. Verify the agreement before booking
Save the page and open its published link in a private browser. Choose a real available room and period, enter fictional contact details and continue to Confirm. Check that the recap and terms belong to the same intended reservation.
Before accepting, verify that the terms title, content and agreement control are visible and readable. For Inline, inspect the control below the content card; on a shorter screen you may need to scroll the page. For Dialog, open the linked words, inspect the reading area and return without agreeing. If reading to the end is required, verify the acceptance control is gated until that requirement is met.
Keep the terms unchecked and confirm the final booking action is unavailable. Read and accept the terms, then check any required acknowledgements too. With every other required field, verification or payment-proof requirement satisfied, the final booking action should become available. Do not submit just to test the tick: that action creates a real booking or approval request. If you perform an authorised test submission, verify its reference and status and clear the test booking afterwards.
Repeat on a phone and in each enabled language. Replace a test document and reopen the saved page to check the new file and acceptance behaviour. A correct result includes readable content, explicit acceptance and the expected change in submission availability; a screenshot of text alone does not verify agreement.
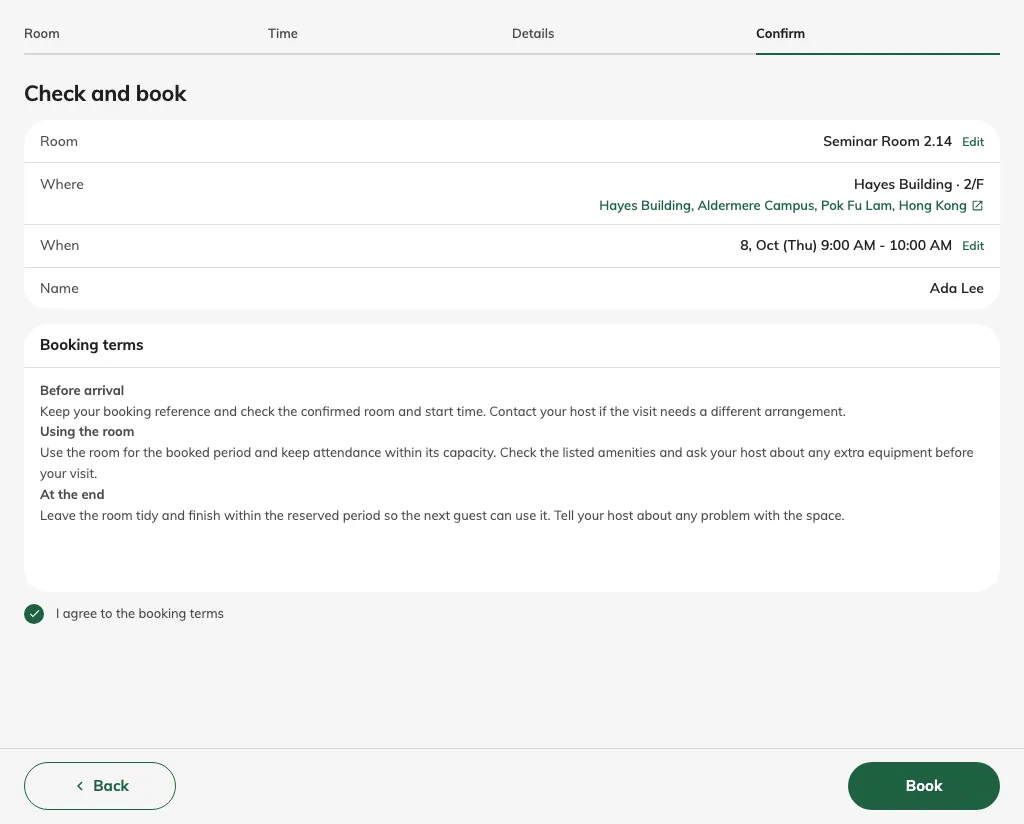
After the required agreement, the booking action is available; no booking has been submitted yet.