

Connect an AXIS door lock
Put the door of a meeting room under Offision, so the panel outside it can let people in. About thirty minutes, most of it on the AXIS device's own settings page.
An AXIS I/O relay box turns the electric strike on a meeting-room door into something Offision can release — so the panel outside the room opens the door for whoever has the booking, and locks it again behind them.
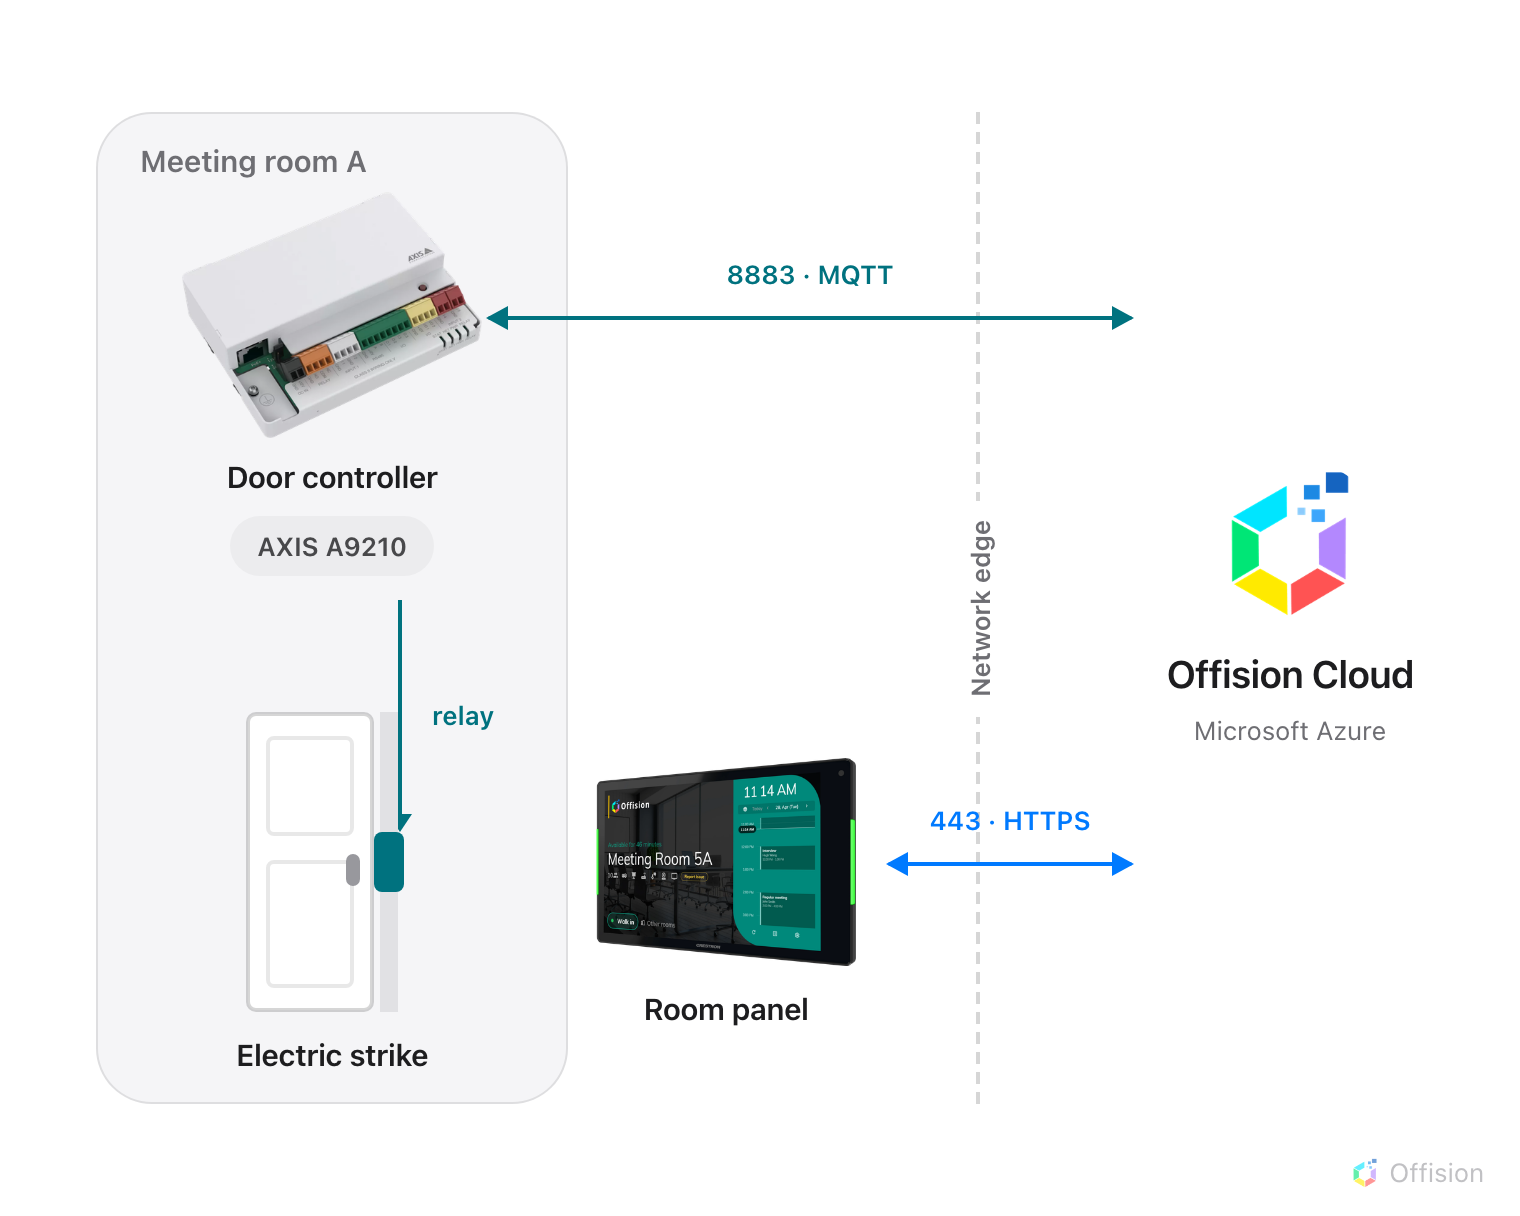
Both devices dial out to Offision. The door opens because a command comes back down the connection the controller opened — no inbound port, no VPN.
What to have ready
- An AXIS I/O relay device (an A9210 or similar) powered up and reachable on your network
- The electric strike already wired to the device’s RELAY port
- The device’s own web address and administrator password
- A booking panel already paired to the room, because the lock is paired to a panel
- About thirty minutes, most of it on the device’s settings page
1. Add the door lock in Offision
AXIS is in the marketplace, and also on the platform integration page. Either opens the same dialog. The tile is marked Beta.
Open Platform integration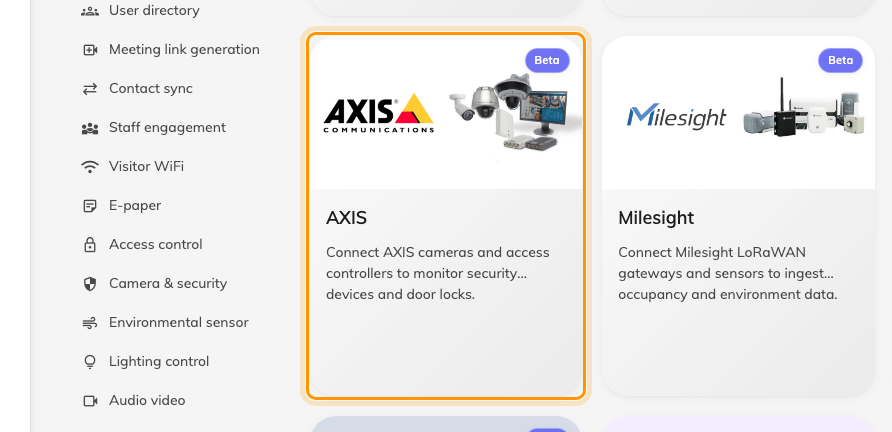
The marketplace, with the AXIS tile.
The dialog opens straight on devices — there is no AXIS account to connect and no API key to paste. Down the left are three sections, one per device type: AXIS camera, AXIS door lock and AXIS relay. Choose AXIS door lock, then Add.
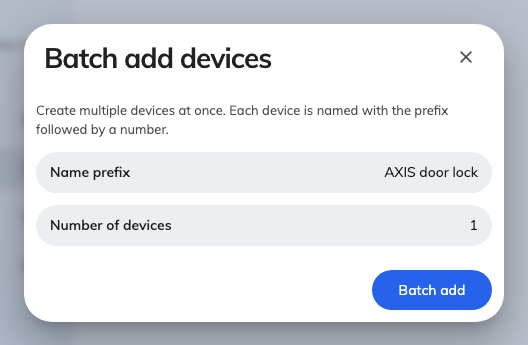
Batch add devices, with the type already fixed to AXIS door lock.
Batch add devices asks for two things: a Name prefix and a Number of devices. Name the prefix after the door rather than the hardware — you will be picking it from a list later, and Meeting Room A door is easier to recognise than A9210-2. Choose Batch add.
Note what this form did not ask for: no IP address, no port, no credentials. Offision does not reach into your network to find the device. The device finds Offision.
2. Open Config guideline
Open the device you just created and go to Config guideline in the rail down the left.
Offision registered the device with its cloud broker as it created it, and minted the three values the next steps paste into the AXIS device — a Client ID, a Username and a Password.
If this page shows a single Enable MQTT action instead of three numbered steps, this device has MQTT switched off. Choose it, and the steps appear.
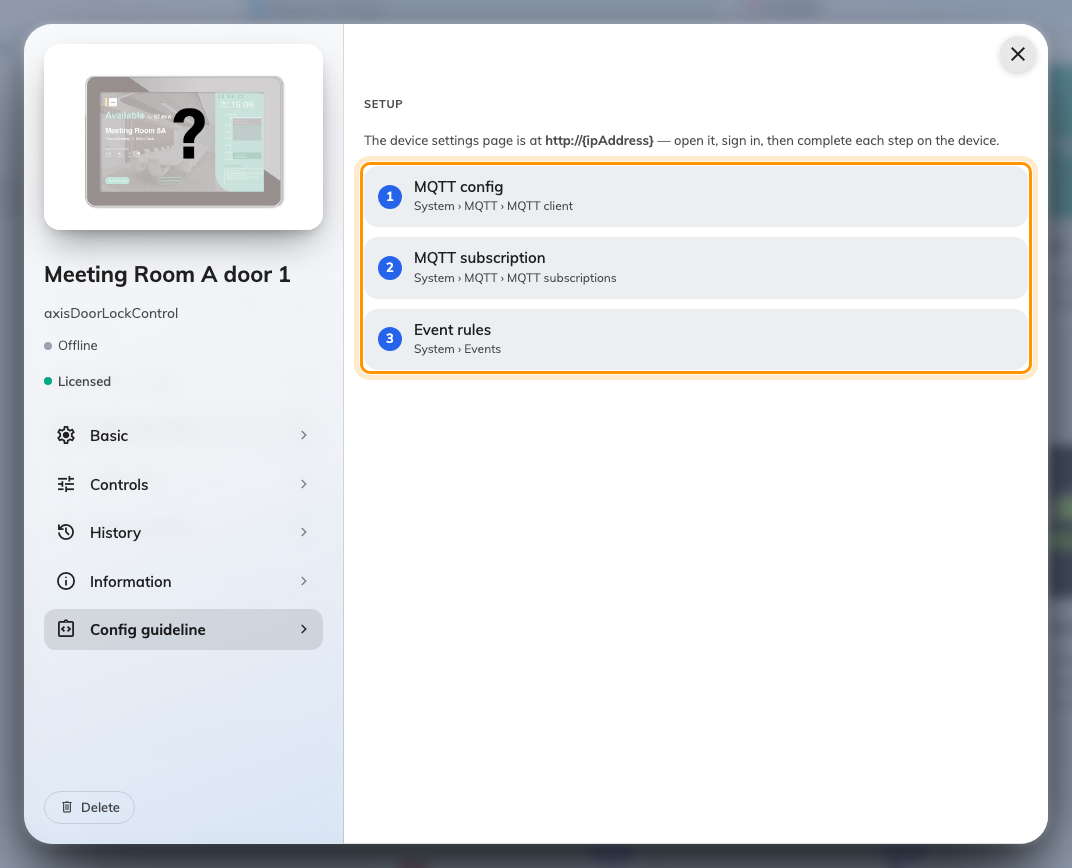
Config guideline, with the three setup steps.
The page now lists the three steps you are about to do on the device, each naming exactly where to find it in the AXIS menus. Keep this page open — you will come back to it three times to copy a value.
3. Copy the MQTT client settings
Back on Config guideline, open step 1, MQTT config. Every value the device needs is on this one screen, each with a copy button beside it.
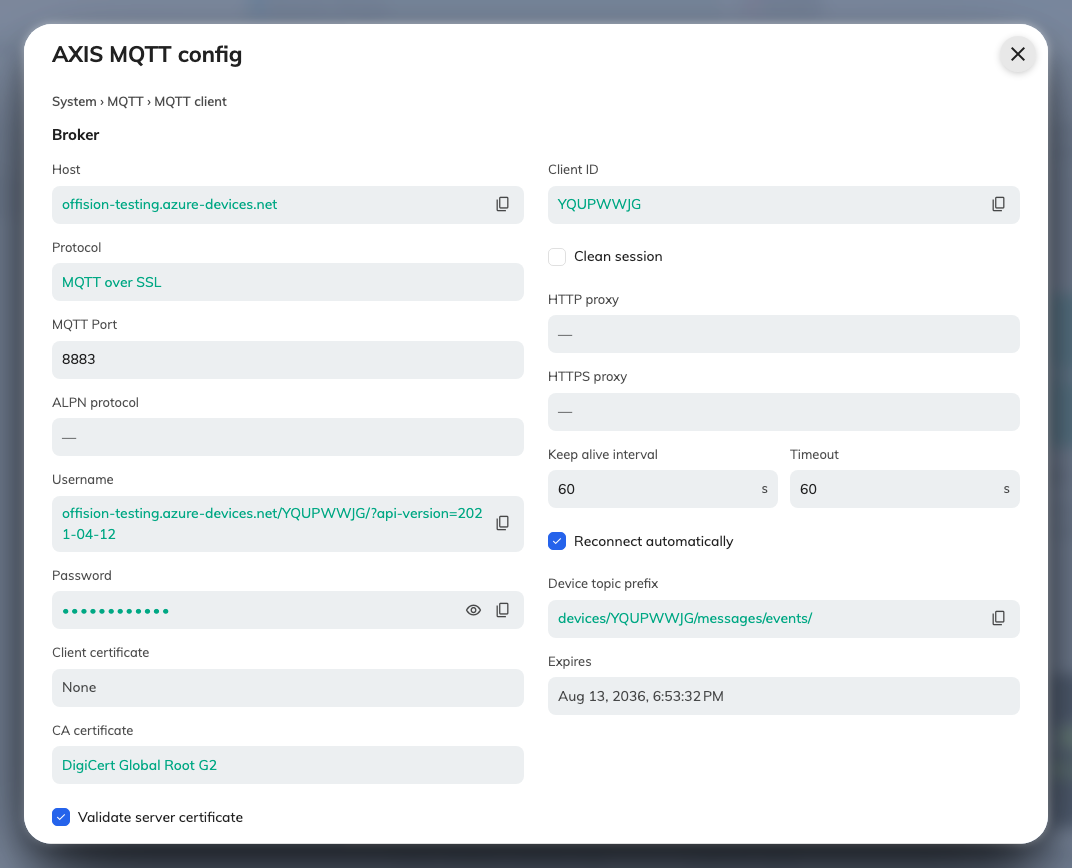
MQTT config, as Offision generated it for this device.
Now open the AXIS device’s own settings page in a browser, sign in, go to System › MQTT › MQTT client, and enter what the screen above shows. Password stays hidden until you reveal it.
Save, and the device should report Connected.
4. Copy the subscription
Open step 2, MQTT subscription.
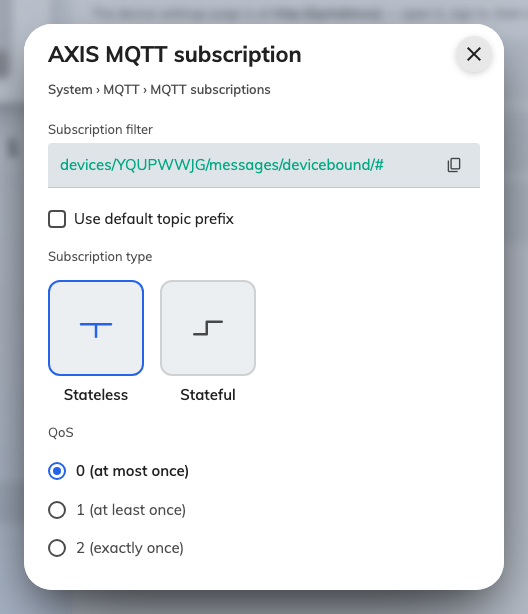
The subscription to add on the device.
On the device, go to System › MQTT › MQTT subscriptions and add one subscription matching that screen.
5. Copy the four event rules
Open step 3, Event rules. There are four rules, one per tab: two of them open and close the door, and two report the state of the relay back to Offision.
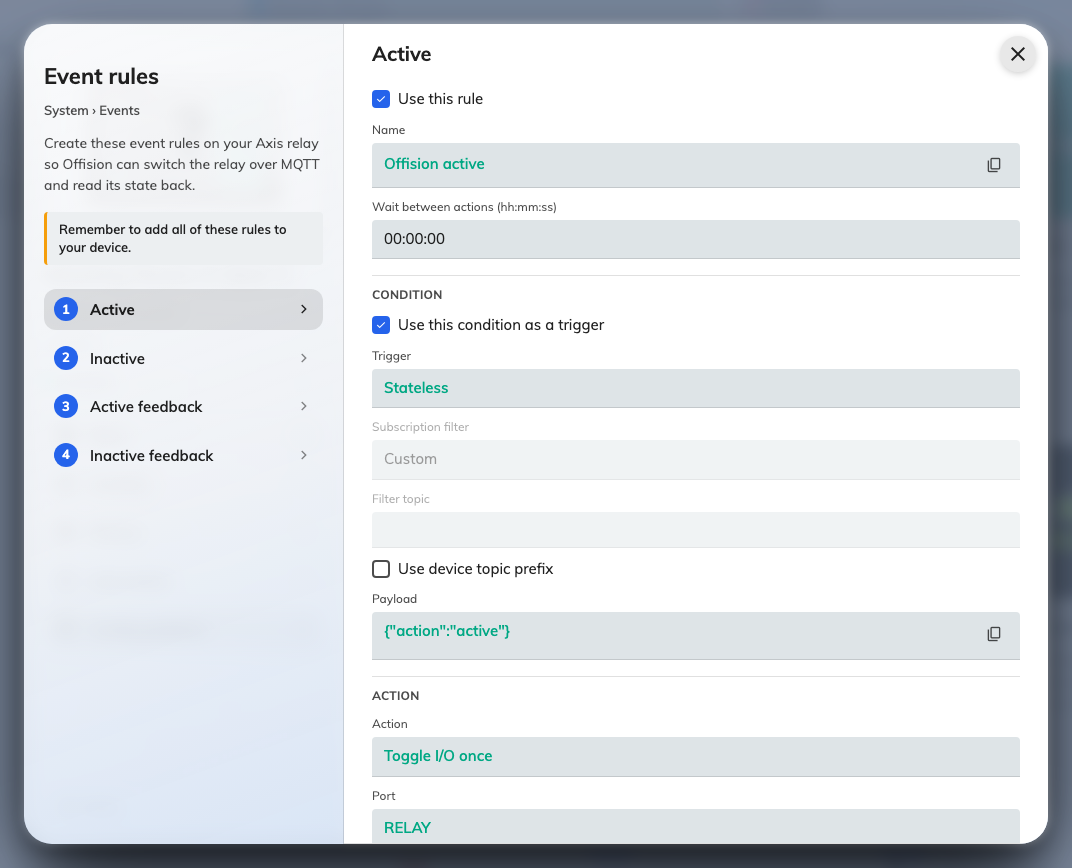
Event rules. Each tab is one rule, field for field.
On the device, go to System › Events and add a rule for each tab, matching the screen field for field.
The last two rules only report; they never open anything. They are what makes the device’s tile in Offision show whether the door is currently locked.
6. Pair the lock to the room panel
Go to Devices › Booking panel › Devices and open the panel outside that room. Choose Door locks in the rail down the left of the panel dialog.
Open Booking panel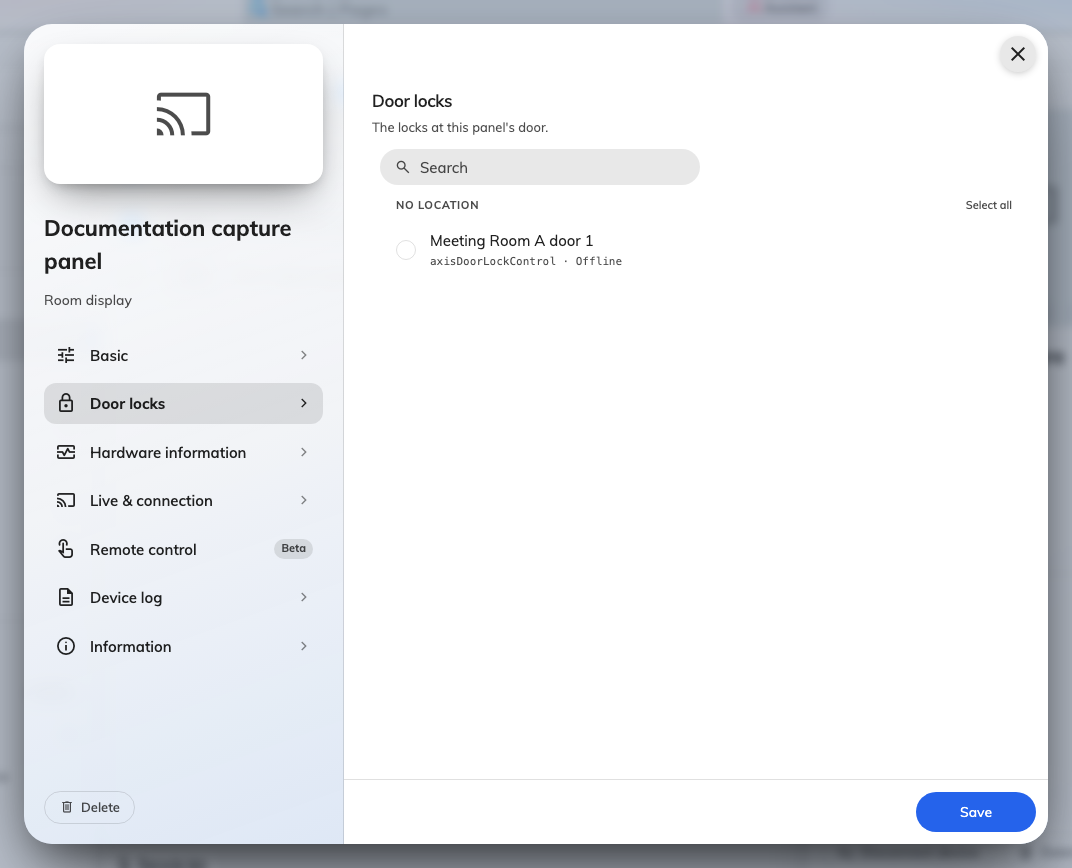
A panel's Door locks page, listing the door lock for that room.
Tick the lock for that door and save. A lock is paired to a panel, not to a room — so a room with two doors and two panels is two pairings, and moving a panel means checking its locks moved with it.
The rail entry only appears when you are editing an existing panel. If a panel is still being created, save it first and reopen it.
Then, in Devices › Booking panel › Panel configurations, open the configuration those panels use and turn on Show open door button on its function page. The related settings live alongside it:
| Setting | What it does |
|---|---|
| Show open door button | Puts the button on the panel while a booking is running |
| Open duration (in seconds) | How long the strike stays released before Offision locks it again |
| Card scan opens door during meeting | A badge tap opens the door as well as checking in |
| Allow visitor open door | Visitors checked in to the meeting can open it too |
| Booking operators open door any time | Keeps the button there when the room is free |
That first setting alone gives you the button only while the room is in use. On a free room, or one still waiting for its check-in, the panel shows nothing until Booking operators open door any time is on as well — and that one sits on the configuration’s Check-in method page beside Booking operators, not on the function page.
7. Check it worked
Both directions, and they are genuinely separate paths:
- The door. Press Open door on the panel. The strike releases, and locks again once the open duration has passed.
- The state. Watch the device in Offision while you do it. Its tile should flip to unlocked and back on its own.
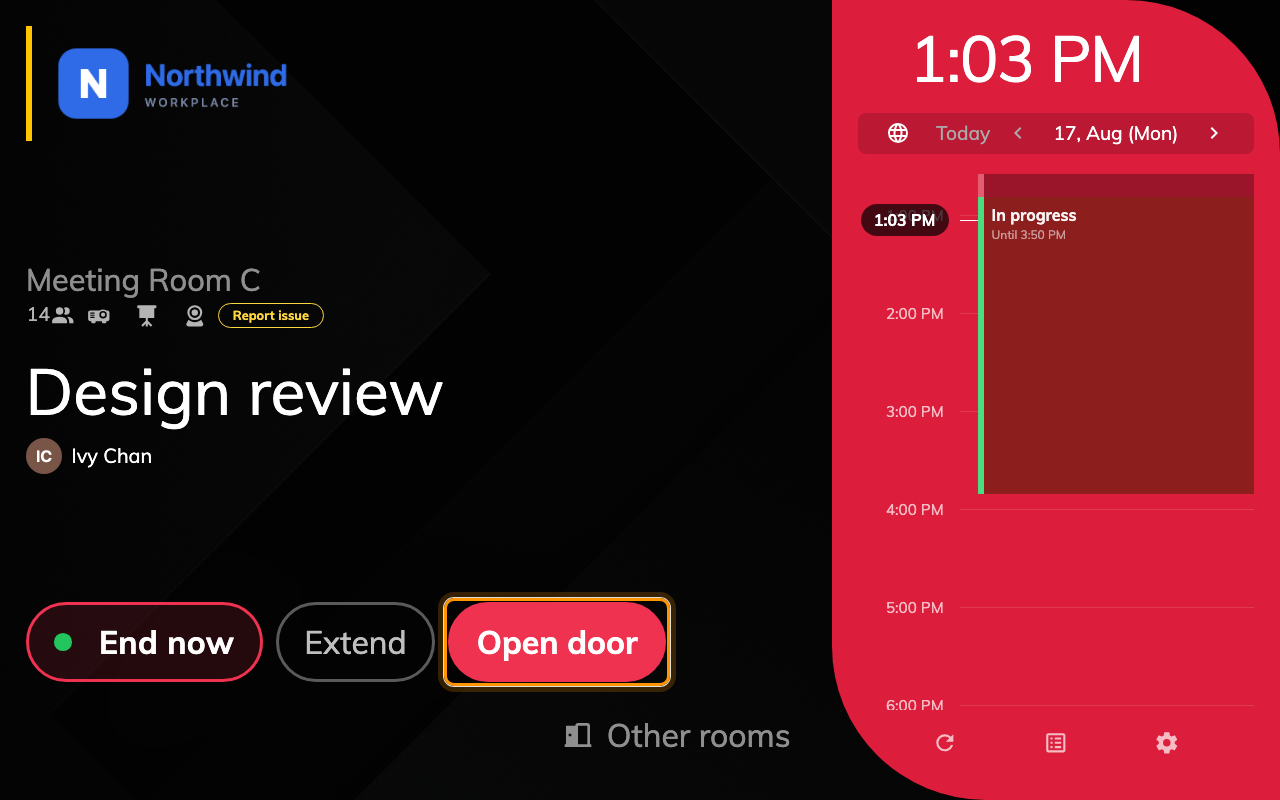
Open door on the panel, beside the buttons that end and extend the booking.
Check both. Feedback and control are independent — the tile can be perfectly correct on a device whose relay has never once moved, because the two directions travel through different rules. Testing only the tile is how a door that never opens gets signed off.
When it goes wrong
| What you see | Usual cause |
|---|---|
| Device says Connected, nothing ever happens | The subscription filter lost its trailing /#, or Use default topic prefix was left on |
| The rule looks right, the relay never moves | The rule has a filter topic set — it can never match, so it never fires |
| Unlock leaves the door locked, lock leaves it open | Rule Duration is not 00:00:00, so the device flips the relay back itself |
| Nothing at all, not even a log entry on the device | The rule is driving O1 instead of RELAY, or RELAY is configured as an input |
| The tile shows the right state, the door never opens | The feedback rules are fine and the control rules are not — the tile proves nothing |
| No door lock found on the panel’s Door locks page | The device was created under a different organization unit |
| A lock is listed but cannot be ticked | It is a relay port whose function has not been set to Door lock |
| The panel has no open door button | Show open door button is off in the panel configuration that panel uses — or the room is free, and Booking operators open door any time is off |
| It worked for weeks, then stopped connecting | The password expired — Regenerate password on Config guideline, then paste it into the device again |