

Register a visitor who arrives without an appointment
Registering someone at the desk who has no invitation. The reception form admits them as it saves — there is no separate check-in afterwards — and which fields it asks for comes from the visiting purpose.
Somebody arrives at the desk with no invitation and asks for a colleague. Register walk-in visitor takes their details and admits them in one pass — which is the part worth knowing before you start, because it does not work like the visitor’s own phone registration. Reception registers a visitor as present: when the form finishes, they are already checked in, and their card offers Check out rather than Check in.
1. Choose Register walk-in visitor
Open Reception from the app home menu. Two buttons sit under the header: Register walk-in visitor for the person standing in front of you, and Schedule upcoming visit for one expected on a later date. On a phone both are on the + button at the bottom right instead.
The distinction is not cosmetic. Reception’s walk-in form registers for now and only for now — the visiting date and arrival time are fixed and cannot be edited. Anything for a future day is the other button.
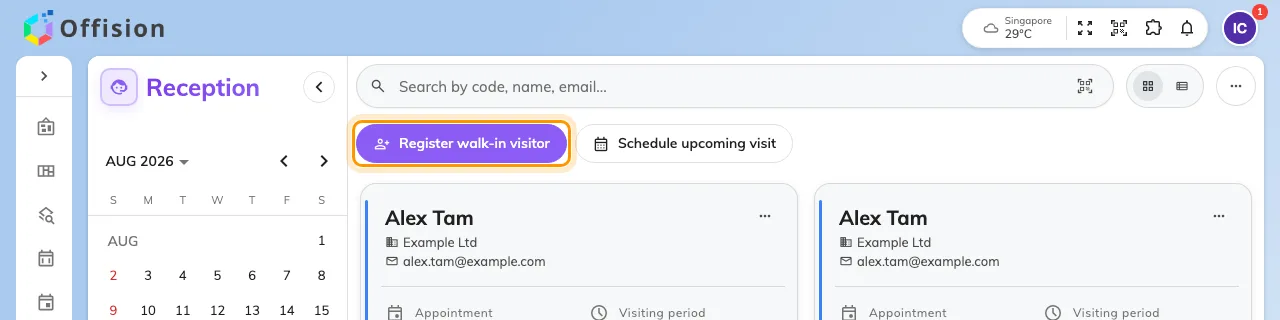
Reception, with Register walk-in visitor beside Schedule upcoming visit.
2. Fill in Visitor information
Everything about the visit and the visitor is on this one step, in this order:
- Visiting purpose — shown only when your organisation has more than one. It is the first thing to get right, because it decides every field below it and how many steps the wizard has. The default purpose is already selected.
- Visiting date and Arrival time — today and now, read-only.
- Expected leave time — the only part of the period you set.
- Location — the building, and optionally the room. The list holds only the buildings you are a receptionist for, so a visitor for another site cannot be registered from your desk.
- Inviter — who they are here to see. This field appears only when proxy invitation is switched on for reception; without it, a walk-in is recorded against no host.
- The visitor’s own details — name, email or mobile, company, and whatever else the purpose asks for. A red dot marks the ones you cannot skip.
Where your organisation has the business-card scanner, Scan business card fills the visitor’s details from a photograph of their card instead of typing.
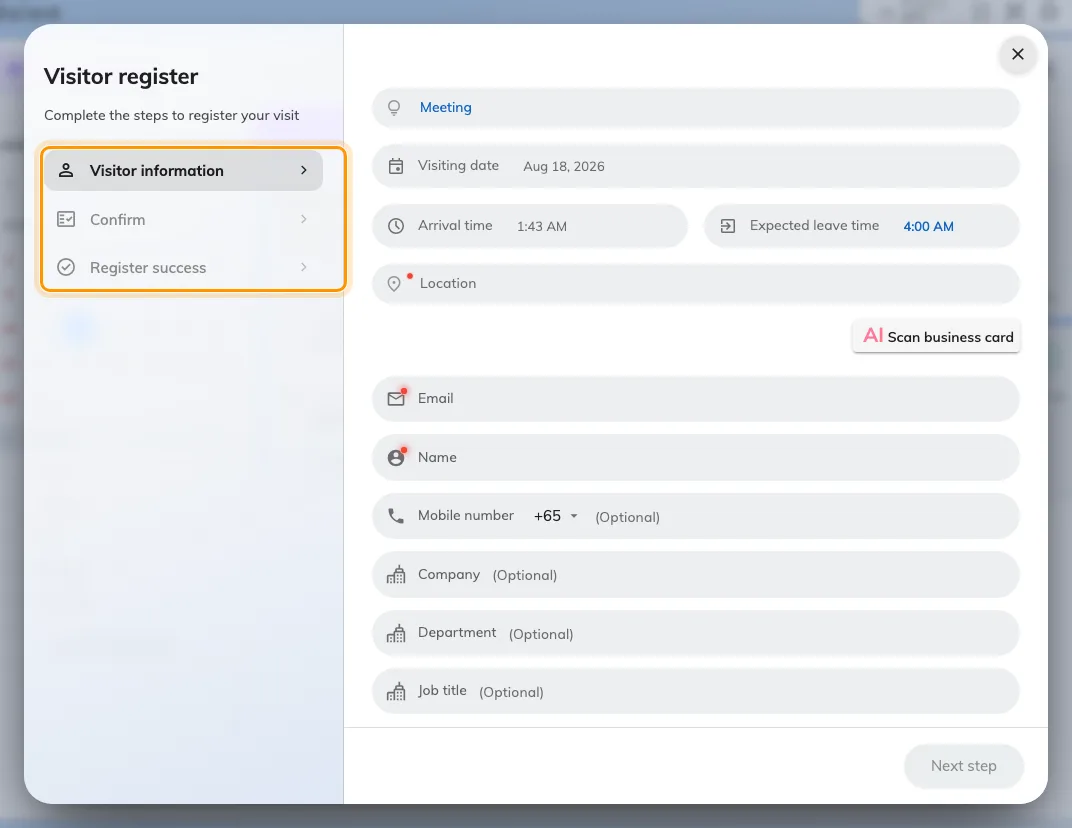
Visitor information. This purpose asks for no photo and no survey, so the wizard is three steps.
3. Take a photo
The purpose decides whether this step exists at all, and whether you may pass it. Where the photo is required, Next step stays greyed until one is taken — so a purpose that demands a photo cannot be completed by a receptionist working from a desk with no camera.
There is no upload: the picture has to come from a camera on this computer. What happens to it afterwards — which badge design prints it, who may open it later — is The visitor photo.
4. Answer any Visitor survey
Each survey attached to the purpose is a step of its own — a health declaration, an NDA, a site-safety question. Ask the visitor and record their answers.
5. Confirm and submit
The last step is a read-only recap of everything: the visit, the visitor, the vehicle and any survey answers. Read it back to the visitor, then Submit.
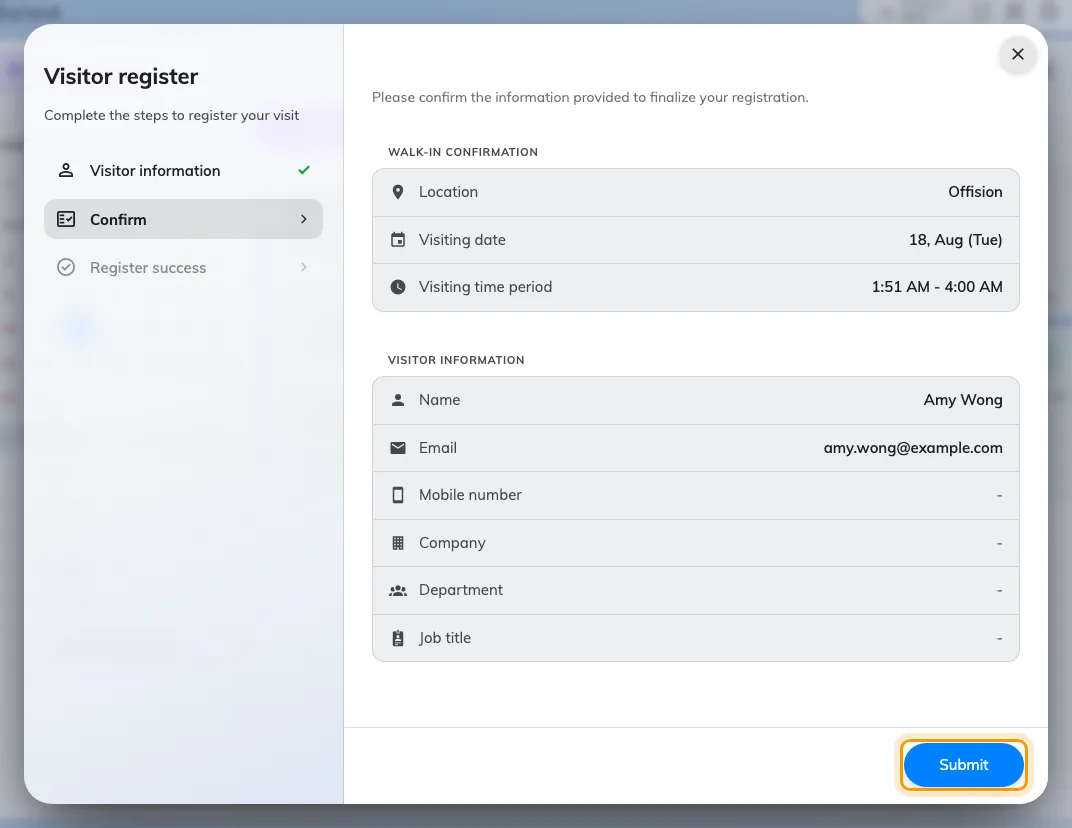
The confirmation step, with Submit in place of Next step.
6. Hand over the pass
The dialog turns into the visitor’s pass: Register success, their Visitor code, and a QR of the same. That code is what they show at a lobby board or a gate, and what you search on if they come back to the desk later.
A label printer connected to this computer prints the badge on its own, with no further action. If nothing prints, no printer is attached yet — see Connect a badge printer to your reception desk.
Register another visitor clears the form and keeps the dialog open, which is the one to use when several people arrive together. Done closes it.
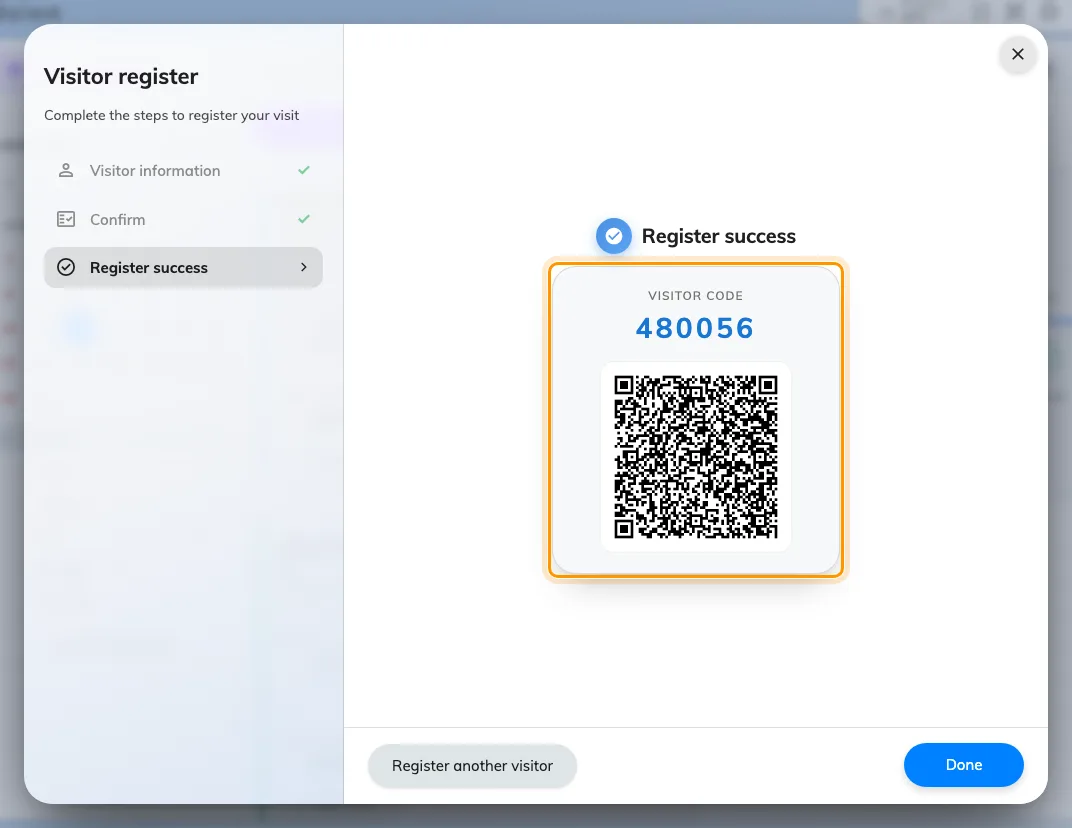
The finished registration, with the visitor code and its QR.
7. Check it worked
Close the dialog and find them on the list. Their card should read Visiting under Visiting period with the time they arrived, and offer Check out.
If it offers Check in instead, the form did not finish — a reception walk-in is never left waiting to be admitted.
What the admin console controls
Half of the form is conditional, and each conditional part is one setting on one admin page. This is the table to read when a field a colleague describes is not on your screen.
| What changes in the form | Setting | Where |
|---|---|---|
| The Inviter field appears | Allow proxy visitor invitation by reception | Visitor self registration form |
| Which visitor fields are asked for, and which are required | the purpose’s per-field Hidden / Optional / Required | Visiting purpose |
| Whether Take a photo is a step at all, and whether it can be skipped | the purpose’s Photo field | Visiting purpose |
| Whether View photos appears on the card afterwards | Reception can view the photo | Visiting purpose |
| How many Visitor survey steps there are | the surveys attached to the purpose | Visiting purpose |
| The vehicle section appears | Allow invited visitors to register vehicle | Visiting policy |
| No pass is issued — the visitor waits for approval | Visitor need approval | Visiting policy |
| The host is emailed the moment you submit | Notify host when a walk-in visitor arrives | Visiting policy |
| Which buildings the Location list offers | the building’s Receptionist list | Visiting location |
The one setting that is reception’s alone is the first — everything else is shared with the visitor’s own self-registration.
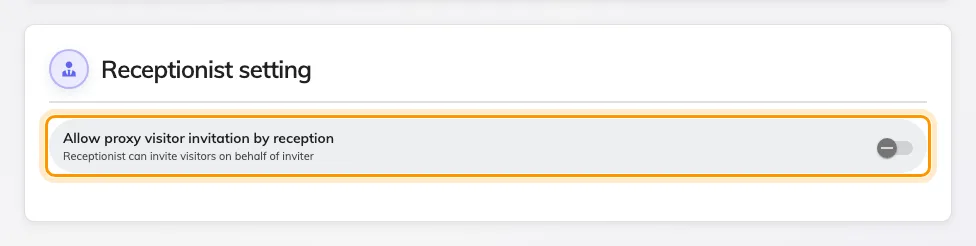
Receptionist setting, the only section of this page that changes reception's own form.