

Set up a service people call for during a meeting
Set up an in-use service for requests during a running booking: options, photos, staff, rooms and a daily last-order deadline in the room’s time zone. Distinguishes the daily cut-off from booking-service deadlines.
An in-use service is asked for while the meeting is happening. Nobody planned it: the pot is empty, something has been spilled, the screen will not wake up.
Setting one up is the same form as a booking service with most of it removed — which is the point of this article, because the differences are all in what is not there.
1. Add it from the In-use service page
Open In-use service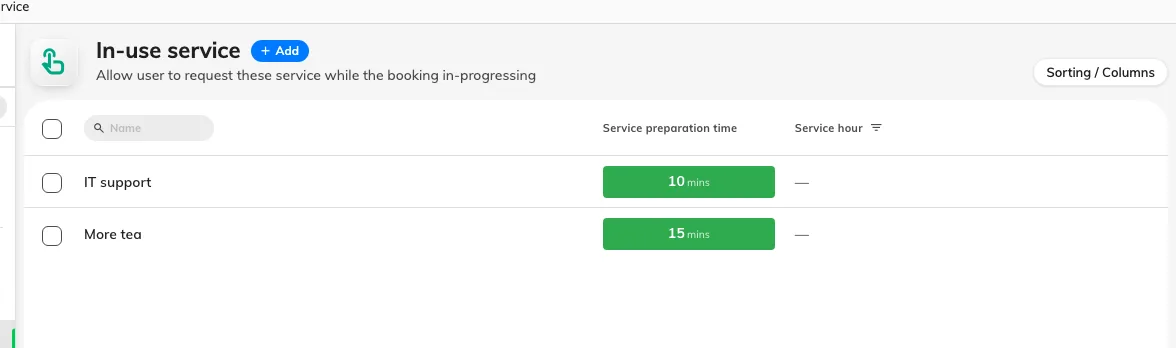
The In-use service list. One column instead of a timeline: how long staff are given.
Add the service here, not on the Booking service page. The page fixes how the service can be ordered and there is no way to move it later.
Name it for what somebody in the room would ask for — More tea, IT support, Clean up a spill.
2. Set how long staff are given
Where a booking service has a timeline, an in-use service has a single box: Service preparation time, in minutes. Fifteen is the default.
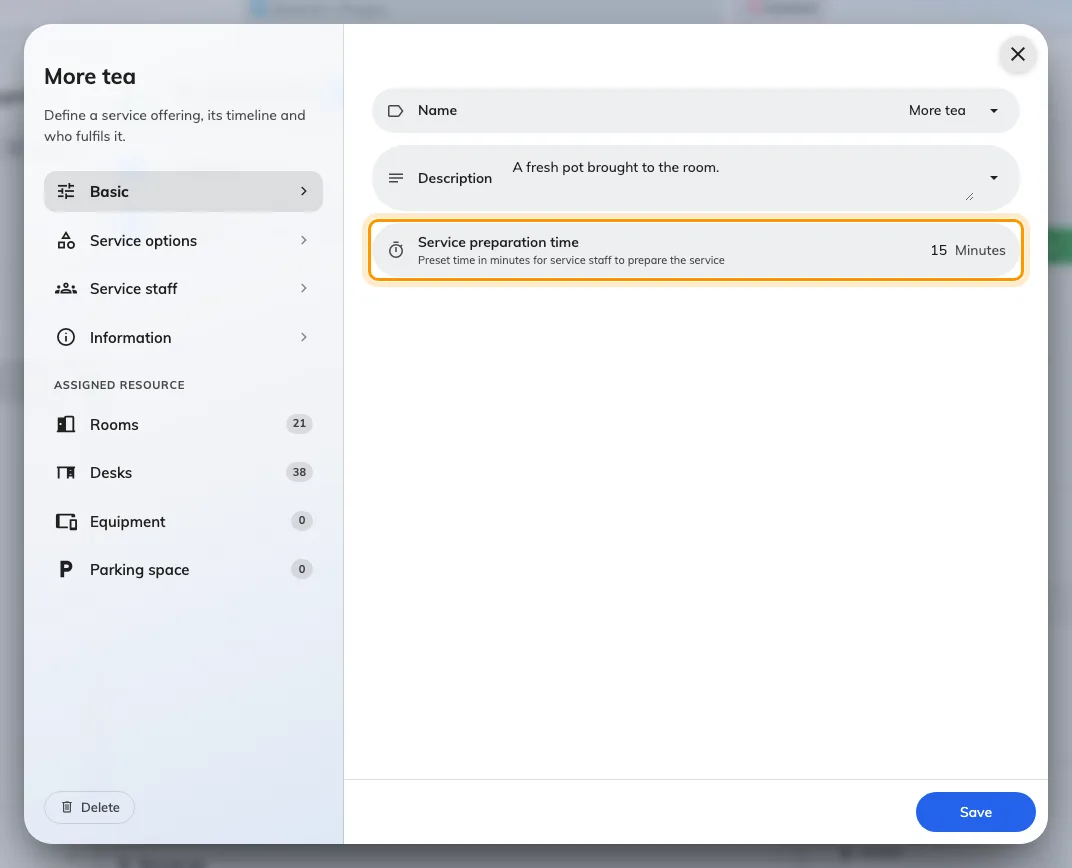
One box instead of a timeline: how long the request is given, counted from now.
That window is counted from the moment the request is sent, not from the booking. There is no before or after, which means an in-use service never takes time out of the room and never affects the booking after it. If you have been worrying about preparation time blocking rooms, none of that applies here.
Add a photo
On Basic, Photo accepts one image of the service. It appears where people choose the service; it does not add another required answer to their order. Both booking services and in-use services have this field.
Stop taking requests at a daily cut-off
On Basic, turn on Daily last order time and set Closes at. The deadline uses the room’s time zone, not the person’s phone. At that time and afterwards, new in-use requests are refused, even if the meeting continues. Requests reopen the next day, subject to Service hours and a running booking.
Leave the switch off for no daily cut-off. This differs from a booking service’s last-order deadline counted back from the booking start: the booking-service exception for editing an existing order does not override this in-use deadline.
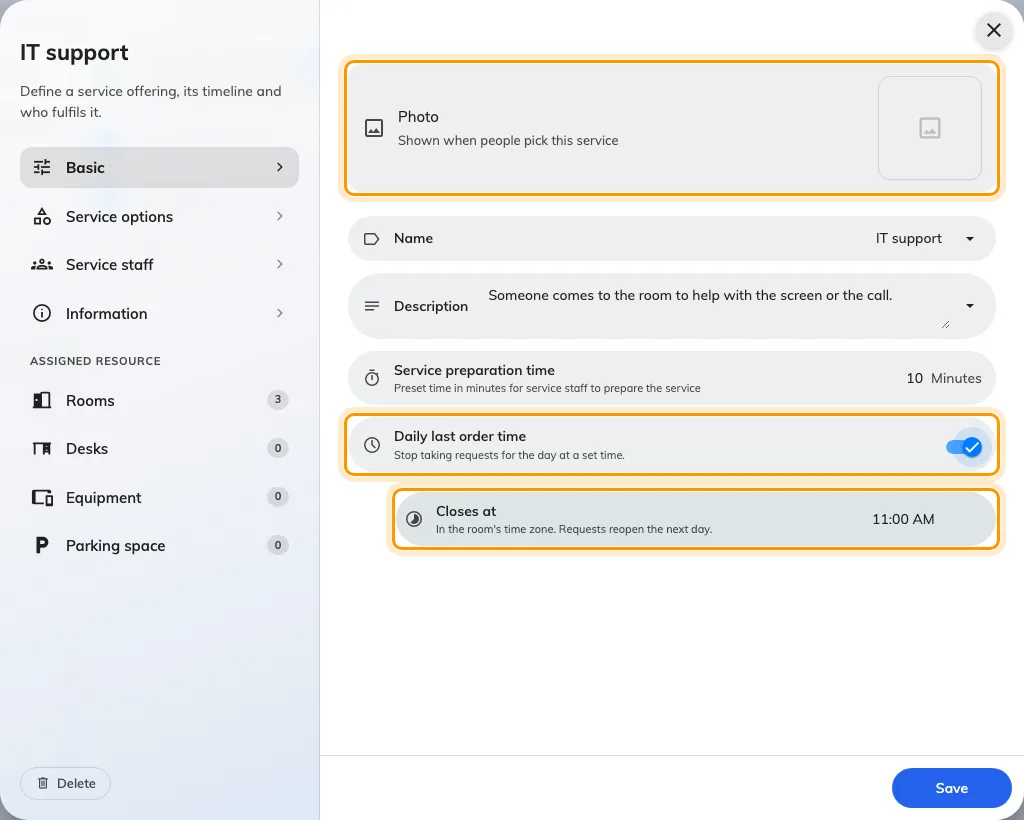
In-use service settings: a photo and a daily last-order deadline.
3. Add options, if there is anything to choose
Service options works exactly as it does for a booking service — a Checkbox option for which drink, a Numeric one for how many cups, a Text one for anything else. Keep it shorter than you would on the booking form: this is being tapped by somebody standing up in a meeting.
For IT support, one Text option — “What is wrong?” — is usually the whole form.
4. Say who answers
On the Service staff page, name the people who can actually come now. This matters more than it does for a booking service: a request made at 15:20 is no use to somebody who sees it tomorrow.
Set Service hours to the hours those people are really on. Outside them the service cannot be requested at all, which is better than a request nobody answers.
5. Put it on the rooms
Same as a booking service: pick the rooms under Assigned resource. A room with no in-use services offers nothing to ask for, and the button to ask does not appear at all.
Where people press it
All four of these reach the same queue:
| Where | What they see |
|---|---|
| The app, while a booking is running | The in-use bar along the bottom expands; a Service button sits beside Extend and End |
| The panel outside the room | A Service sheet listing the room’s services |
| The desk booking panel | The same request flow |
| A QR code on the table | Call service — and this one needs no Offision account at all |
In the app it is the island along the bottom of the screen, which appears whenever one of your bookings is running. Expanding it puts Service beside Extend and End.
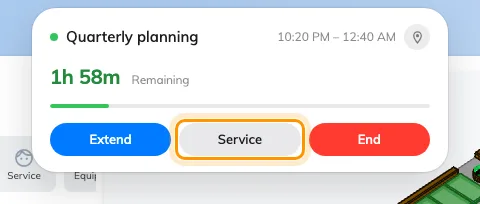
The in-use island, expanded. Service sits beside Extend and End.
Pressing it lists what this room offers, and the request goes with two taps.
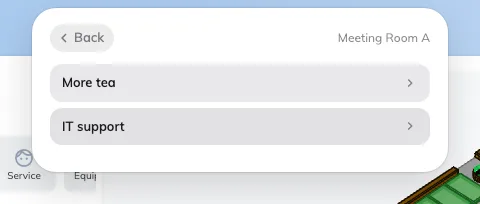
The room's in-use services. Pick one, set the options, Send request.
The QR code is worth knowing about: it opens a small page on the person’s own phone, so a guest in the room who has never heard of Offision can still ask for tea. The option only appears when the room actually has an in-use service on it.
Whichever they use, the flow is the same three beats — pick the service, set the options, Send request — and the room is attached automatically, so nobody has to say where they are.
Check it worked
Book a room for right now and check in, then open the in-use bar in the app. The Service button should be there, and the service you just made should be in the list. Send one, and confirm it appears in Service requested in the console with a member of staff against it.