

Set up a working schedule
Creating the schedule a team clocks in against: define the working hour, assign workers by user or by group, name supervisors, and open the channels they may punch from. About ten minutes, plus a test punch.
A working schedule is what makes clocking in possible at all: until a person is on one, the app shows them no Sign in button and a kiosk turns them away. This walk-through creates one schedule and puts a team on it. Done means one of those people has clocked in and the punch shows in Attendance Records.
1. Define the working hour
A schedule does not carry times of its own — it points at a working hour, which says which weekdays count and when work starts and ends, and carries the holiday calendar. Open Working hours in the Attendance menu and add one: tick the working days, set the daily time range, and attach holidays if your estate keeps a holiday list.
Open Working hoursOne working hour can serve several schedules, so a company on uniform office hours defines it once. Only teams whose times differ need working hours of their own — teams that differ in people or rules but share times can share it.
2. Add the schedule
Open Working schedule and select Add. The editor opens on Basic Info, with the rest of the pages on the left.
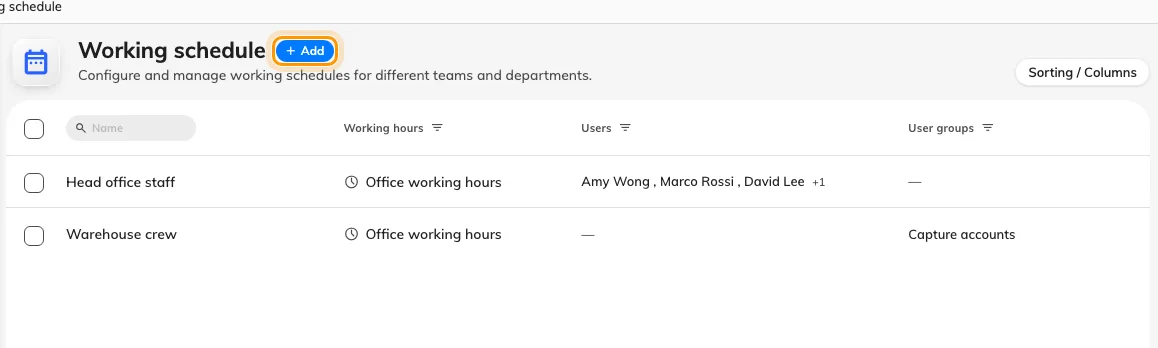
The working schedules on this tenant — each row shows its working hour and who is on it. Add opens the editor.
Name it for the team, then set:
- Working hour — pick the one from step 1. The add button beside the field creates one inline if you skipped ahead.
- Worker — who clocks in against this schedule. Pick user groups where you can: a person added to the group later is on the schedule automatically, which is the difference between maintaining a schedule and maintaining a list.
- Supervisors — optional. Anyone named here can view and export this schedule’s results in the user app, and nothing more — the field’s own hint says as much. Covered separately in Give supervisors a team view.
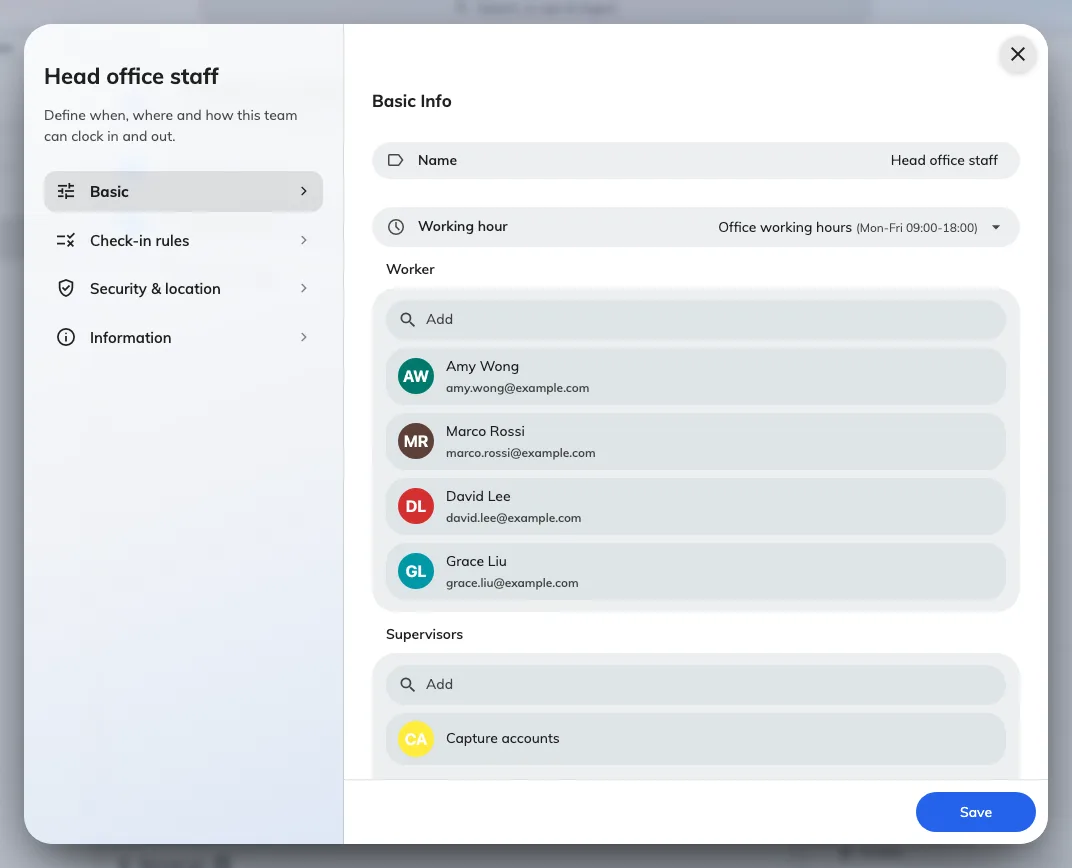
Basic Info: the name, the working hour it reads times from, and the Worker and Supervisors pickers — both take users and whole groups.
3. Open the channels
Switch to Check-in rules on the left. Channel Access holds four switches — check-in and check-out, via User Portal and via Player. A new schedule should open at least one pair, or nobody can punch at all. The rest of this page — timing tolerances and remark requirements — has sensible defaults; the full list is in the settings reference.
If punches should also prove where they came from — GPS, office network, selfie — that is the Security & location page, and it has a walk-through of its own.
4. Save, and make a test punch
Save closes the editor and the schedule is live. Now verify it end to end: sign in to the user app as one of the workers — the home screen’s My attendance action and the footer’s Sign in appear once the schedule covers them. Punch in, then open Attendance Records in the console: the record should be there with today’s date, type Sign in, method Manual.
Open Attendance RecordsIf the button never appeared, the account is not a worker on any schedule that allows check-in via User Portal — reopen the schedule and check the Worker list and the Channel Access switches.