Qbic relay
The Qbic relay can be used to control equipment such as door lock and light. Followings are the installation steps of connect AC-500 relay to Qbic FHD-100.
Demonstration Video
Installation Steps
For first time boot-up
- After boot-up the device, set-up the Wifi Networking and timezone in configuration screen on start-up first.
Set-up content
- After turning on the device, in the content field in configuration screen on start-up, enter the server address +
/qbic, e.g.
https://company.bookings.one/qbichttp://192.168.0.100/qbic
- Click
Save and Playbutton, then the device will then enter the Qbic controller screen and will load Qbic controller when it start-up.
Get back to setting page
If you want to get to the setting page, please tap the right bottom corner until the panel back to the setting page.
Connect to server
Create Access Token
- Go to Management console -> Settings -> API authentication
- Click
Addbutton. - Input a name.
- Click
Savebutton.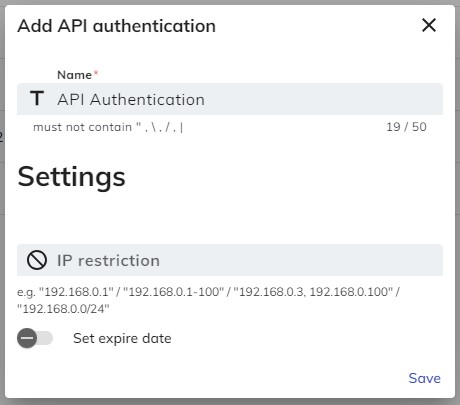
- Click
OKand copy the access token.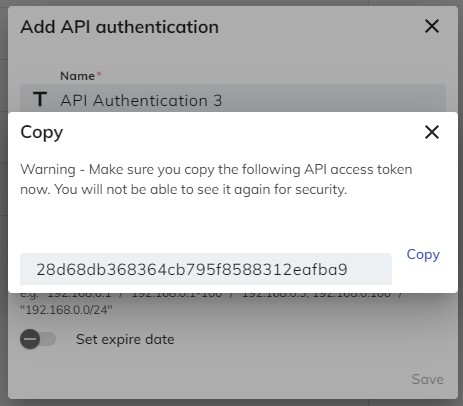
Setup Access Token
- Go to Setting of Qbic controller.
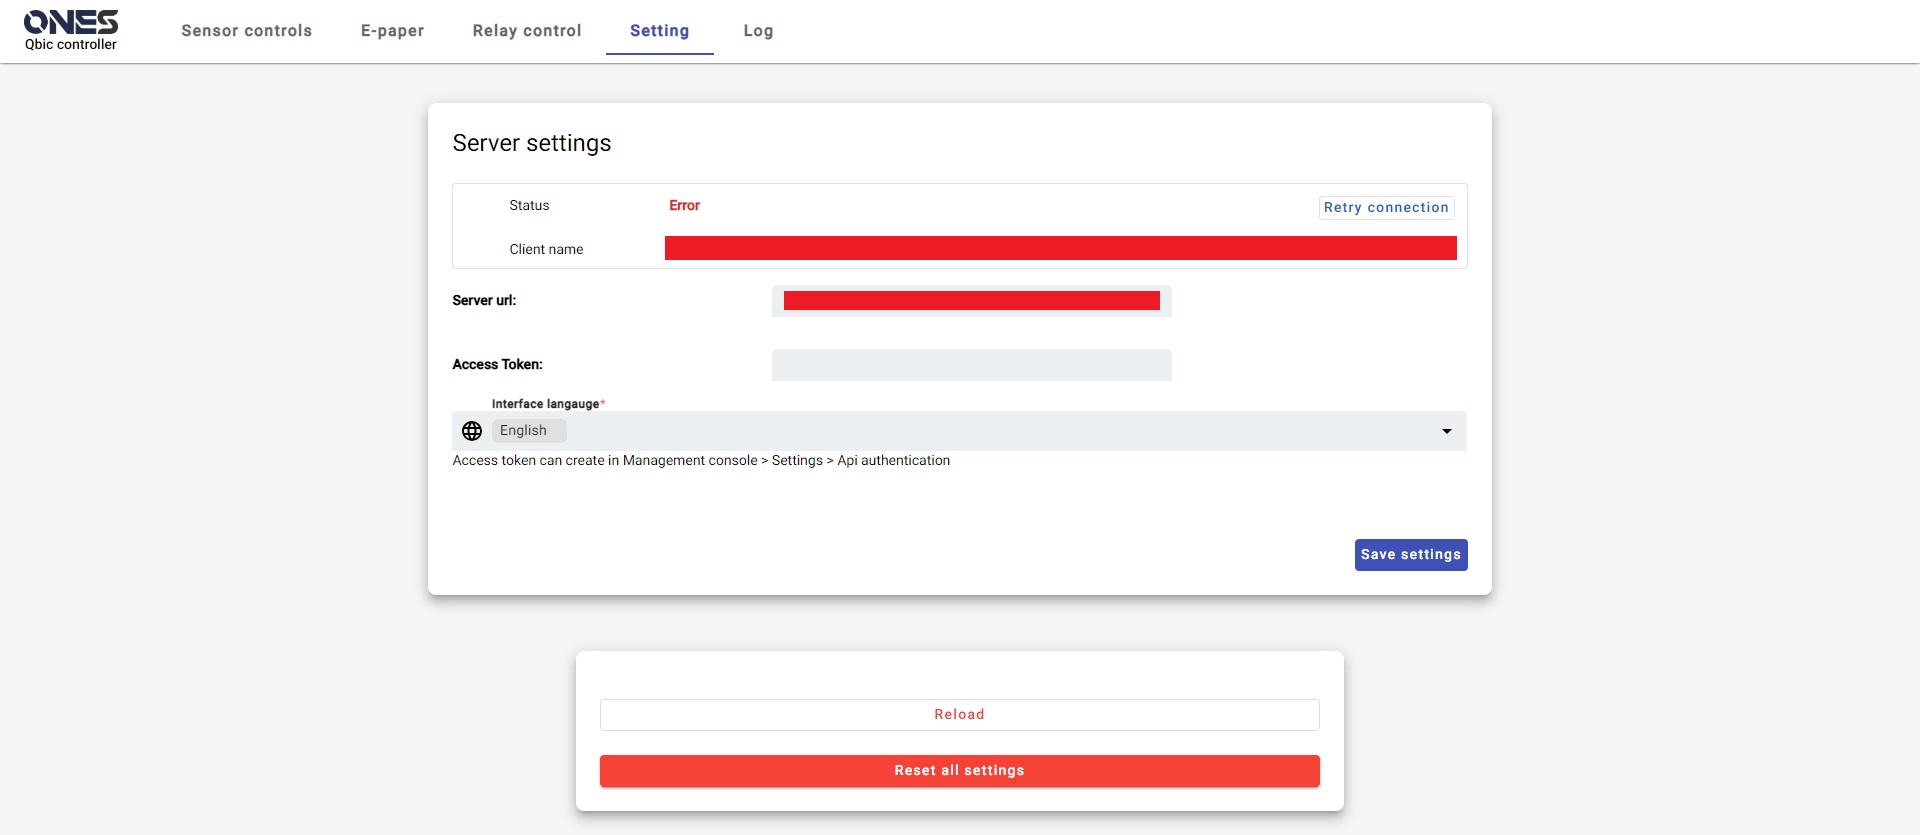
- Input the access token to the Access Token field.
- Click
Save settings
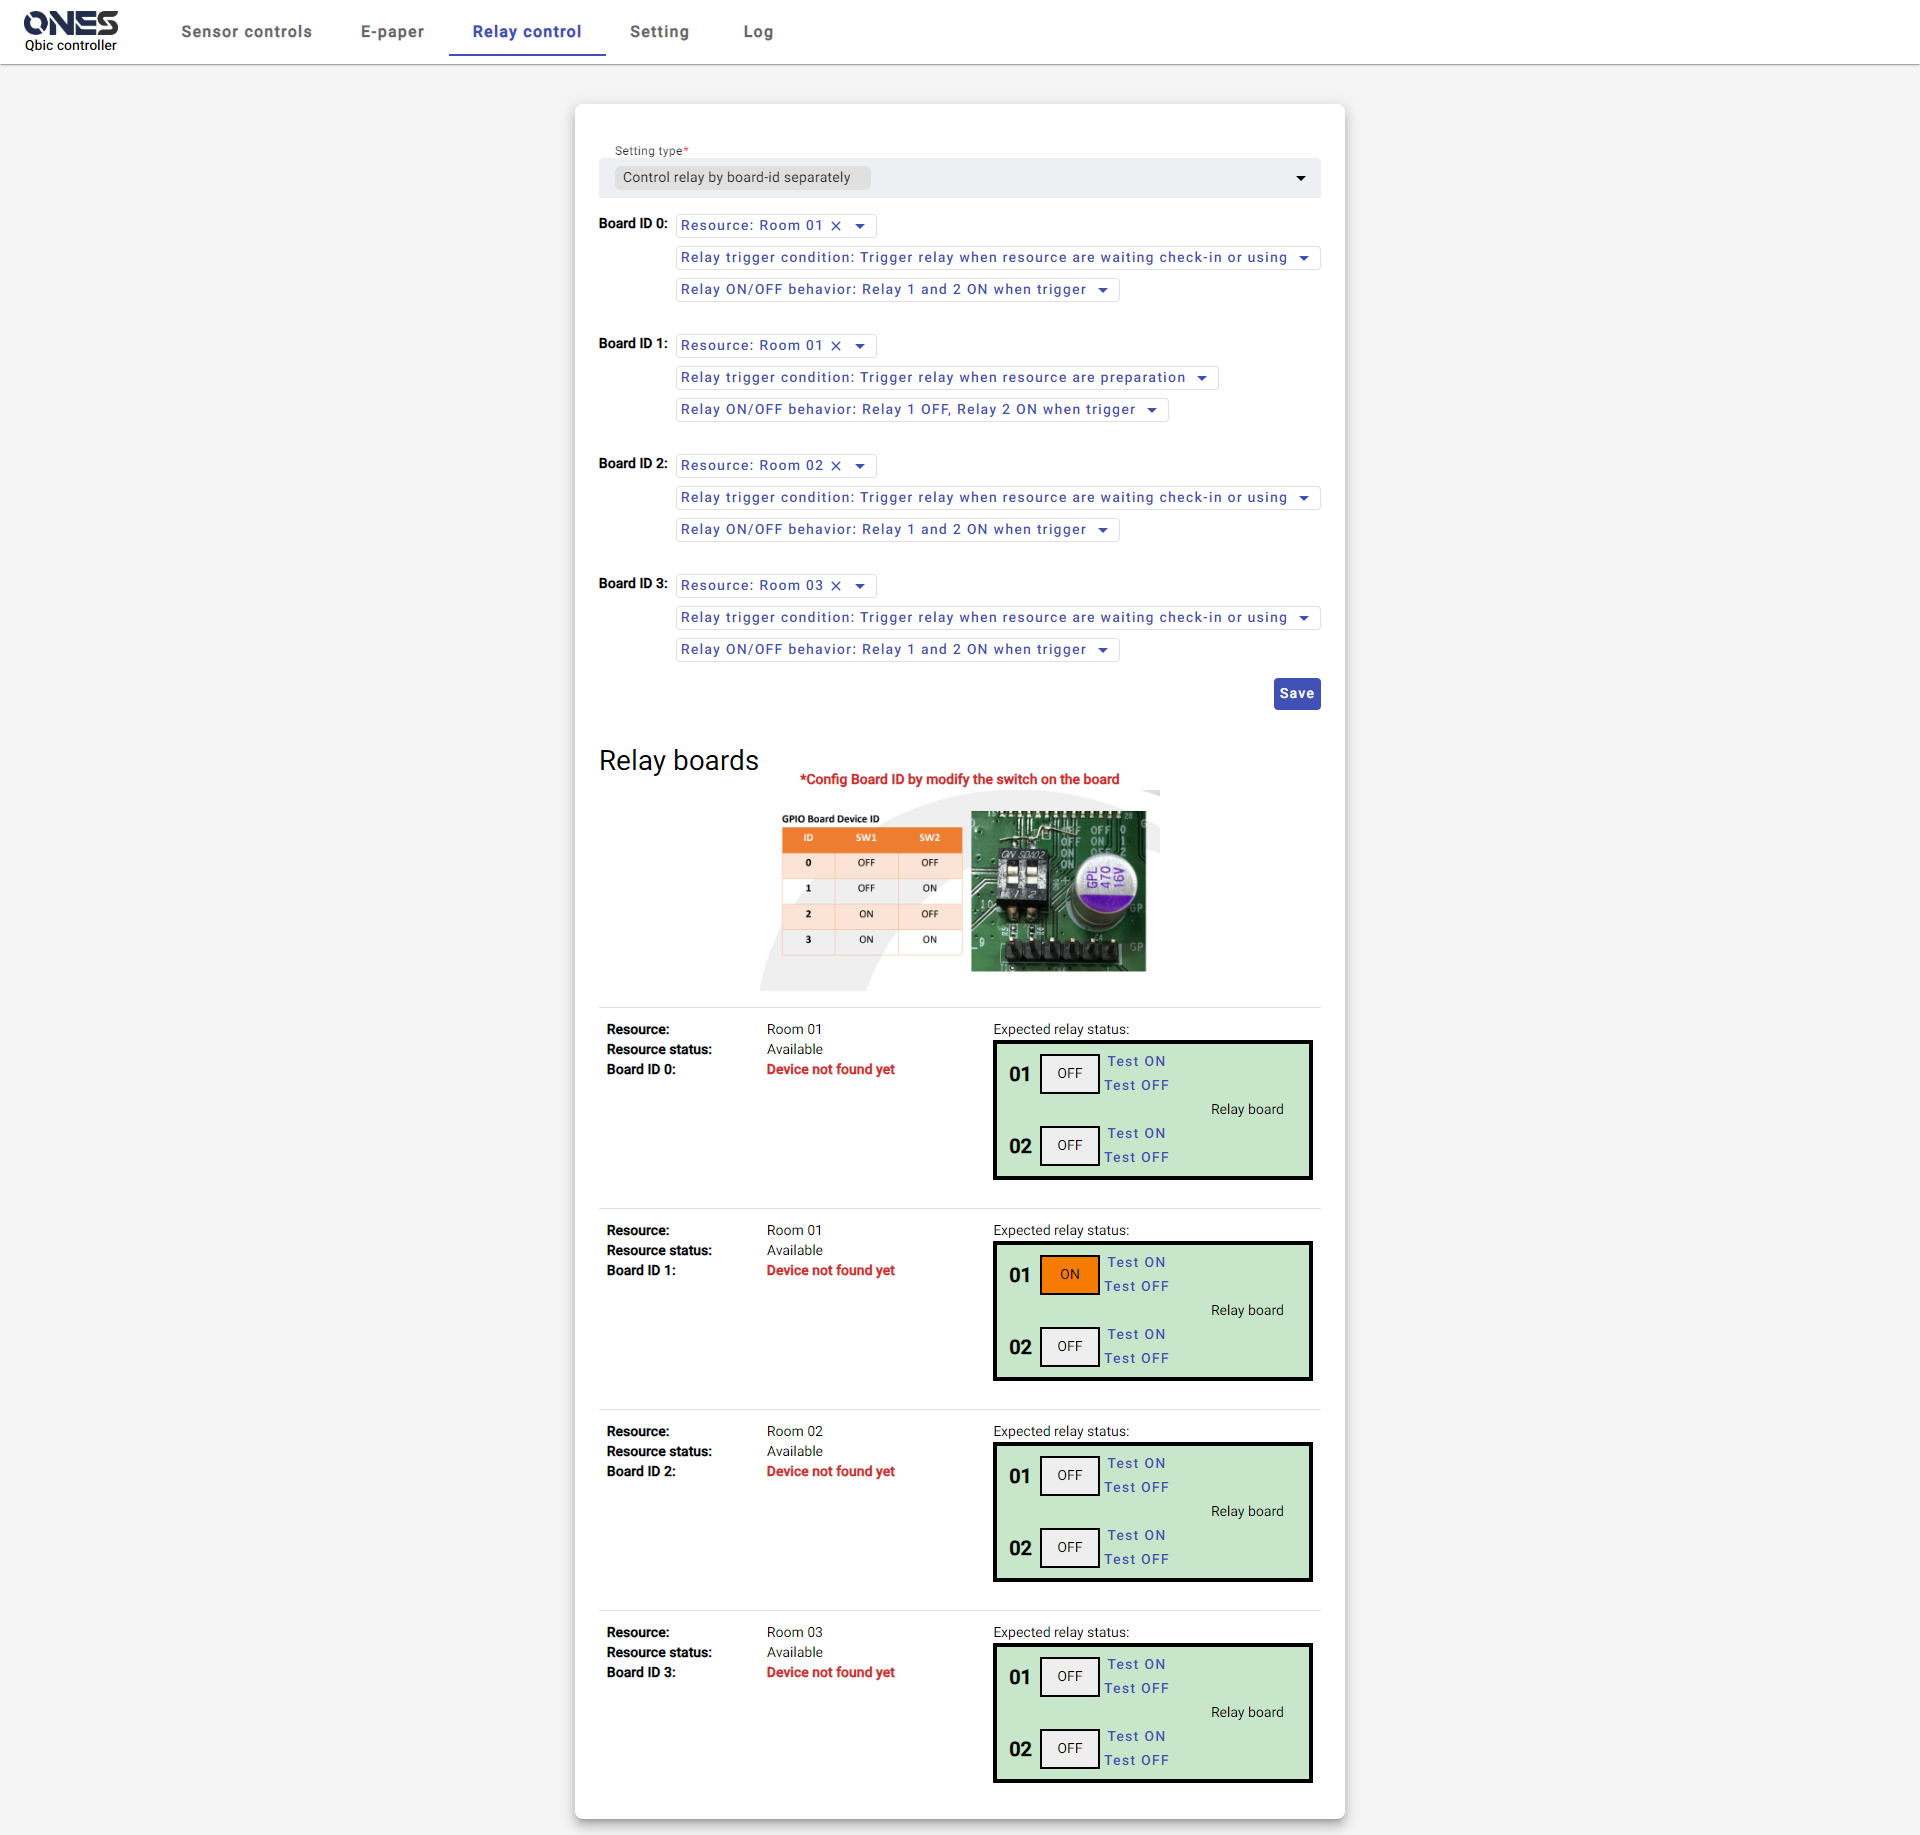
Relay setting
Select setting type
There are two setting types:
- Control relay over all usb port: This setting allows you to apply same setting to all boards.
- Control relay by board-id separately: This setting allows you to assign resources to each relay by Board ID separately.
You can configure the Board ID of the relay by modify the switch on the board
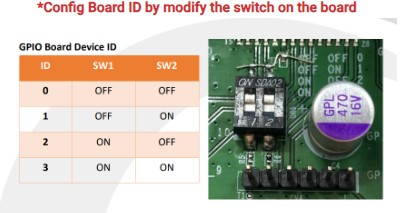
Set resources
- After you select the setting type, you need to set a resource to the board.
- Then, you need to select the trigger condition:
- Trigger relay when resource are waiting check-in or using
- Trigger relay only when resource are using
- Trigger relay when resource are waiting check-in
- Trigger relay when resource are preparation
- Finally, you need to select the ON/OFF behavior:
- Relay 1 and 2 ON when trigger
- Relay 1 and 2 OFF when trigger
- Relay 1 ON, Relay 2 OFF when trigger
- Relay 1 OFF, Relay 2 ON when trigger
- Click
Savebutton to finish the setting.
