Application permission
This section will introduce the procedure of integration (Application permission) with Microsoft 365. This integration is suggested for the companies who will use ONES for all staff.
Server settings
Getting start
Enter the
nameof integration for identification of this integration in ONES.Microsoft 365 service operatormainly isMicrosoft.21Vianetis for Mainland China client.
Create App registrations
For retrieving the directory ID, application ID and client secret, navigate to your Azure Portal AAD tenant's app registrations blade.
Select
App registrationsand clickNew application registration: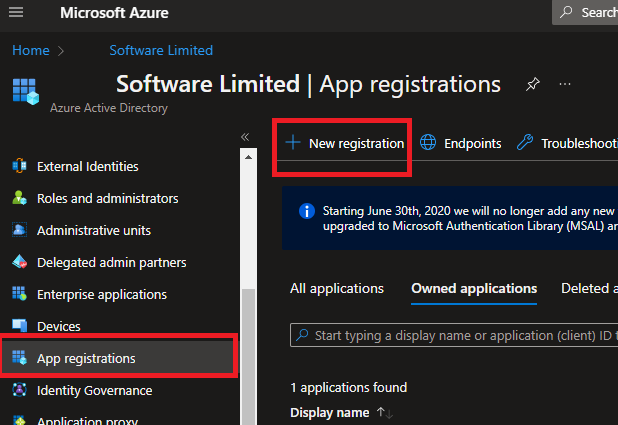
Enter a name for the app registration. (This is not important for the integration with ONES.)
Go to the
Overviewand copy the value:Client ID (Application ID)andTenant ID (Directory ID)into the corresponding fields.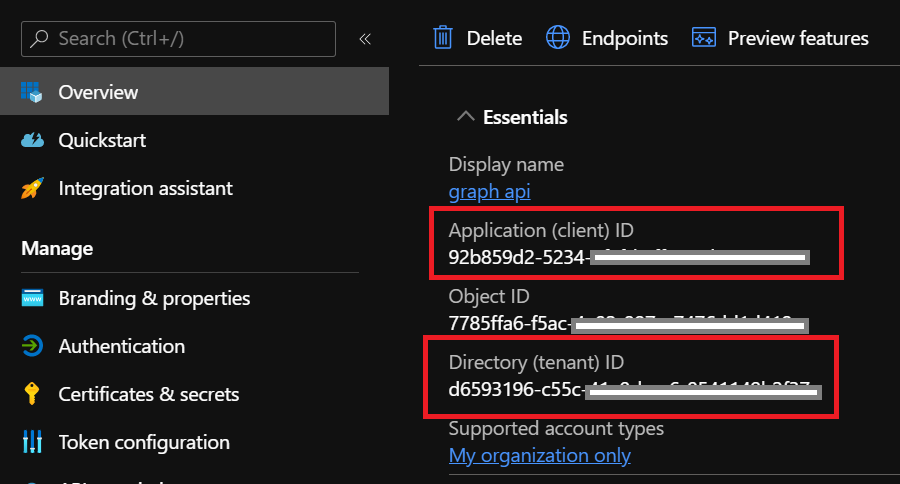
Grant API Permission
Go to
API Permissions, clickAdd a permission, selectMicrosoft Graph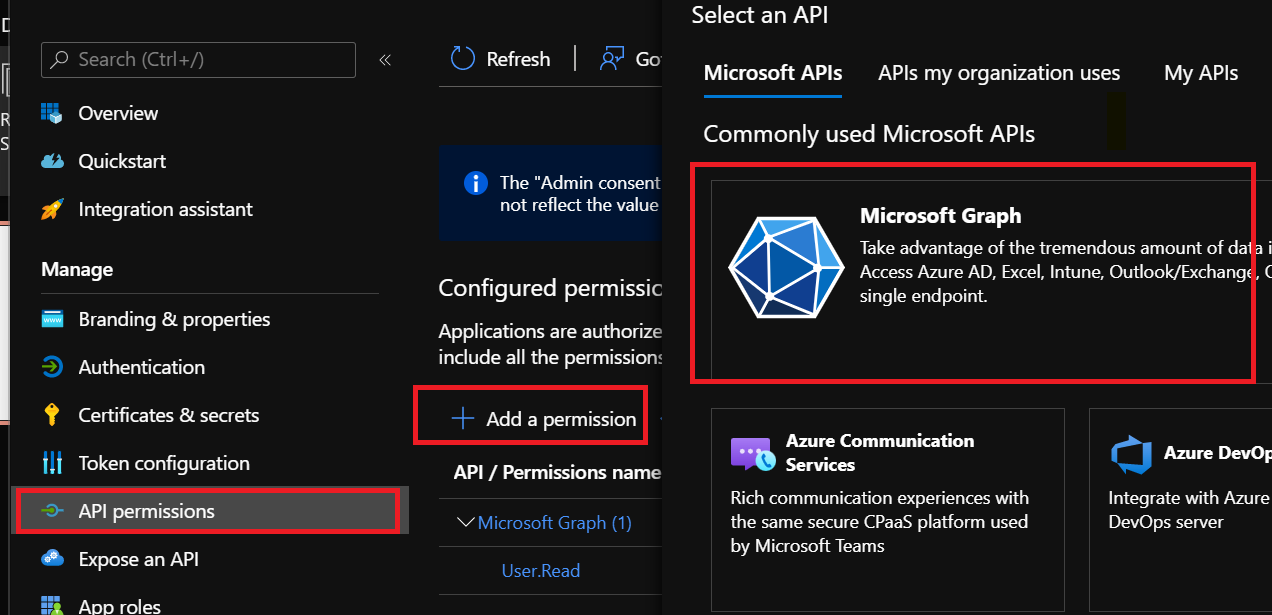
Click
Application permissions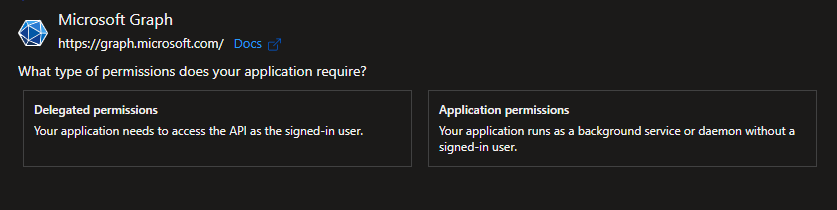
Select the following permissions in
Application permissionsand clickAdd permissionsCalendars -> Calendars.ReadWriteGroup -> Group.Read.AllPlace -> Place.Read.AllUser -> User.Read.All
You will see the permissions added to the list but there are a warning
Not granted for "Your organization name"in status. You have to click theGrant admin consent for "Your organization name"to confirm the permission.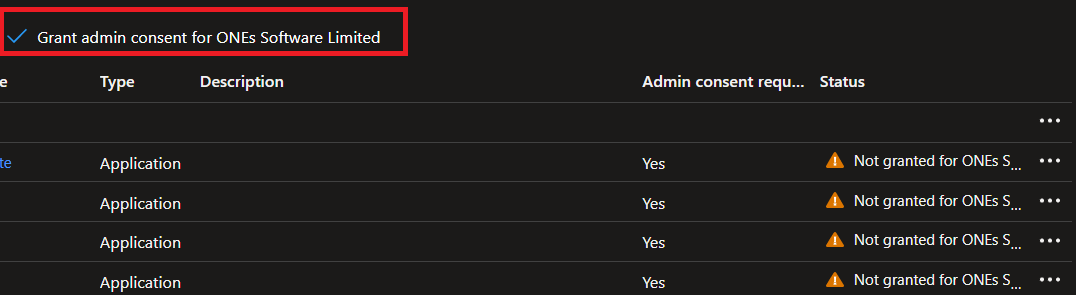
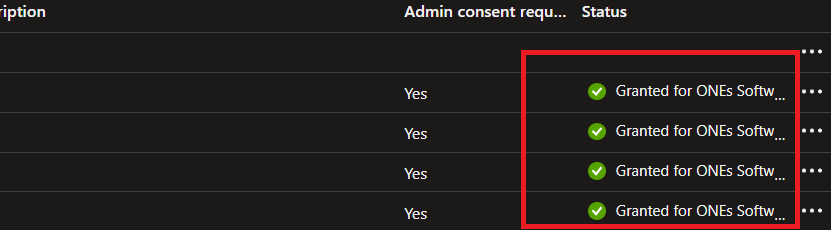
After that, you should see the permissions are granted successfully.
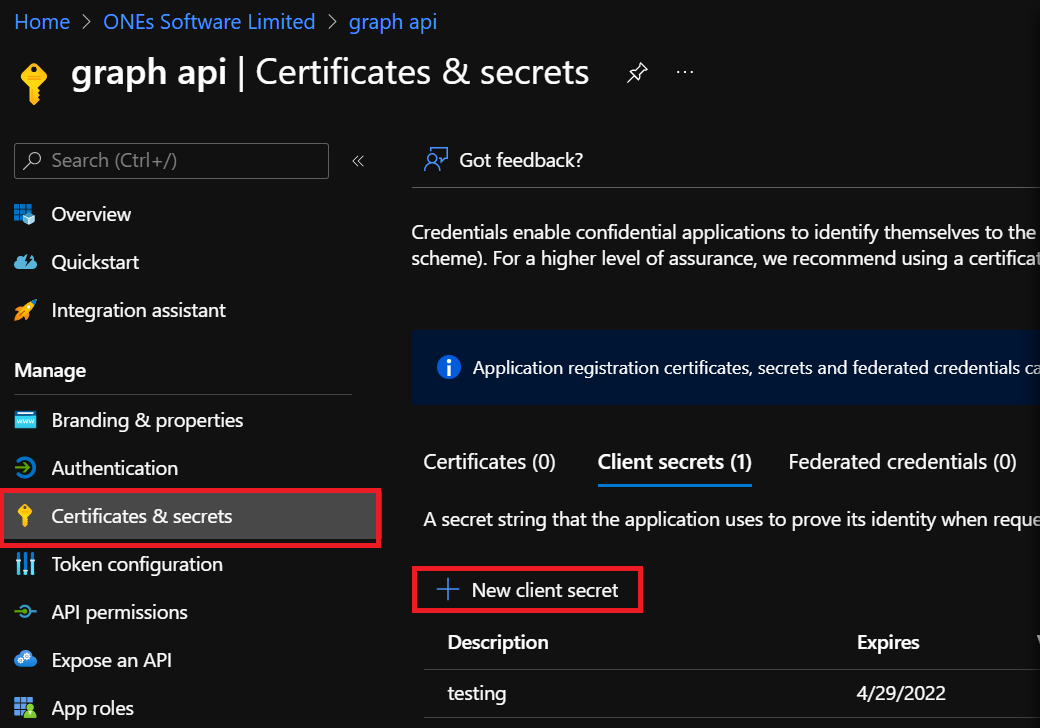
Create client secret
After the app registration is created, go to
Certificates & secretsSelect
Client secrets, and clickNew Client secret.Enter a name (e.g. Offision Integration) for the client secret, and select the expire time based on your needs.
Click the
Addbutton, and you can get theClient secretimmediately after creation. Please copy it at this moment and fill in the field. Otherwise you may need to recreate a new client secret.
Testing
Back to the setting in the right hand side. Click
Test settingsto test if the information provided is correct.Click
Save and nextto continue once the information is confirmed to be correct.
Room settings
Sync room
Select
Sync specified roomto select the rooms required orSync all rooms.Click
Save and nextto continue.
If you want to apply the Offision policy to O365 room, please click here for more information.
User settings
Redirect URI
Redirect URI is for adding single-sign-on callback-link to Microsoft 365 (Please also add this to the Azure Portal)
Navigate to
Authentication, clickAdd platform, then clickWeb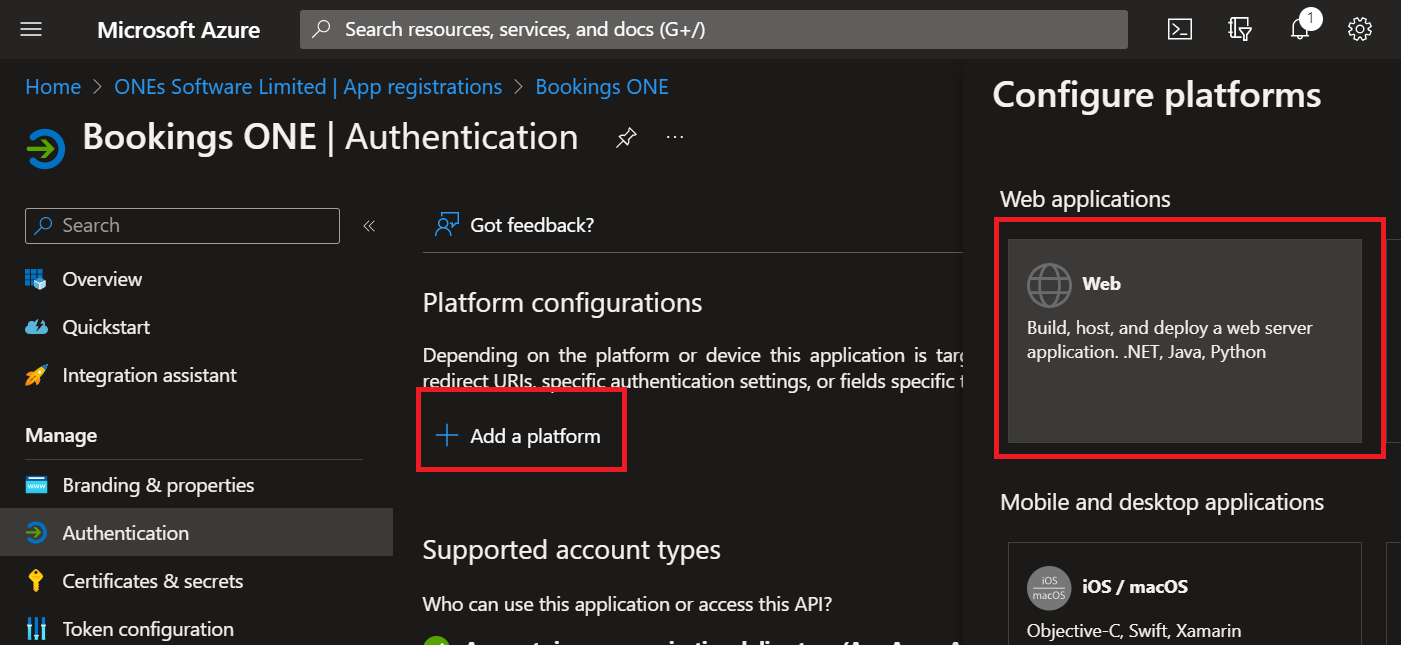
Copy the Redirect URI from the right and paste in the
Redirect URIsin the Azure Portal AAD tenant. ClickConfigure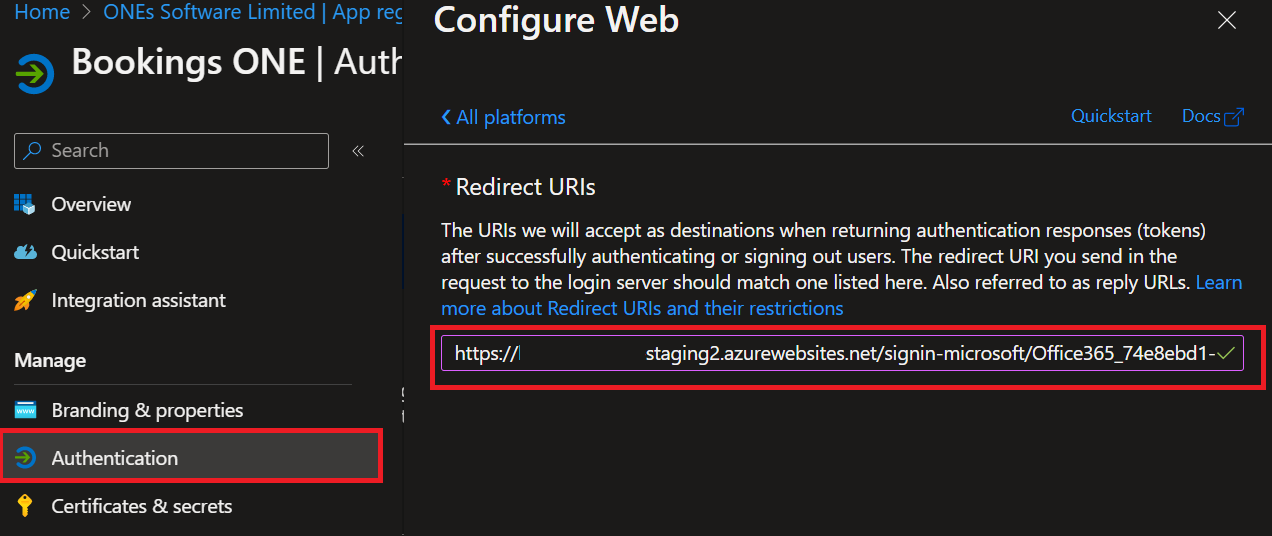
Others
You can set-up the default user groups in ONES for adding newly synchronized users.
You can select
Pagerin user account as the card number of user in ONES.You can set the
Login button namein the login page.Click
Save and close.